Web analytics
According to Wikipedia, web analytics is “the measurement, collection, analysis and reporting of internet data for purposes of understanding and optimizing web usage.”
There are two main technological approaches to collecting the data: logfile analysis, which reads the logfiles in which the web server records all its transactions; and page tagging, which uses JavaScript on each page to notify a third-party server when a page is rendered by a web browser.
Tip
If your analytics tracker is not working, try turning debugging on and off
again via index.php. The analytics code should appear in ‘View Source’.
See: Debug mode
Jump to:
See also
Logfile analysis tools
These types of tools require access to the log files generated by the web server.
- AWStats: http://awstats.sourceforge.net/
- Webalizer: http://www.webalizer.org/
Page tagging tools
The tools found under this section require a system administrator or developer to insert a JavaScript code snippet into the relevant page in AtoM where you’d like to gather analytic data. Probably the best known open source solution is Piwiki.
You should be able to configure any solution in AtoM by editing the corresponding PHP templates.
AtoM also includes built-in integration with Google Analytics, described further below. By studying the way that the tracking snippets are incorporated into the PHP templates linked above, you should be able to make modifications as needed based on your chosen solution to implement something similar.
Jump to:
Google Analytics
Google Analytics is a web analytics service offered by Google that tracks and reports website traffic and activity, such as session duration, pages viewed per session, bounce rates of individuals using the site, and more.
You can configure Google Analytics in AtoM by adding your tracking
ID to the config/app.yml configuration file:
google_analytics_api_key: UA-XXXXX-X
Replace UA-XXXXX-X with your tracking ID. Once you are done, remember to
clear the cache and
restart PHP-FPM.
See also
Google Analytics for tracking institutional pageviews
It’s also possible to track pageviews for individual institutions who are sharing a multi-repository AtoM instance by adding a custom dimension to the tracking ID. Adding this dimension will set the authorized form of name from the source culture of the repository as the dimension value (e.g. for a repository where the source culture is English but translations into other languages are present, Analytics will use the English form of the authorized form of name).
- Description pages (all templates) use the repository value (direct or inherited)
- Actor pages use the maintaining repository value
- Repository pages use the repository’s authorized form of name value
See also
Follow the instructions provided in Google’s Analytics Help pages to Set up custom dimension. When you reach step 6, Select the scope, choose Hit as the scope and set it to active. Once you have completed all the steps, the custom dimension will be displayed in a table. The index number is displayed in the column Index.
In the config/app.yml configuration file, set the newly-created dimension
index number below the API key and make sure that the setting is uncommented.
google_analytics_api_key: UA-XXXXX-X
google_analytics_institutions_dimension_index: 1
Once you are done, remember to clear the cache and restart PHP-FPM.
See also
Viewing Google Analytics institutional pageview data
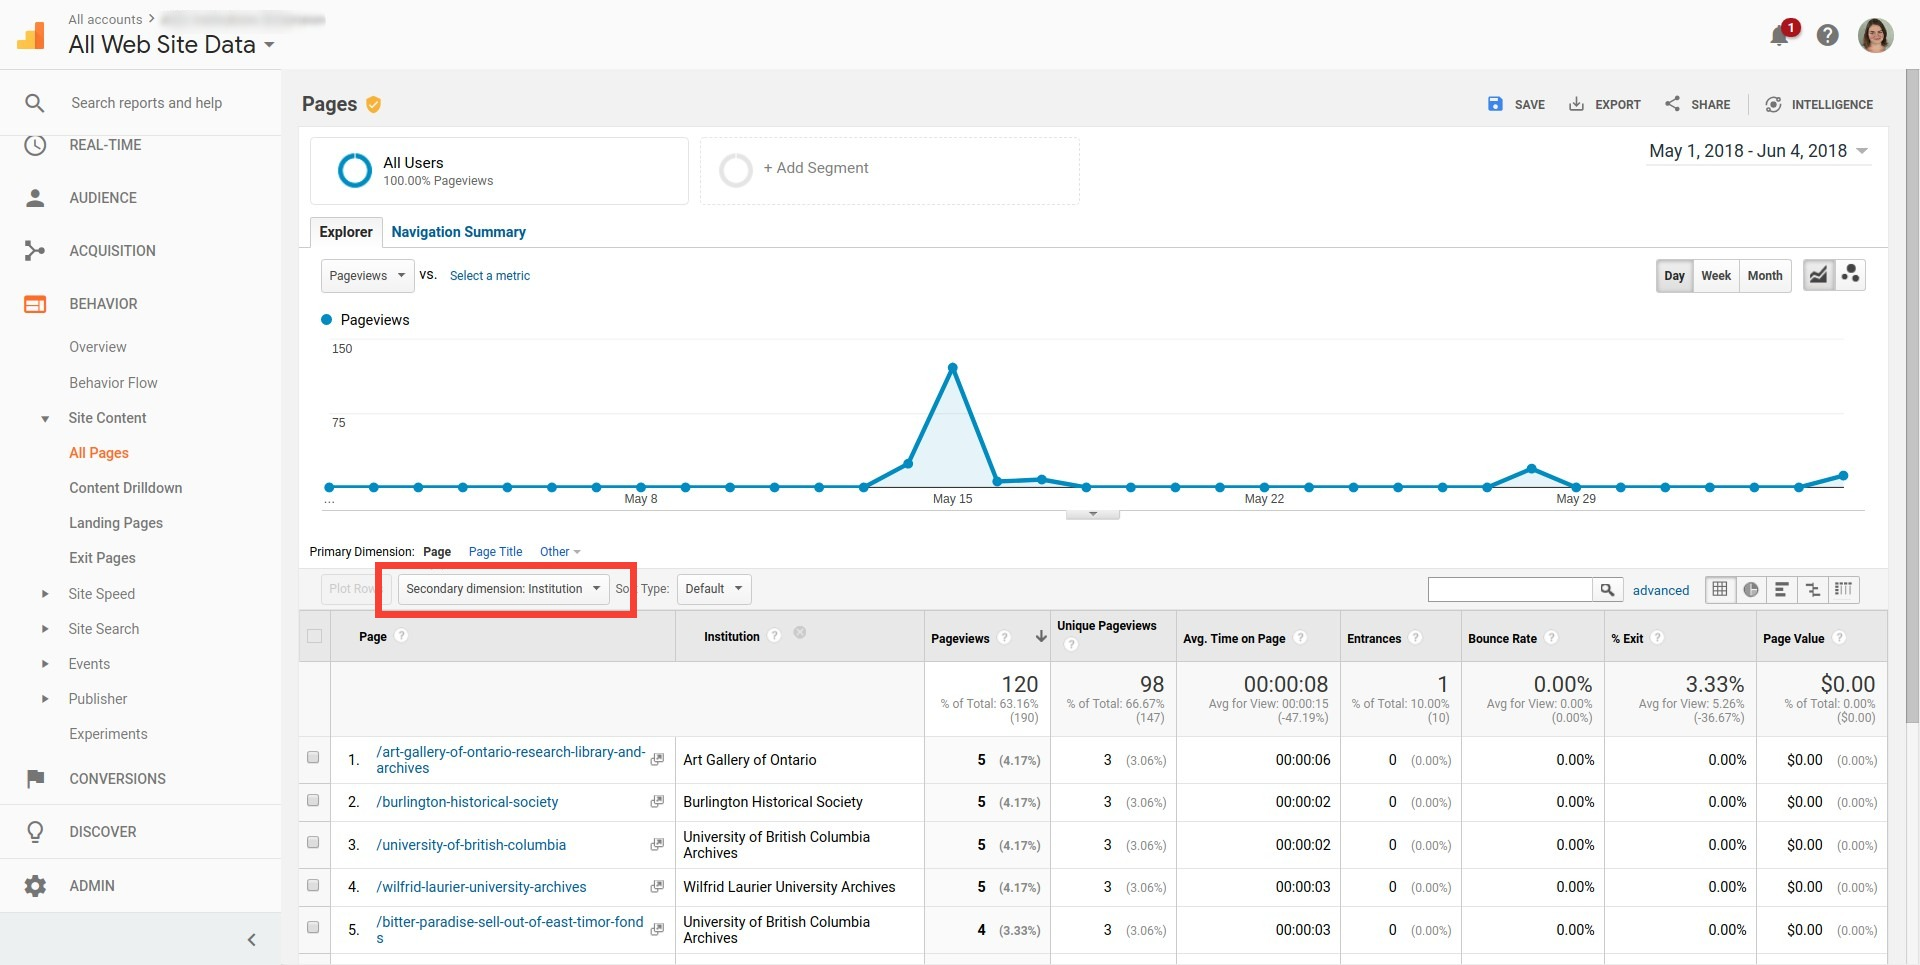
There are several ways to visualize analytics data in the Google Analytics dashboard. You can view institution names in the page views table:
In the Google Analytics dashboard left sidebar, select Behaviour.
Under Site Content, select All pages.
In the main body of the page, below the graph showing page hits, open the Secondary dimension dropdown and select Custom Dimensions, then your dimension.
A new column should appear in the table below, with the name of the custom dimension as the column header. Clicking on the column header will sort the table alphabetically by institution.
You can export this data by clicking the Export button in the top right.
It is also possible to create a custom report that displays the total number of pageviews for each institution:
- In the Google Analytics dashboard left sidebar, select Customization, followed by Custom Reports.
- Select New custom report.
- Give the report a title and following parameters:
- Name: The default name is fine; if you want to add more tabs to the resulting output, you can change it to a more specific name.
- Type: Select Flat Table
- Dimensions: Click on + add dimension and select Page (under Behaviour); repeat and select Institution (under Custom Dimension)
- Metrics: Click on + add metric and select Pageviews (under Users)
- Click Save. The report will be displayed and can be exported by clicking the Export button in the top right.
- You can save this report for future review by clicking on the Save button in the top right.
Google Tag Manager
Like Google Analytics, Google Tag Manager is a web based analytics service offered by Google, with a somewhat different focus. Tag Manager is a tag management system (TMS) that allows you to quickly and easily manage tracking and measurement codes and marketing tags (collectively known as “tags”) on a website or mobile application, without having to modify the code directly.
These can be used in AtoM to collect end-user analytics in a more granular way than Google Analytics allows on its own - for example, seeing how often a finding aid is downloaded, or how often a clipboard is saved.
The following section will walk you through set-up and configuration of Tag Manager for use in AtoM, and we’ll use tracking finding aid downloads as an example implementation.
Requirements
You’ll need to have a Google Analytics account, and your tracking ID, configured with a web property, to be able to visualize Tag Manager reports. You’ll also need to set up a Google Tag Manager account, to configure your containers and tags.
Let’s begin!
- Google Analytics web property setup
- Google Tag Manager container set up
- Tag Manager Variables
- Tag Manager Triggers
- Tag example: tracking finding aid downloads
- Previewing your Google Tag functionality
- Publishing your tag and getting an Analytics event report
Google Analytics web property setup
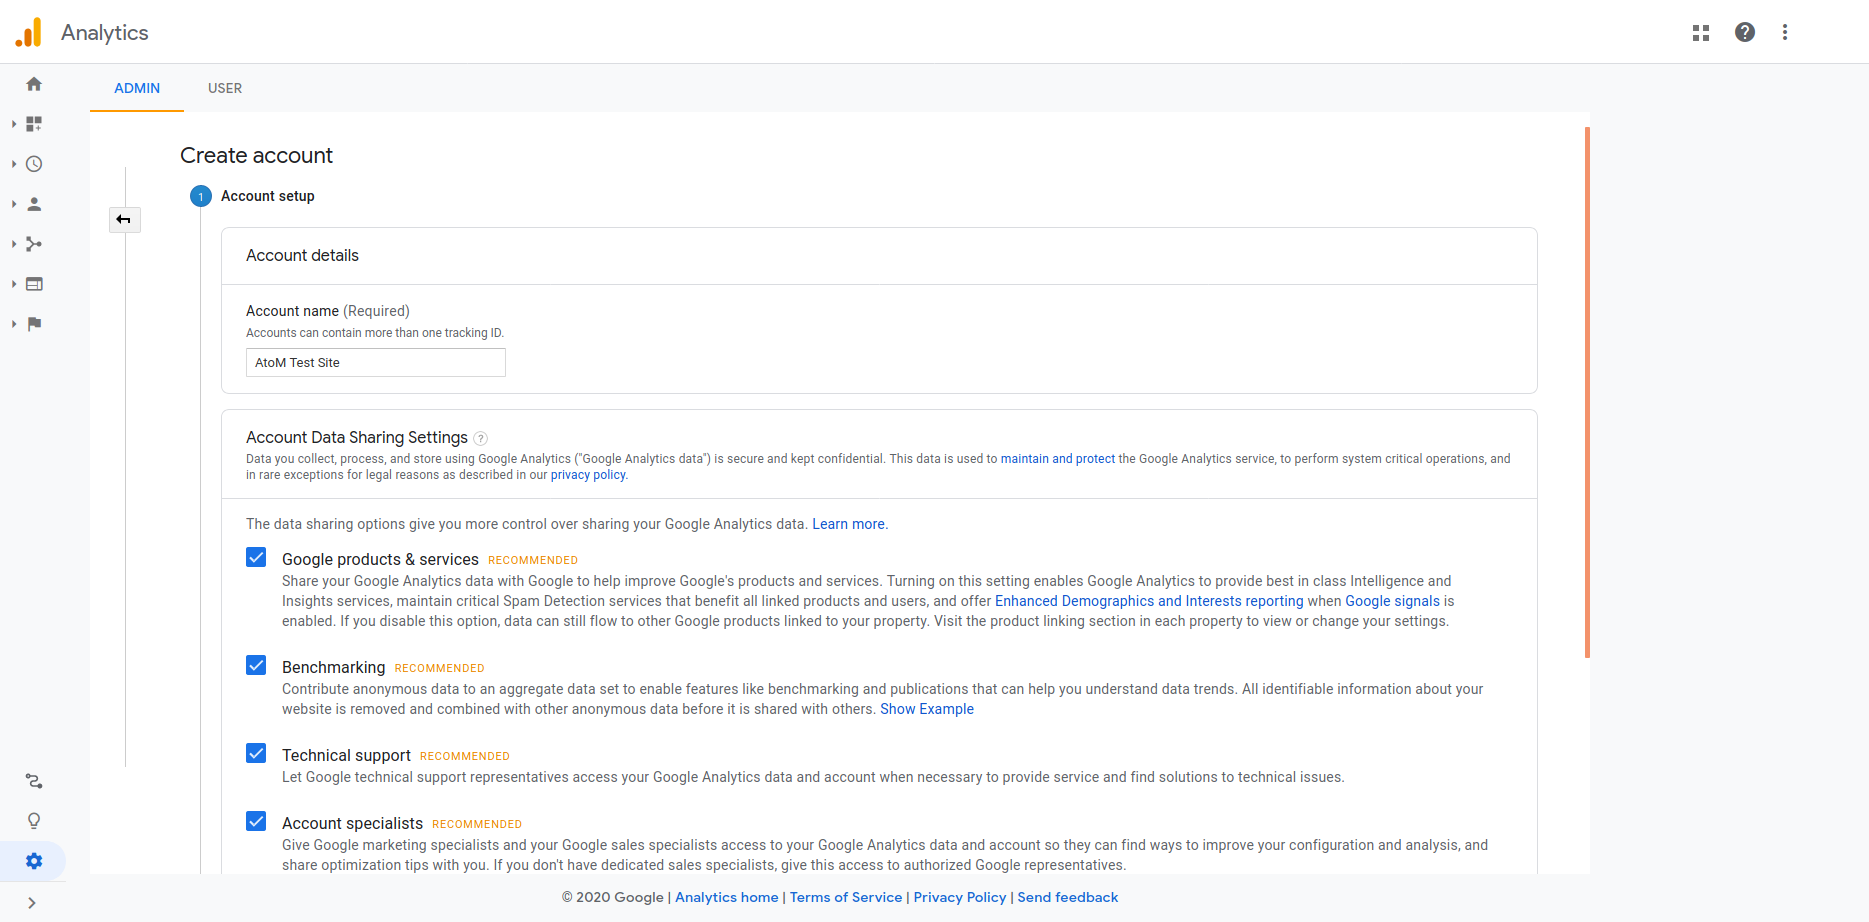
- If you haven’t already, log in to https://analytics.google.com with a Google account and click the “Create Account” button.
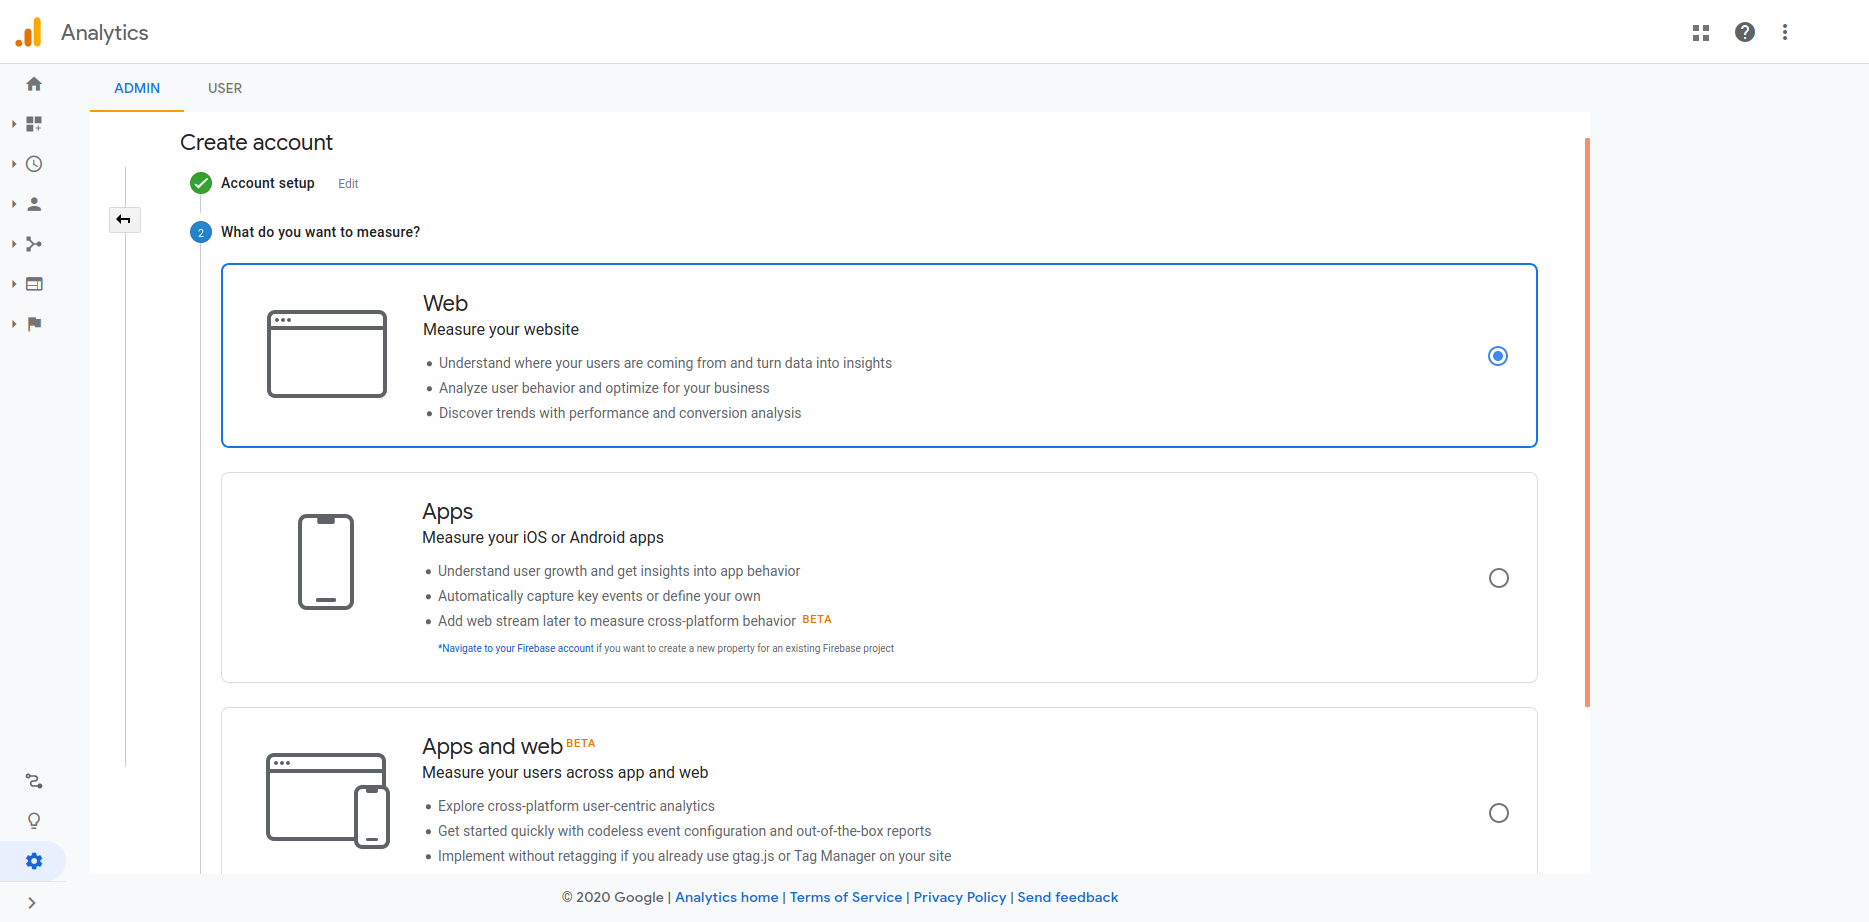
- In the “What do you want to measure?” section, select Web.
- Fill out the Property setup section and click the “Create” button.
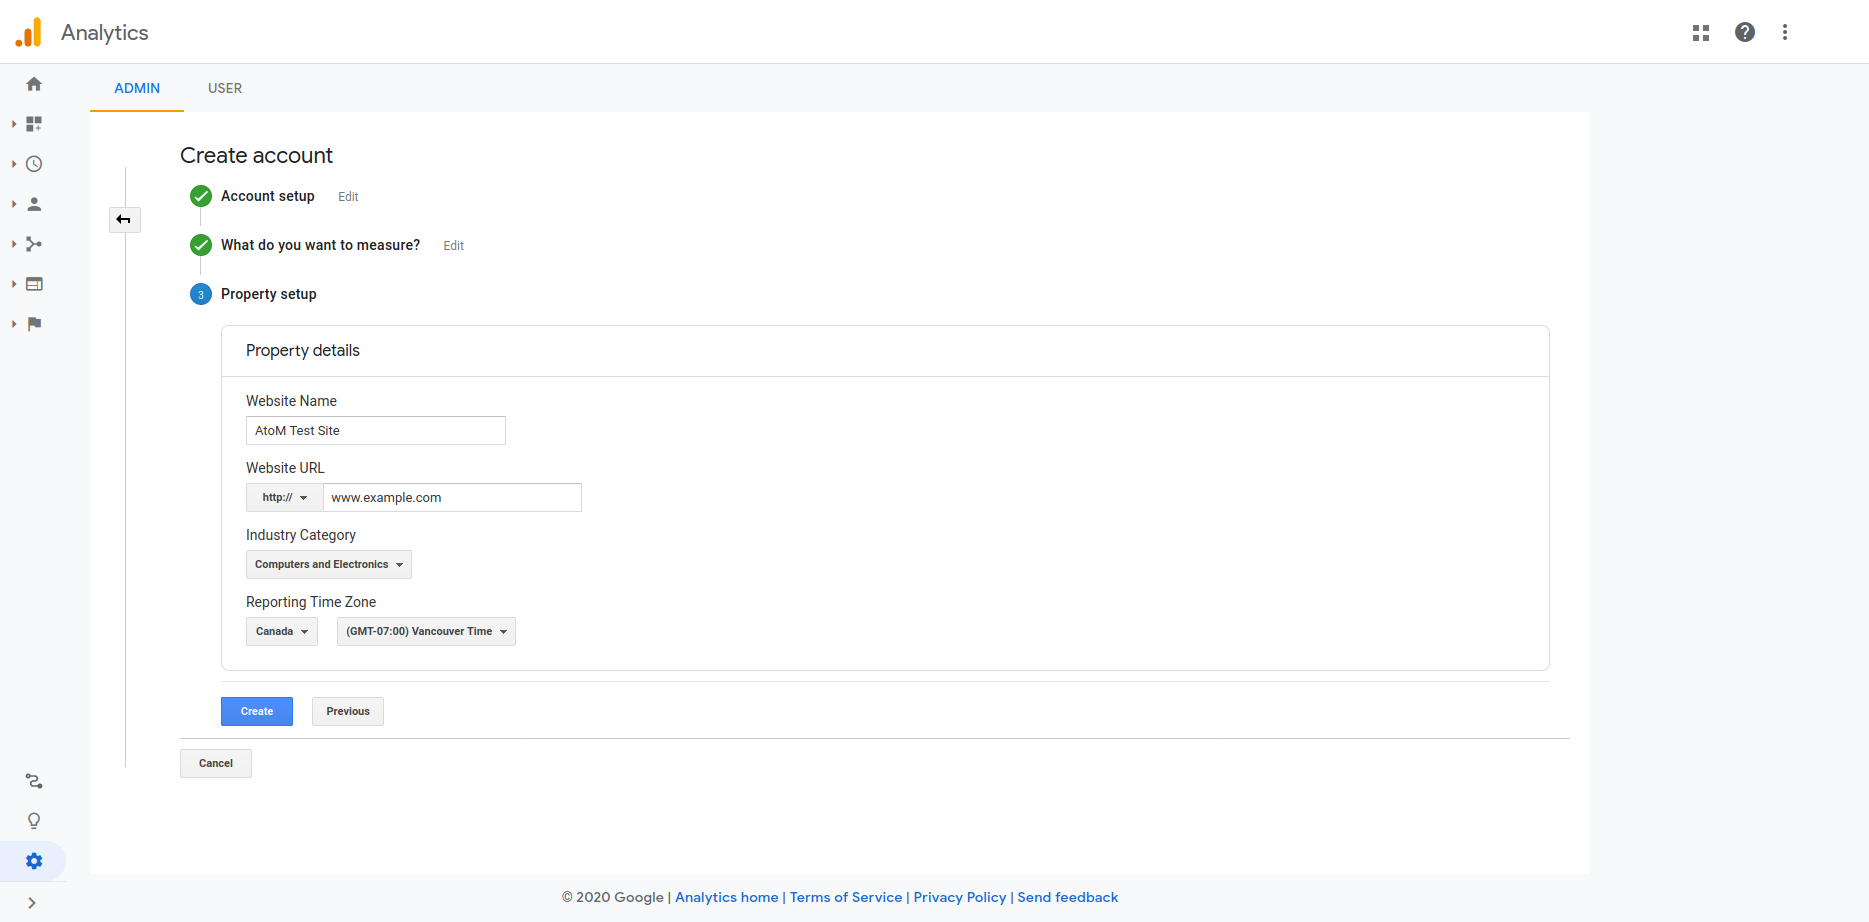
- Accept the service agreement that pops up. You’ll be redirected to the Tracking Code section of your new web property. Copy down the Tracking ID shown on this screen - you’ll need this to set up your Google Tag Manager variables.
Google Tag Manager container set up
Log in to https://tagmanager.google.com/ with a Google account and click the “Create Account” button.
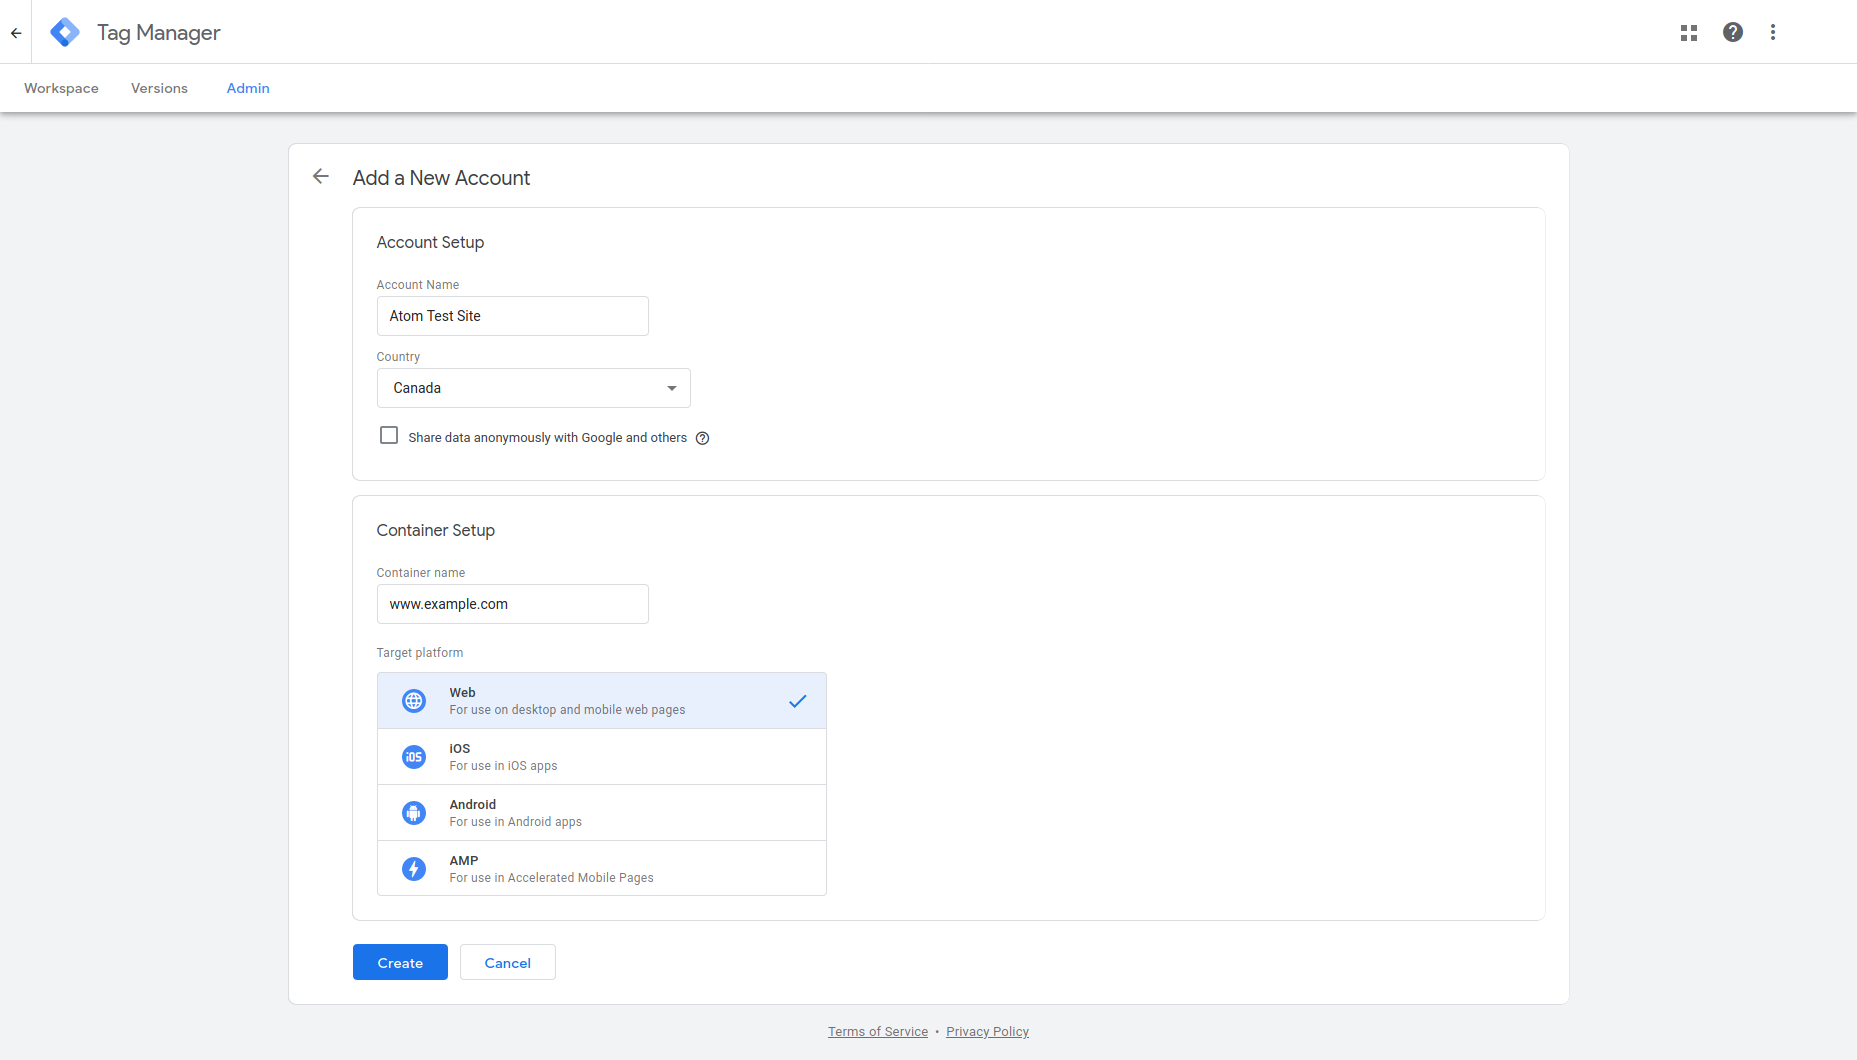
The account will be created with a single Google Tag Manager container and you specify its name and type in the Container Setup area. You can specify it as a Web container for the AtoM functionality.
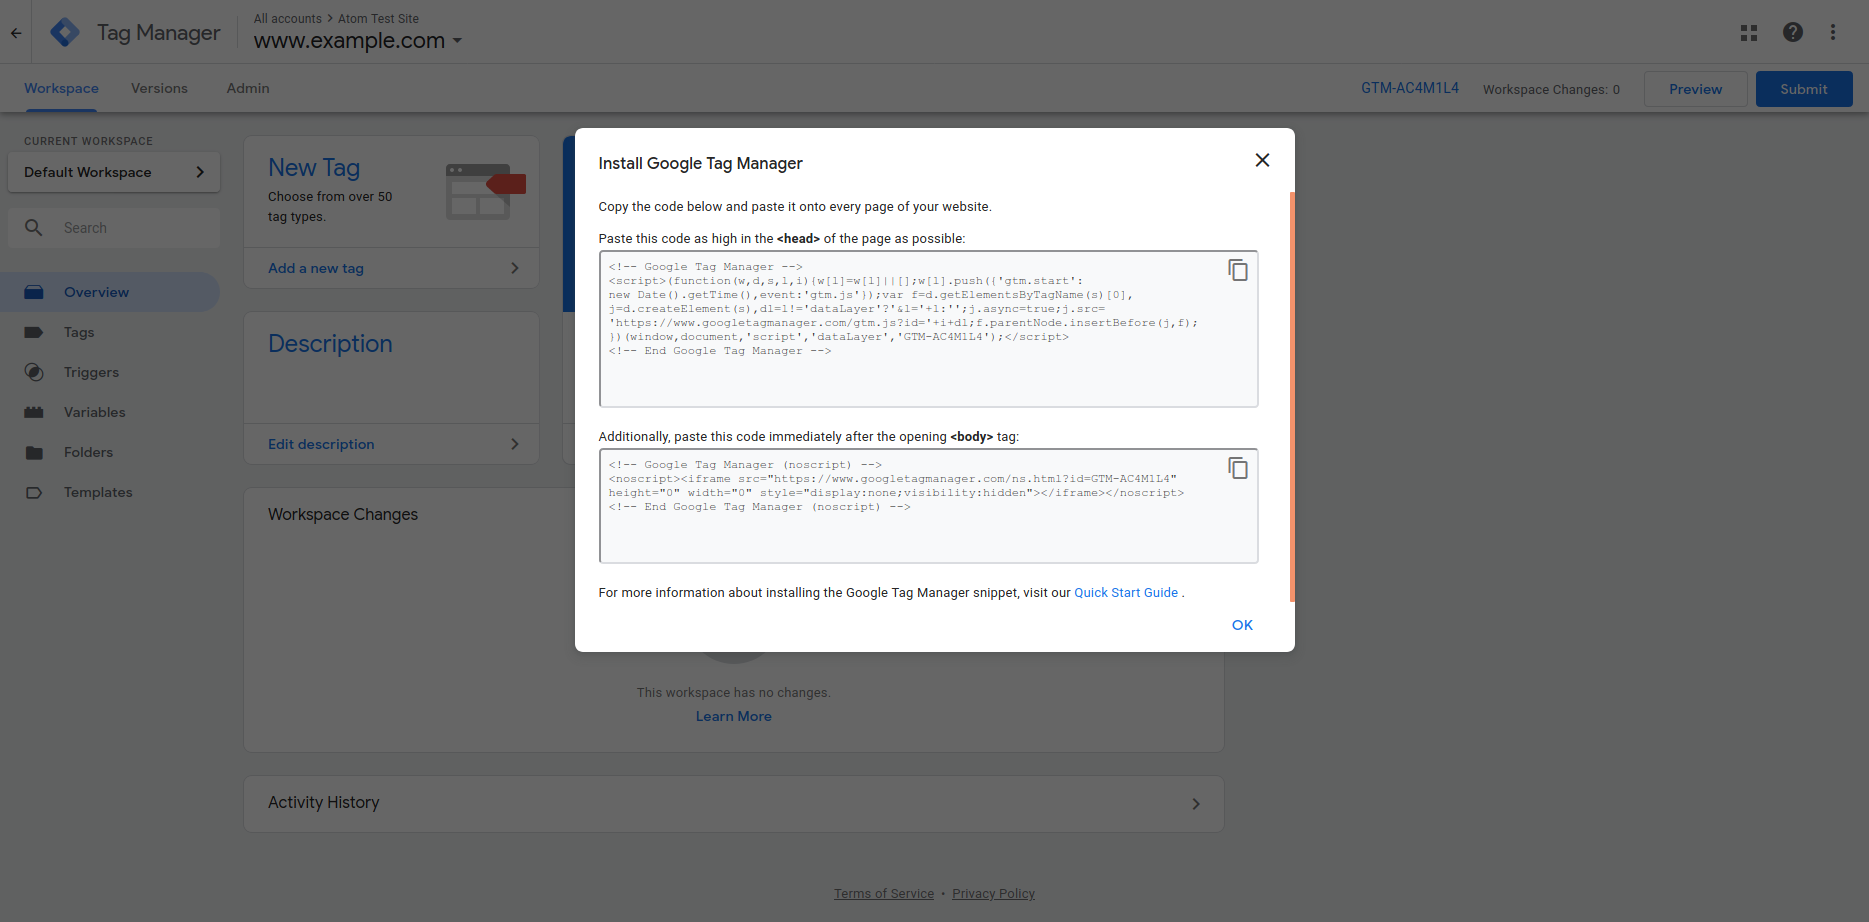
Click create. You’ll be shown a service agreement, and when you click Yes to agree to its terms, you’ll be redirected to the container dashboard, which will show the code snippets for the first time. AtoM will produce these automatically from the container ID so you don’t need to copy them, and can close the dialog.
The ID for your new container will be displayed in the dashboard:
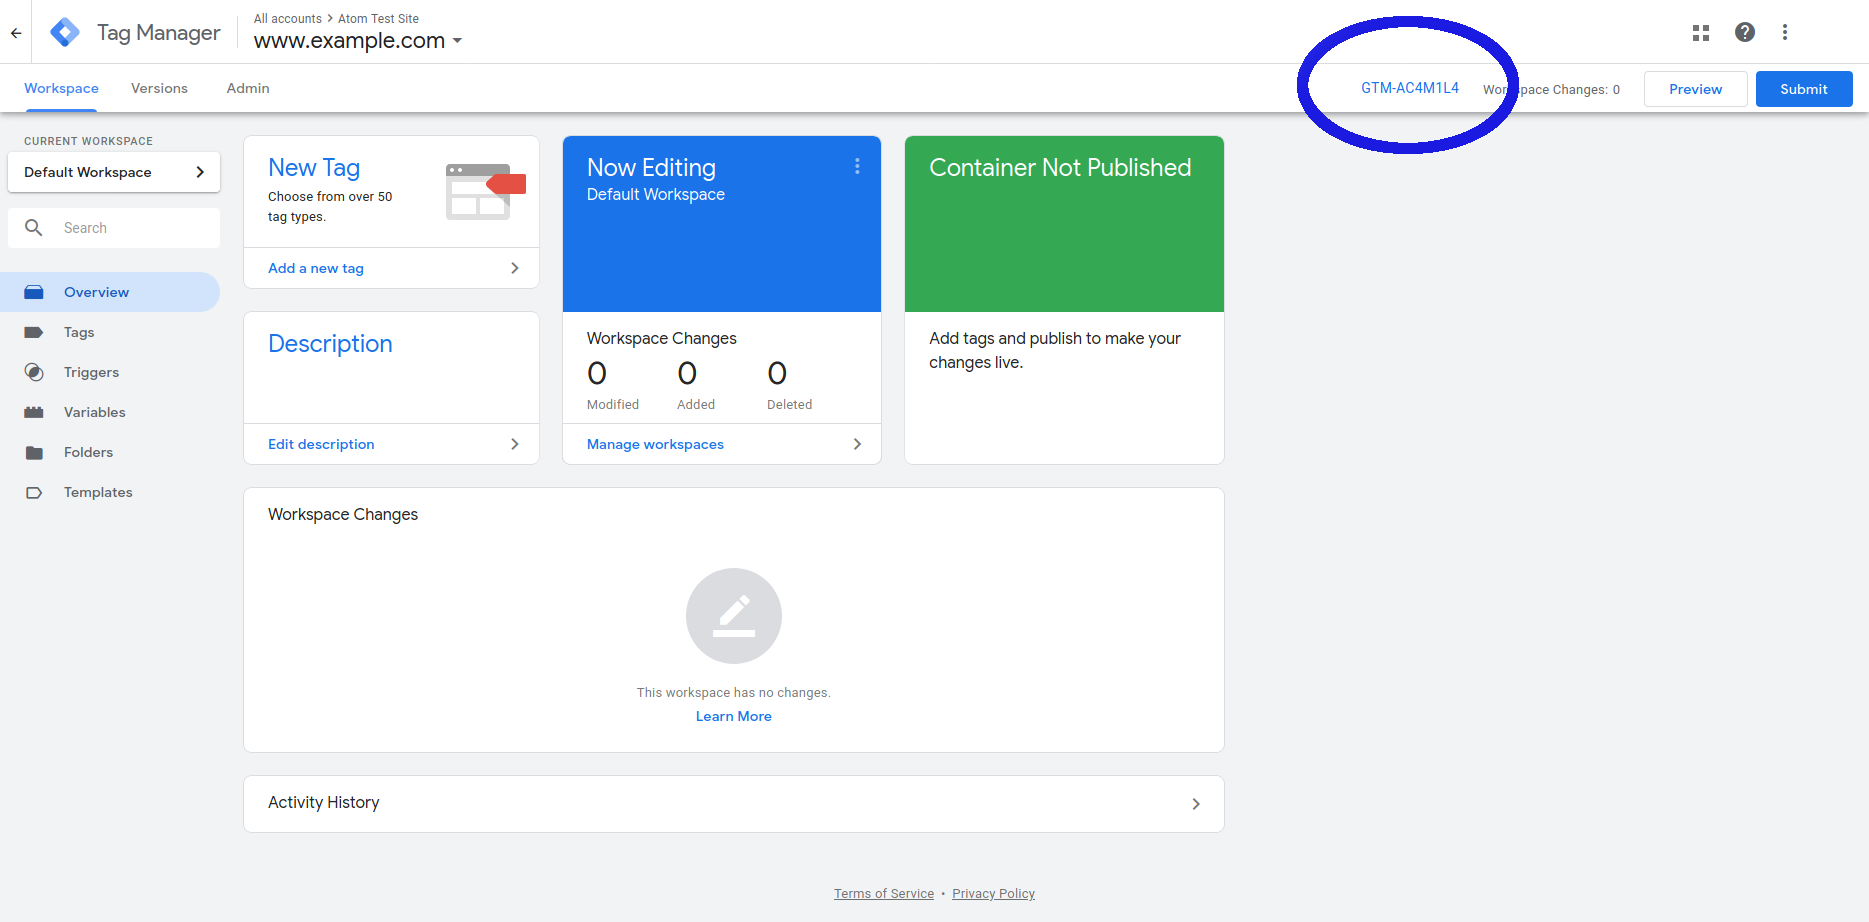
You’ll need to copy this ID into AtoM’s
config/app.ymlconfiguration file. An example:google_tag_manager_container_id: GTM-AC4M1L4
Tip
For more information on working with AtoM’s configuration files, see:
Don’t forget to clear the application cache and restart PHP-FPM after modifying this file! See:
- Once the tracking code is in place and PHP-FPM has been restarted, the tracking code snippets will be included in every page and you can start setting up tags to track events in your pages and getting reports in Google Analytics.
Tag Manager Variables
In the following example we’re going to track Click events (buttons, links, etc). First we need to enable the built-in “Clicks” variables, and make a few other configuration changes.
- Click “Variables” in the left sidebar and then the “Configure” button in the Built-in Variables section.
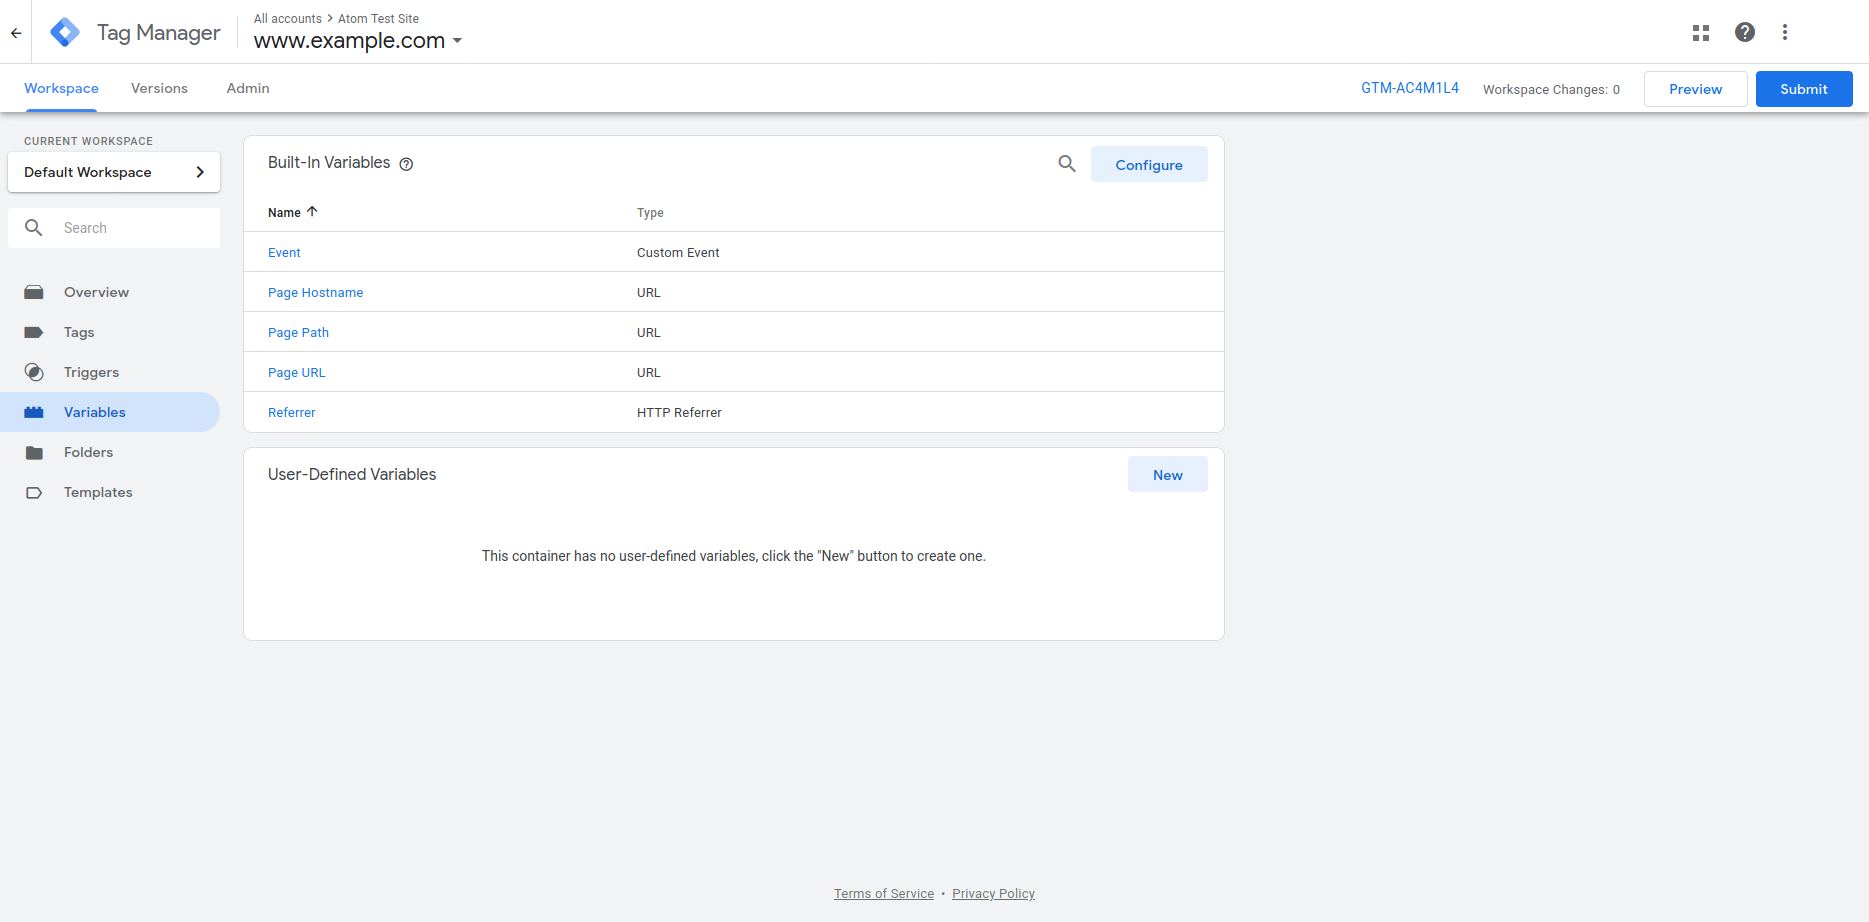
- Enable all the Clicks variables:
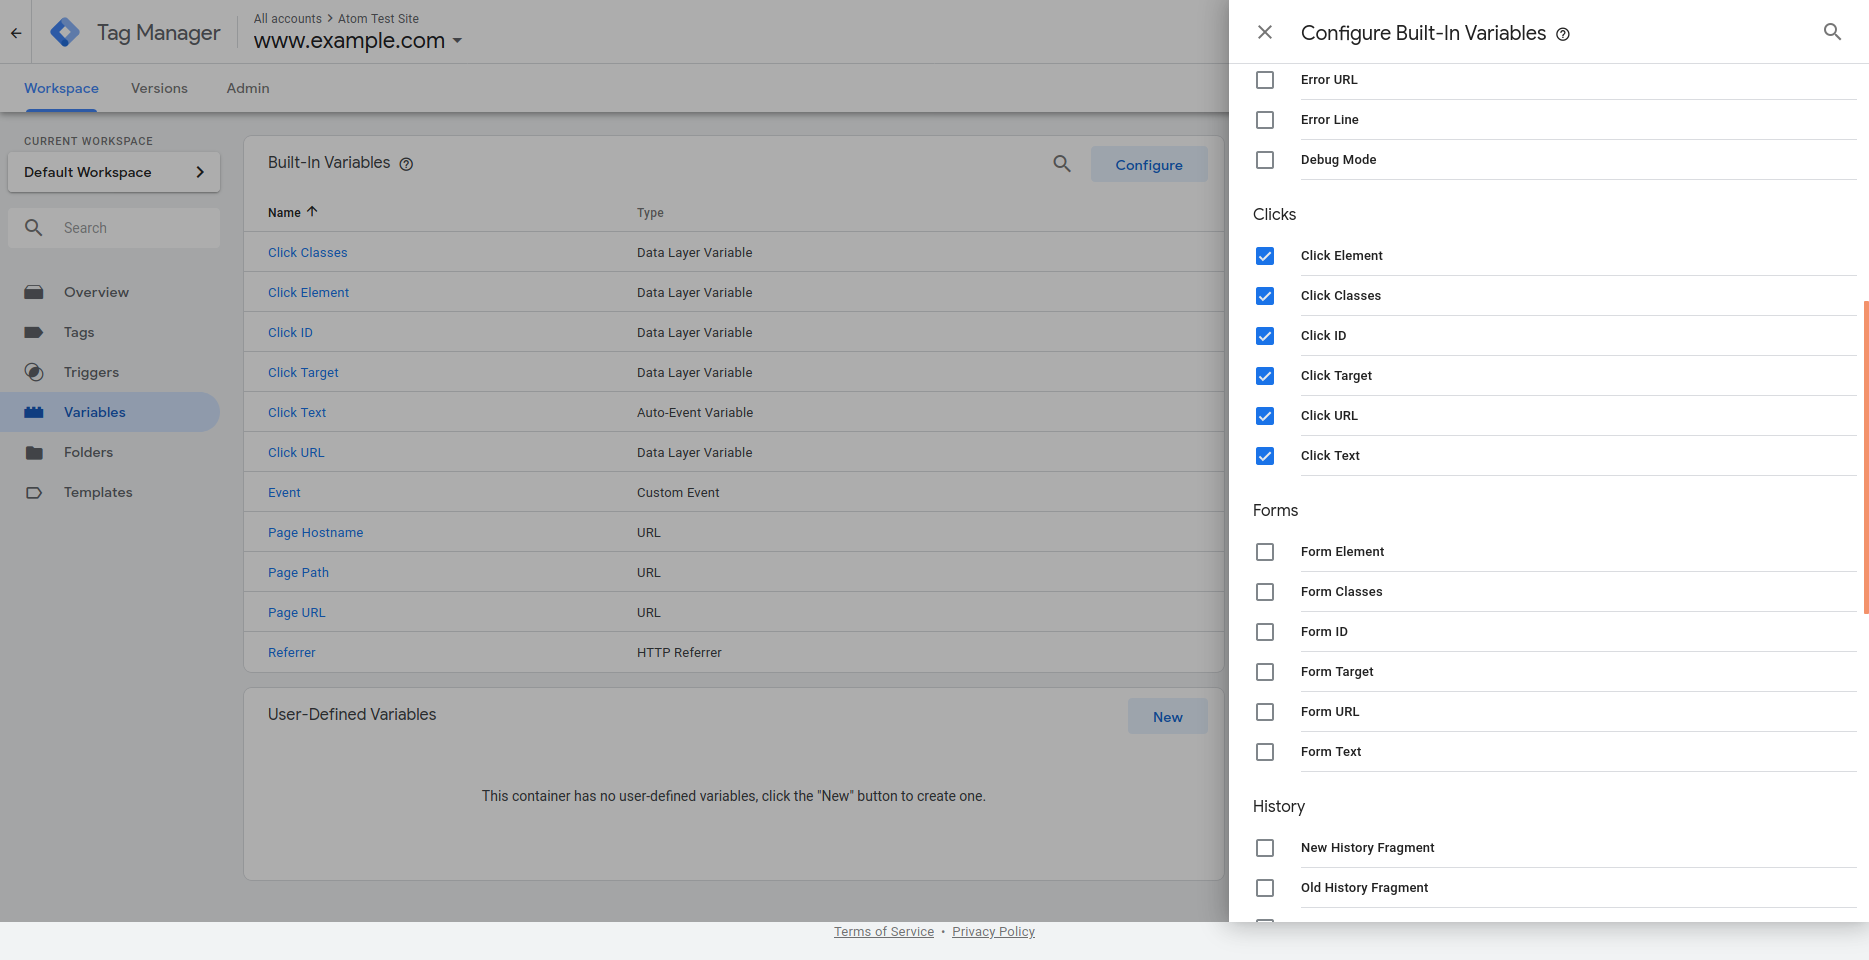
We can also create a variable to store the Tracking ID of the Google Analytics web property we set up in the section above, so we can reuse it in multiple tags.
To do so, click “Variables” in the left sidebar and then the “New” button in the User-Defined Variables section.
- In the Variable Configuration section, click the Lego block icon or the pencil icon to get started. In the resulting configuration page, select the Google Analytics Settings type, and set the Tracking ID of your Google Analytics web property. At the top of the page, we’ll also name the new variable “Tracking ID” so we can identify it when setting tags. When this is complete, click the “Save” button.
Tag Manager Triggers
Triggers listen to events on specific page elements and make tags react when the event is detected. We’re going to create a trigger to listen to click events on the Download button of the Finding aids section of the right-hand context menu of an archival description. Note that this button is just an HTML link element styled to look like a button. Let’s set up a trigger for this event.
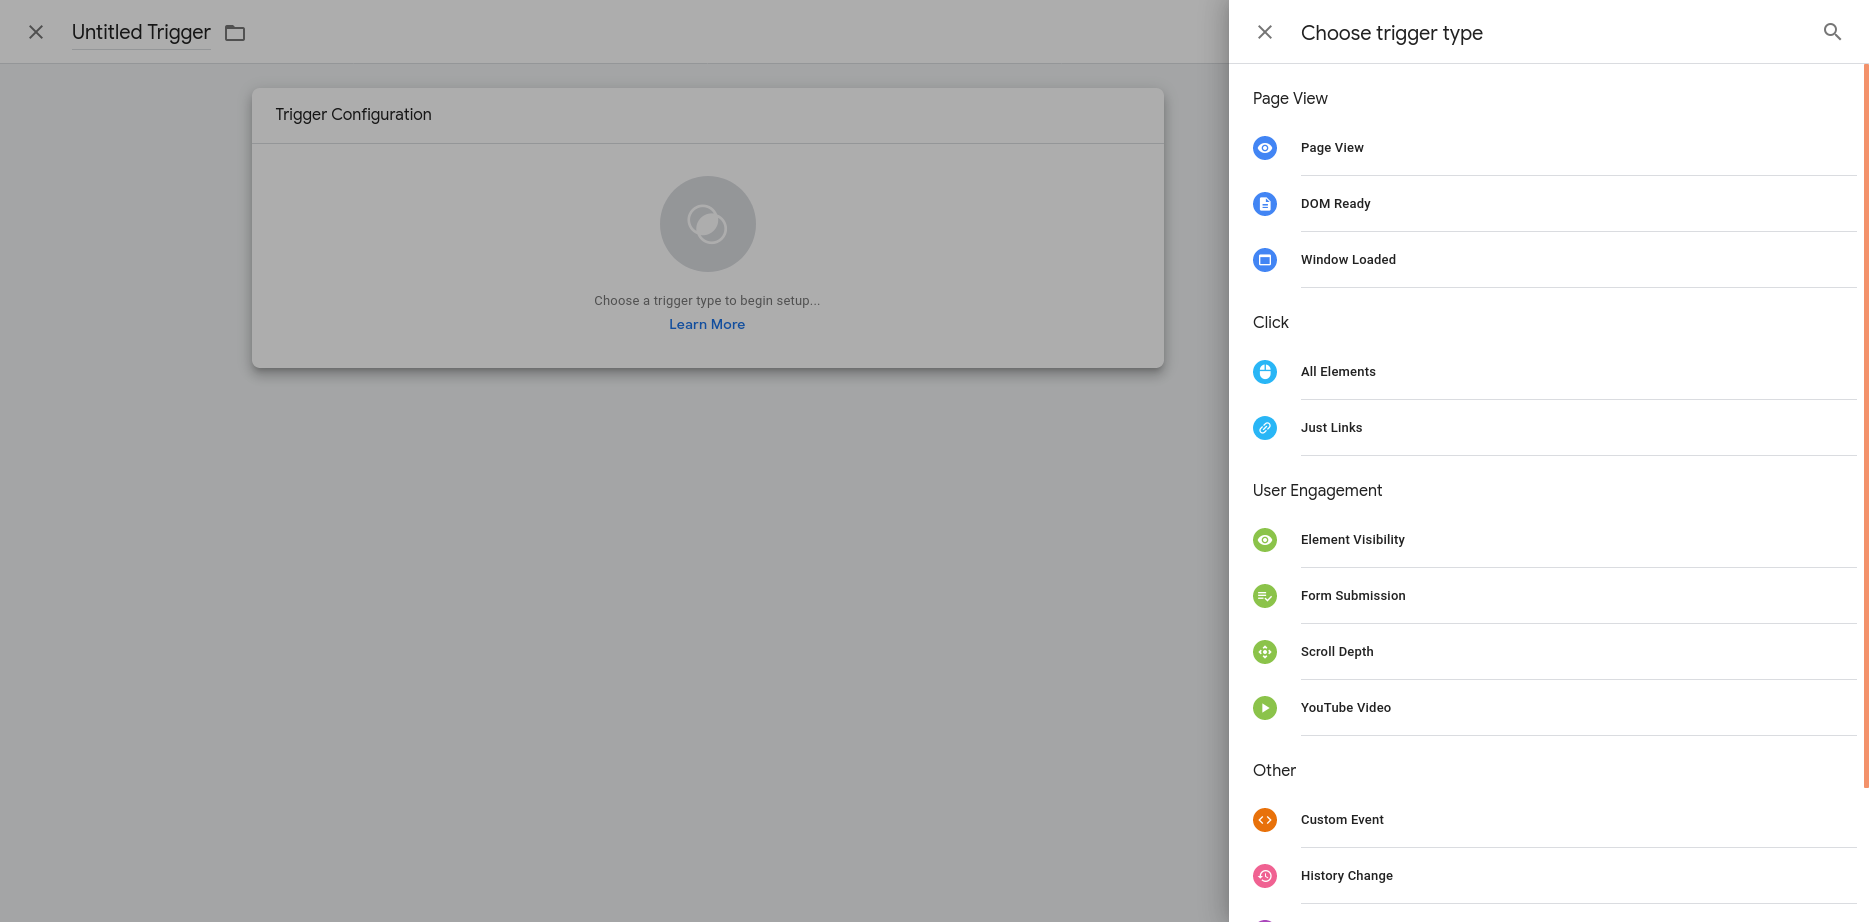
- Click “Triggers” in the left sidebar, and the “New” button in the Triggers section.

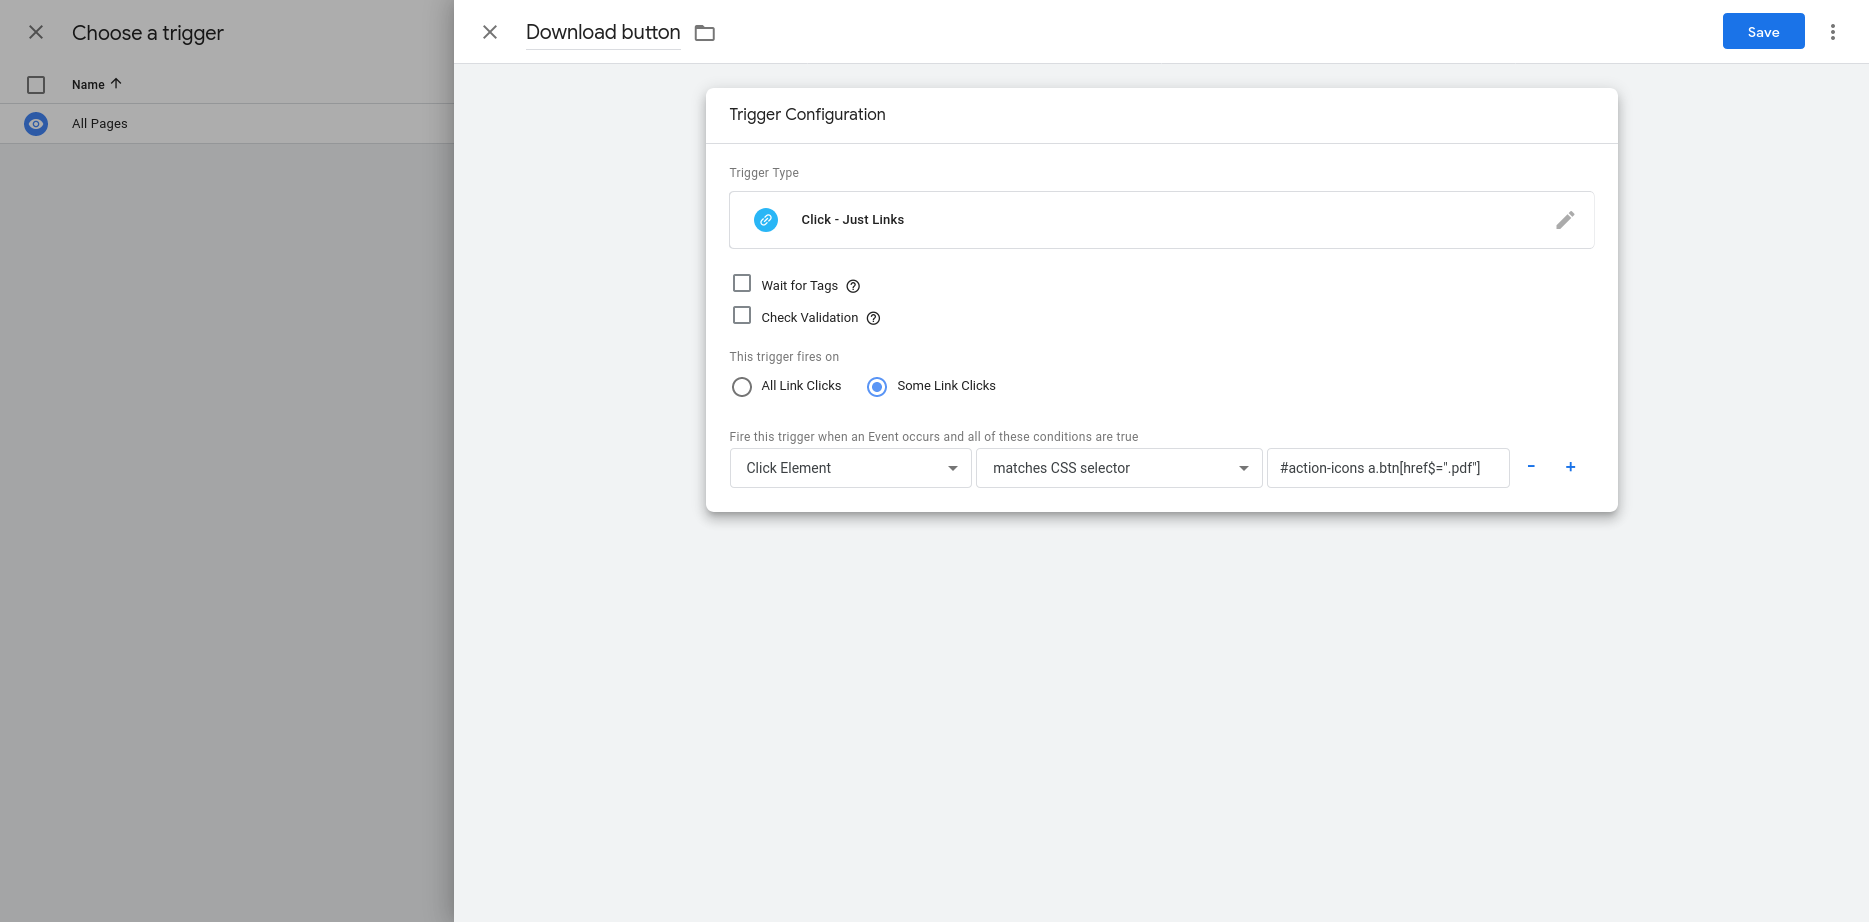
- In the Trigger Configuration section click the circled button or the pencil icon and choose the “Just Links” trigger type under the Click category.
- Under “This trigger fires on,” select “Some Link Clicks,” which allows you
to define selectors to identify the specific HTML elements you want to
track. This will depend on the markup of the page and how specific you want
to be. A selector like
#action-items a.btn(all links that look like a button on the right sidebar) might be good enough or#action-items a.btn[href$=".pdf"](all links that look like a button on the right sidebar and where thehrefURI ends in.pdf) might be way more specific. Name the trigger “Download button” and then click the Save button at the top of the screen.
Tag example: tracking finding aid downloads
Now that we’ve configured our Variables and Triggers, in the following example we’re going to track how many times users click the finding aid Download button in the right context menu of an archival description. We are going to generate a report that groups all these events in the single category of “Finding Aids,” and which shows the URL of their related archival description.
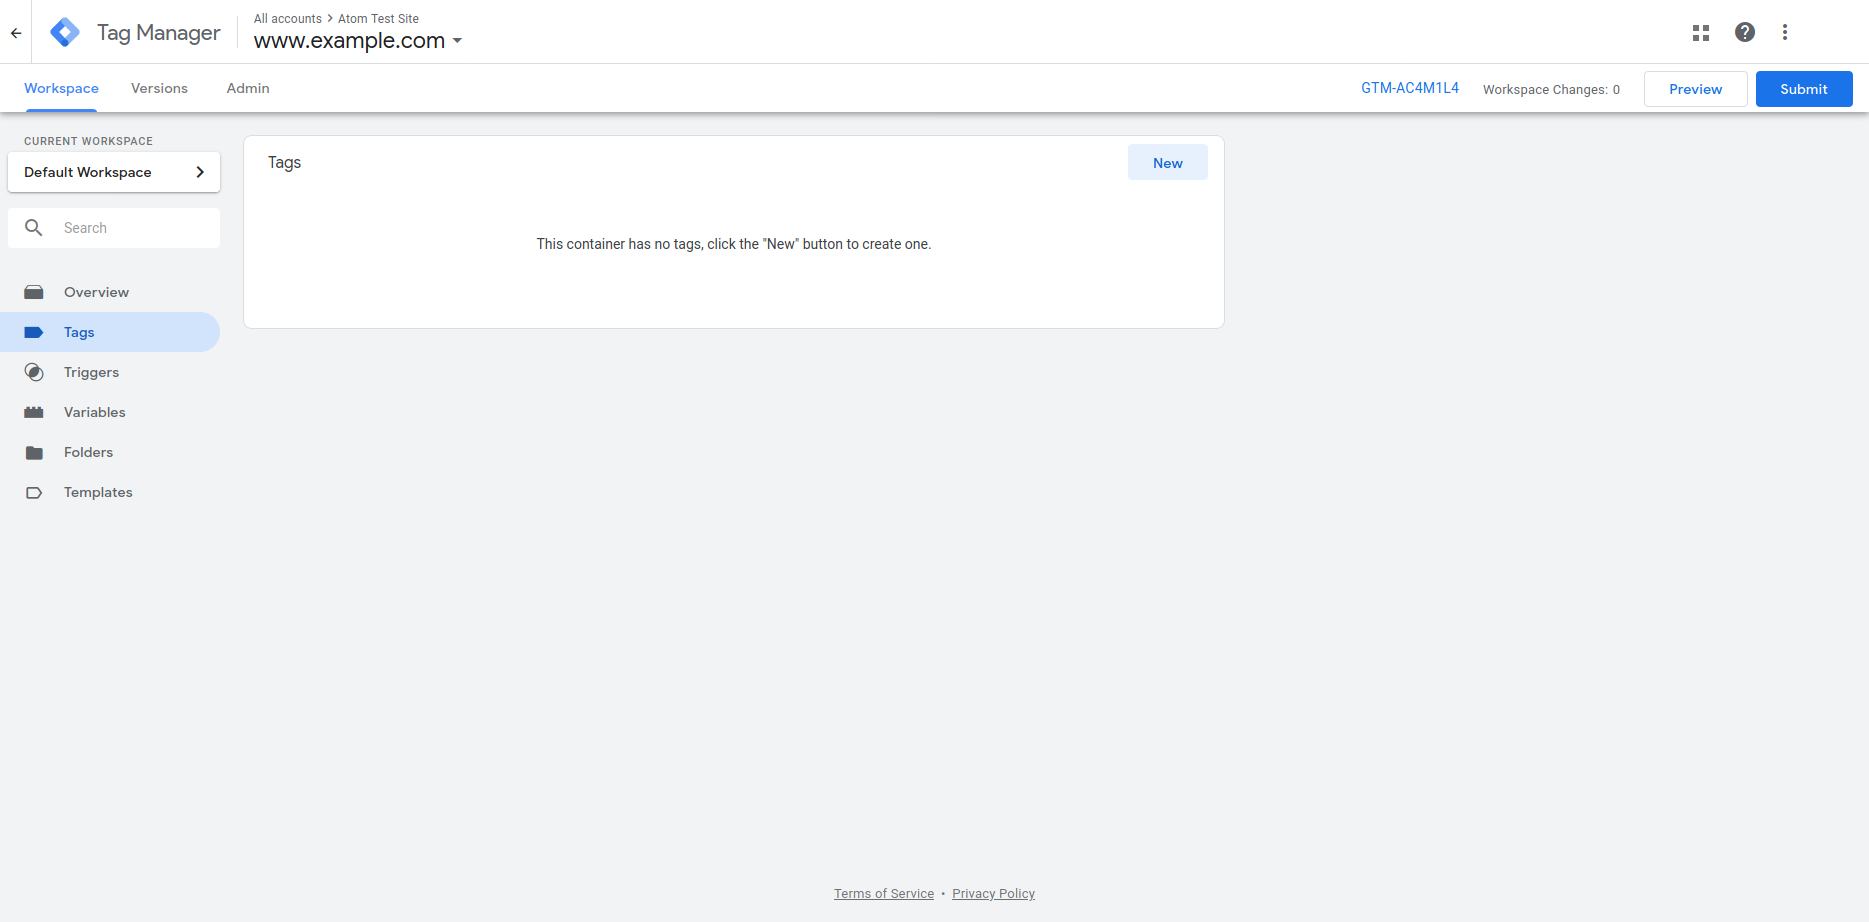
- Click “Tags” on the left sidebar and the New button in the Tags section.
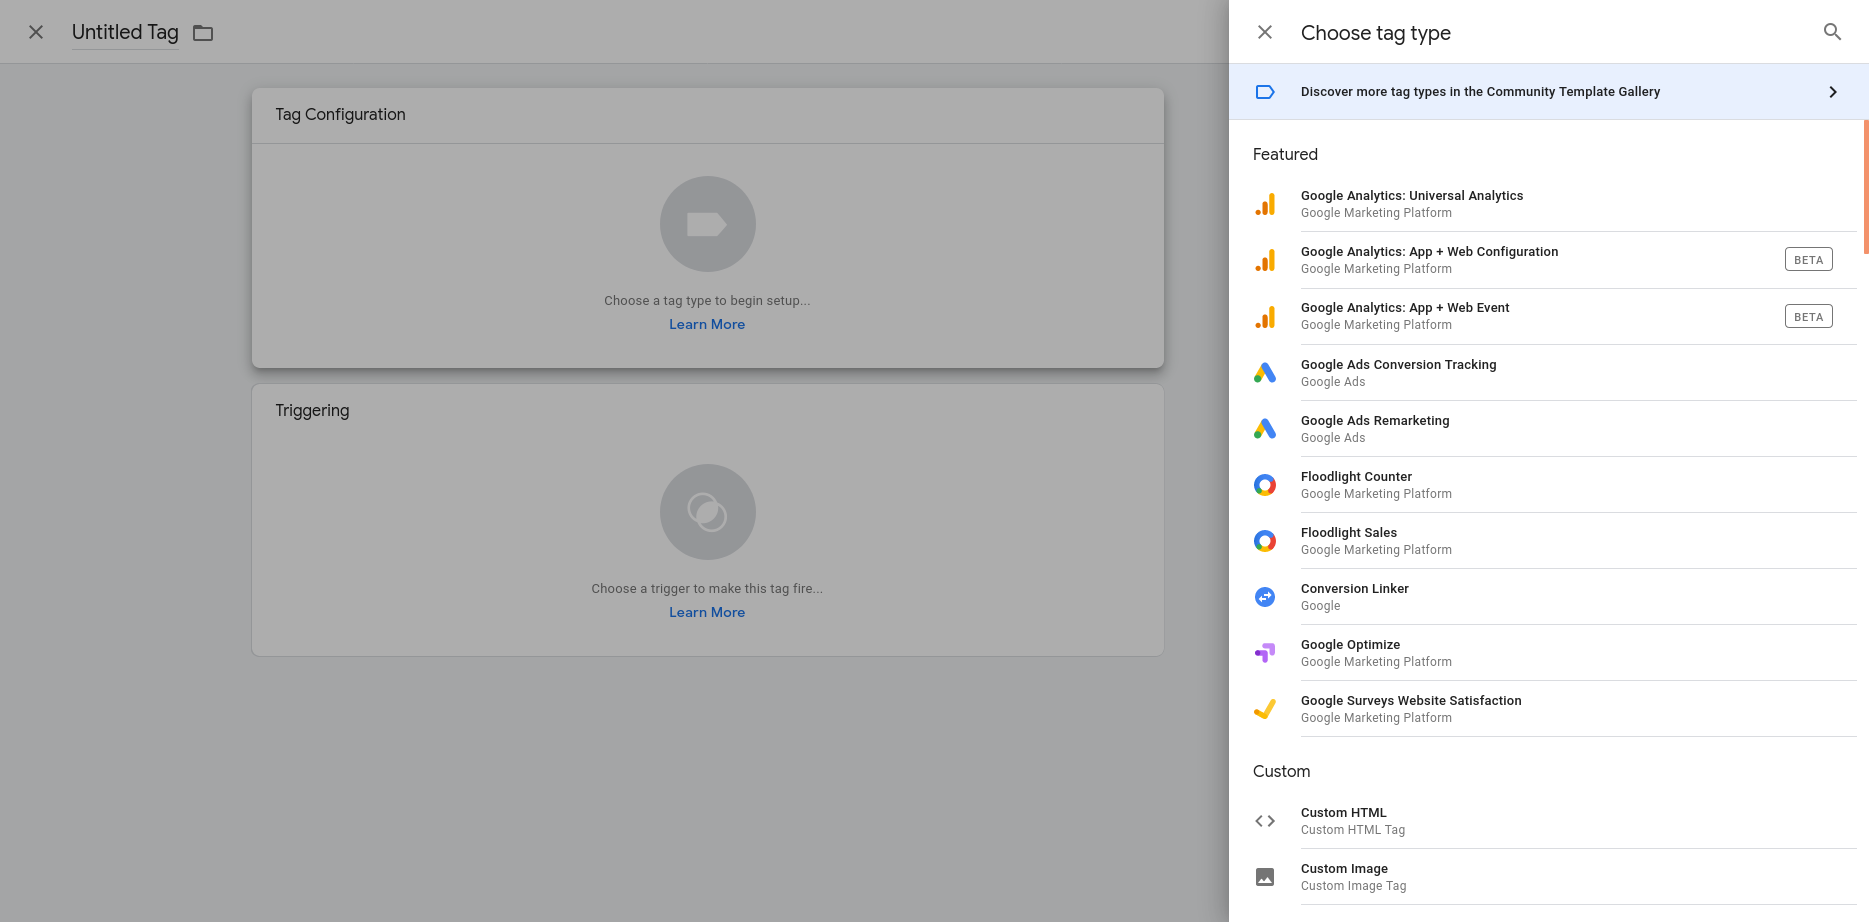
- In the Tag Configuration section, click the tag button or the pencil icon and choose the “Google Analytics: Universal Analytics” type. For Track Type select “Event” and for the Google Analytics Setting, select your Tracking ID variable.
- The Category, Action and Label tracking parameters are arbitrary values that become dimensions in the Google Analytics event reports so you can adjust them conveniently. For example, we’re going to use the URL of the archival description as the Event label, so click the lego block button next to the field and select the “Click URL” variable.

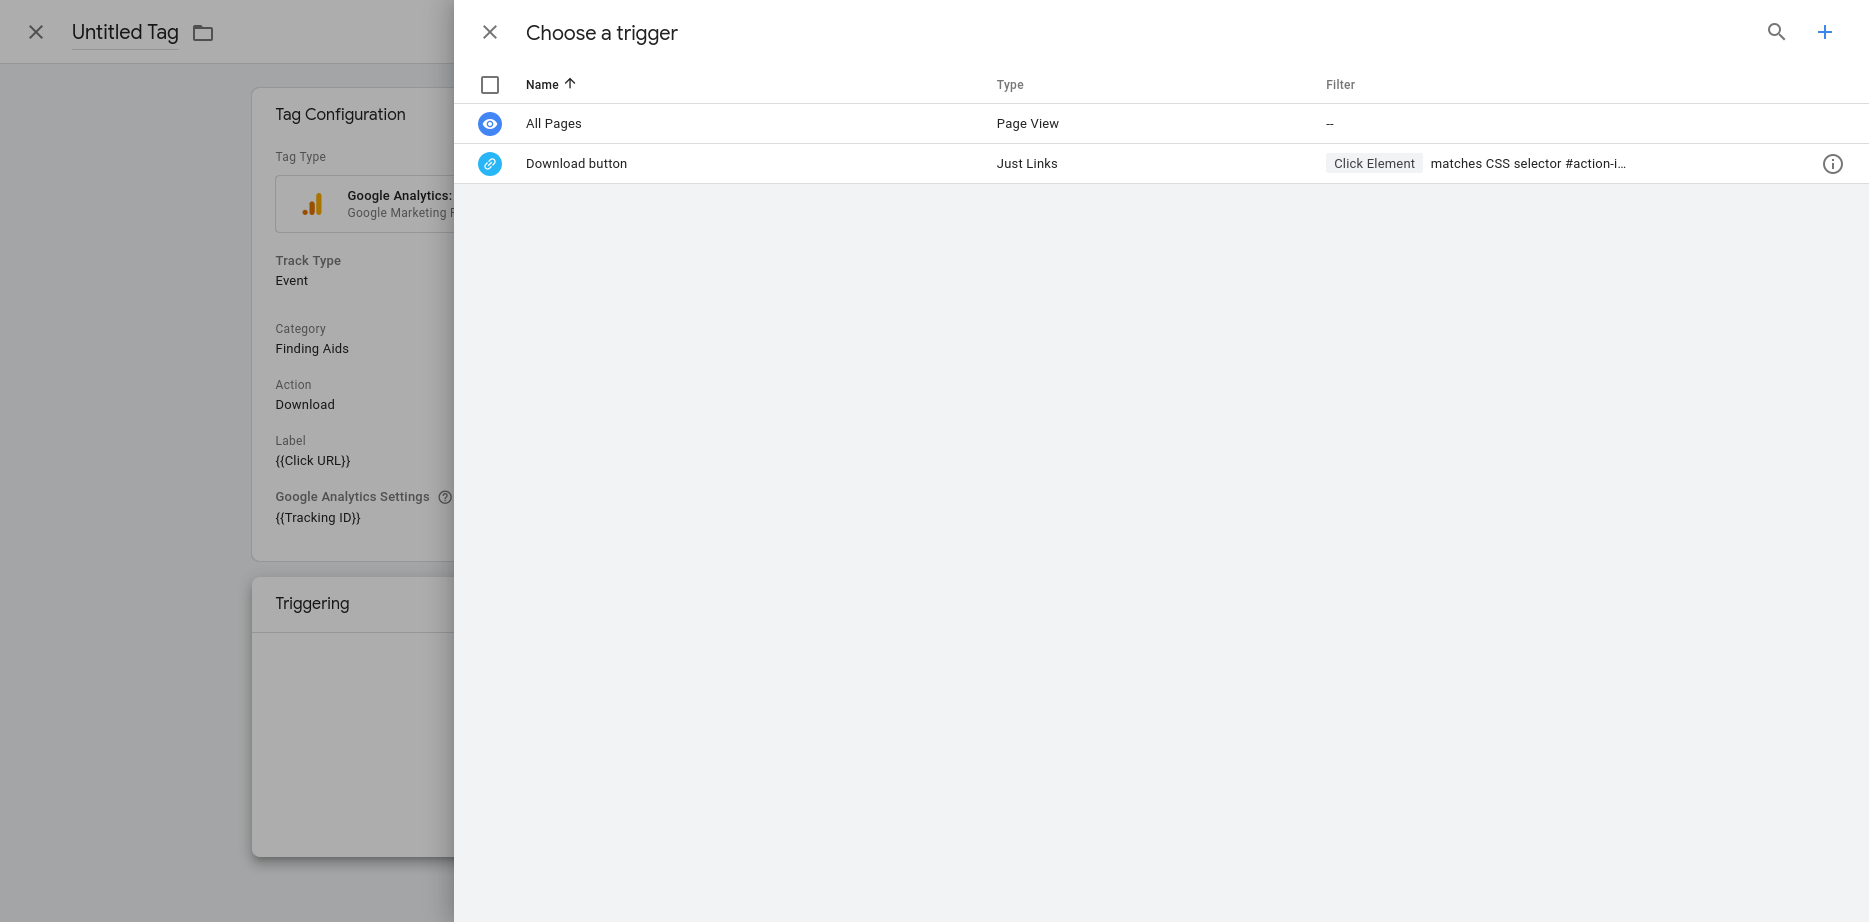
- In the Triggering section click the circled button or the pencil and choose the Download button we configured in the previous section.
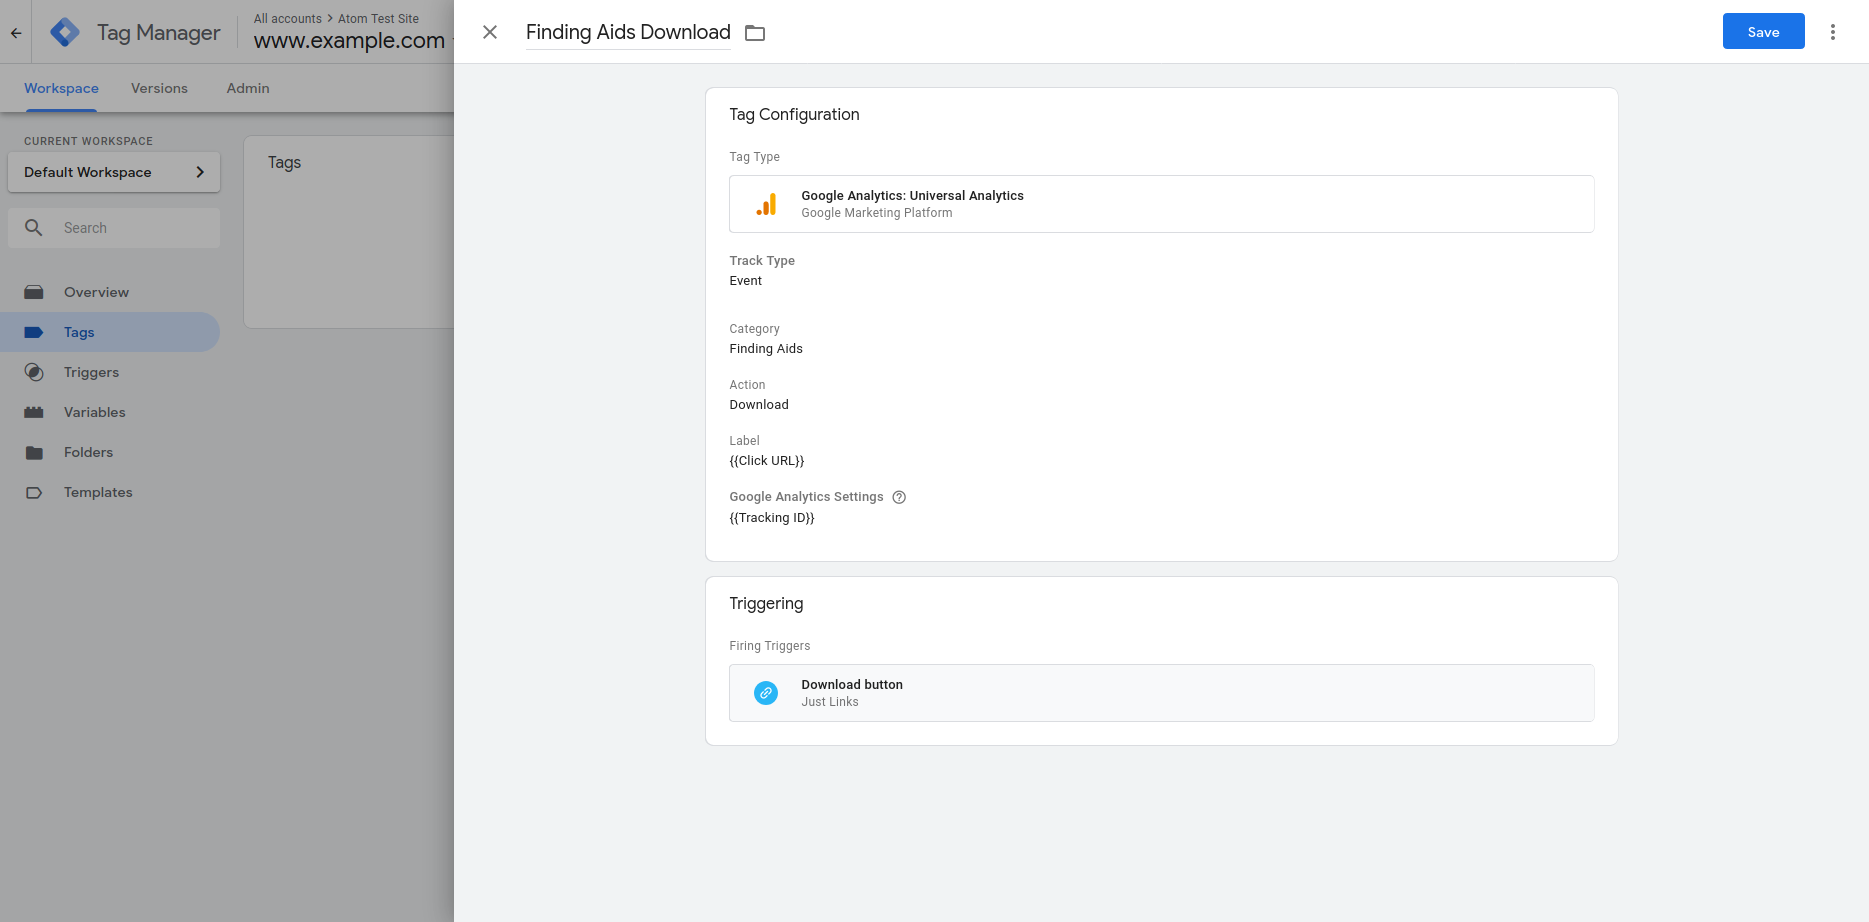
- Finally, name your tag “Finding Aids Download” and click the Save button at the top of the screen.
We’re almost set! Let’s preview our work and make sure everything is working as expected.
Previewing your Google Tag functionality
Before publishing your new tag you can preview its functionality by clicking the Preview button in the container dashboard. Once you’re in preview mode you can open a new tab in the same browser and visit your site.
You’ll see a Tag Manager pane at the bottom of your page.
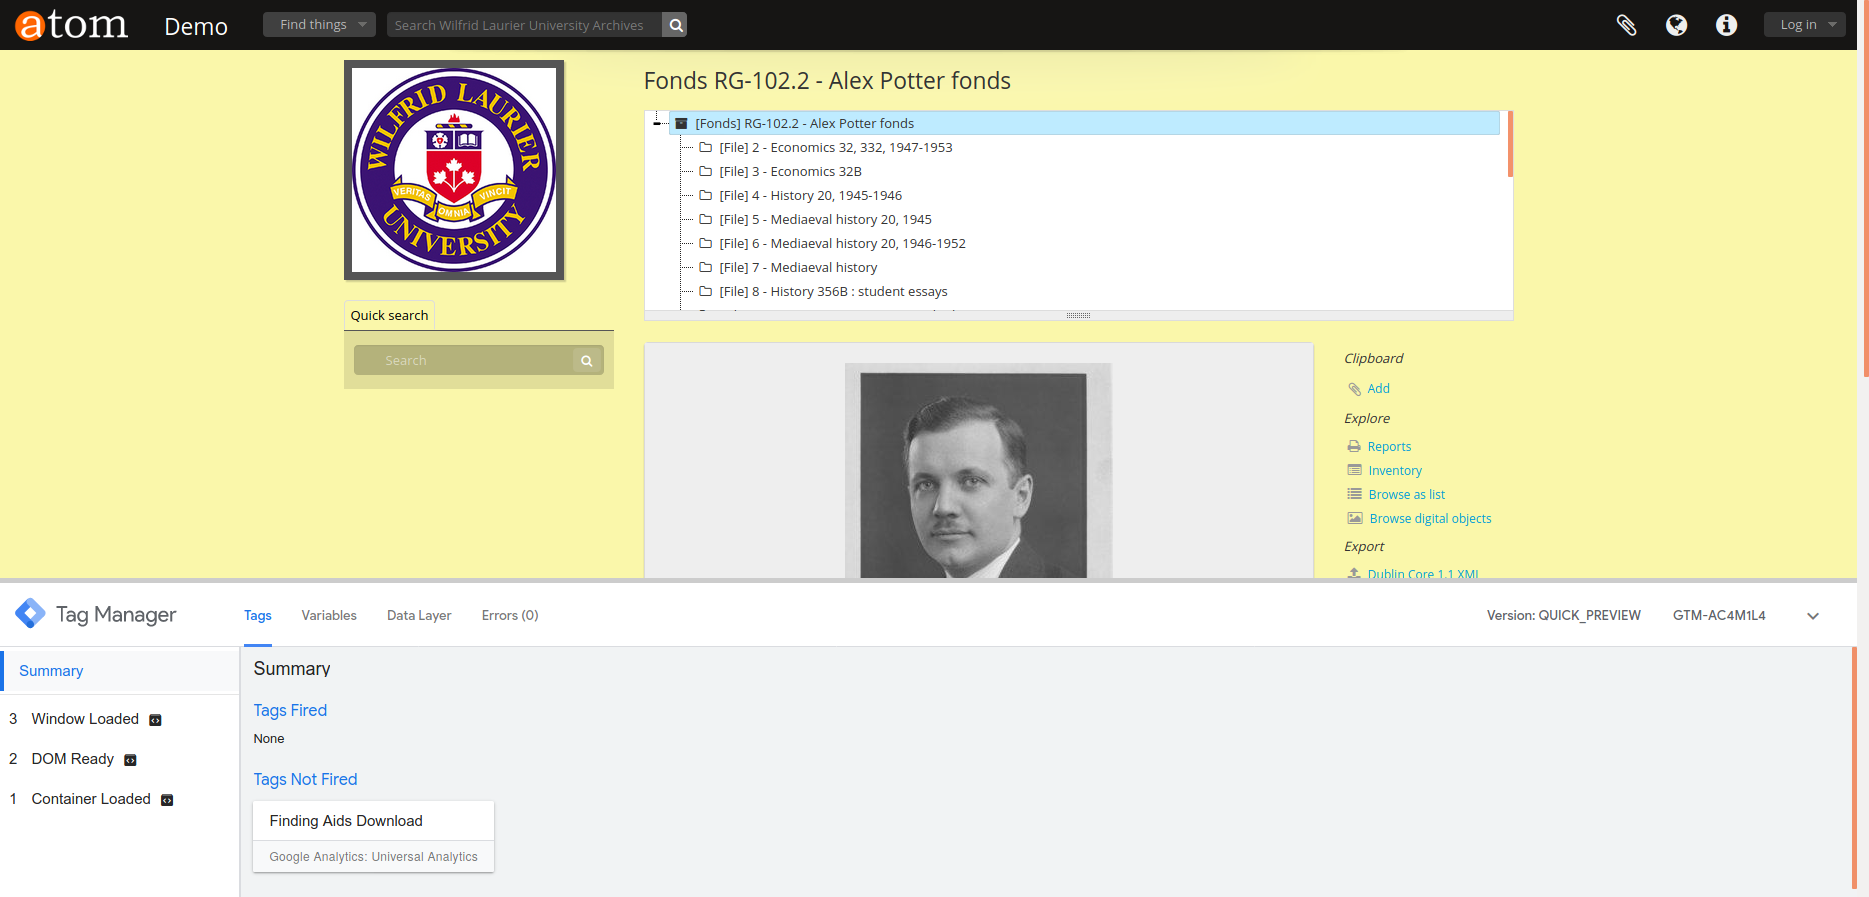
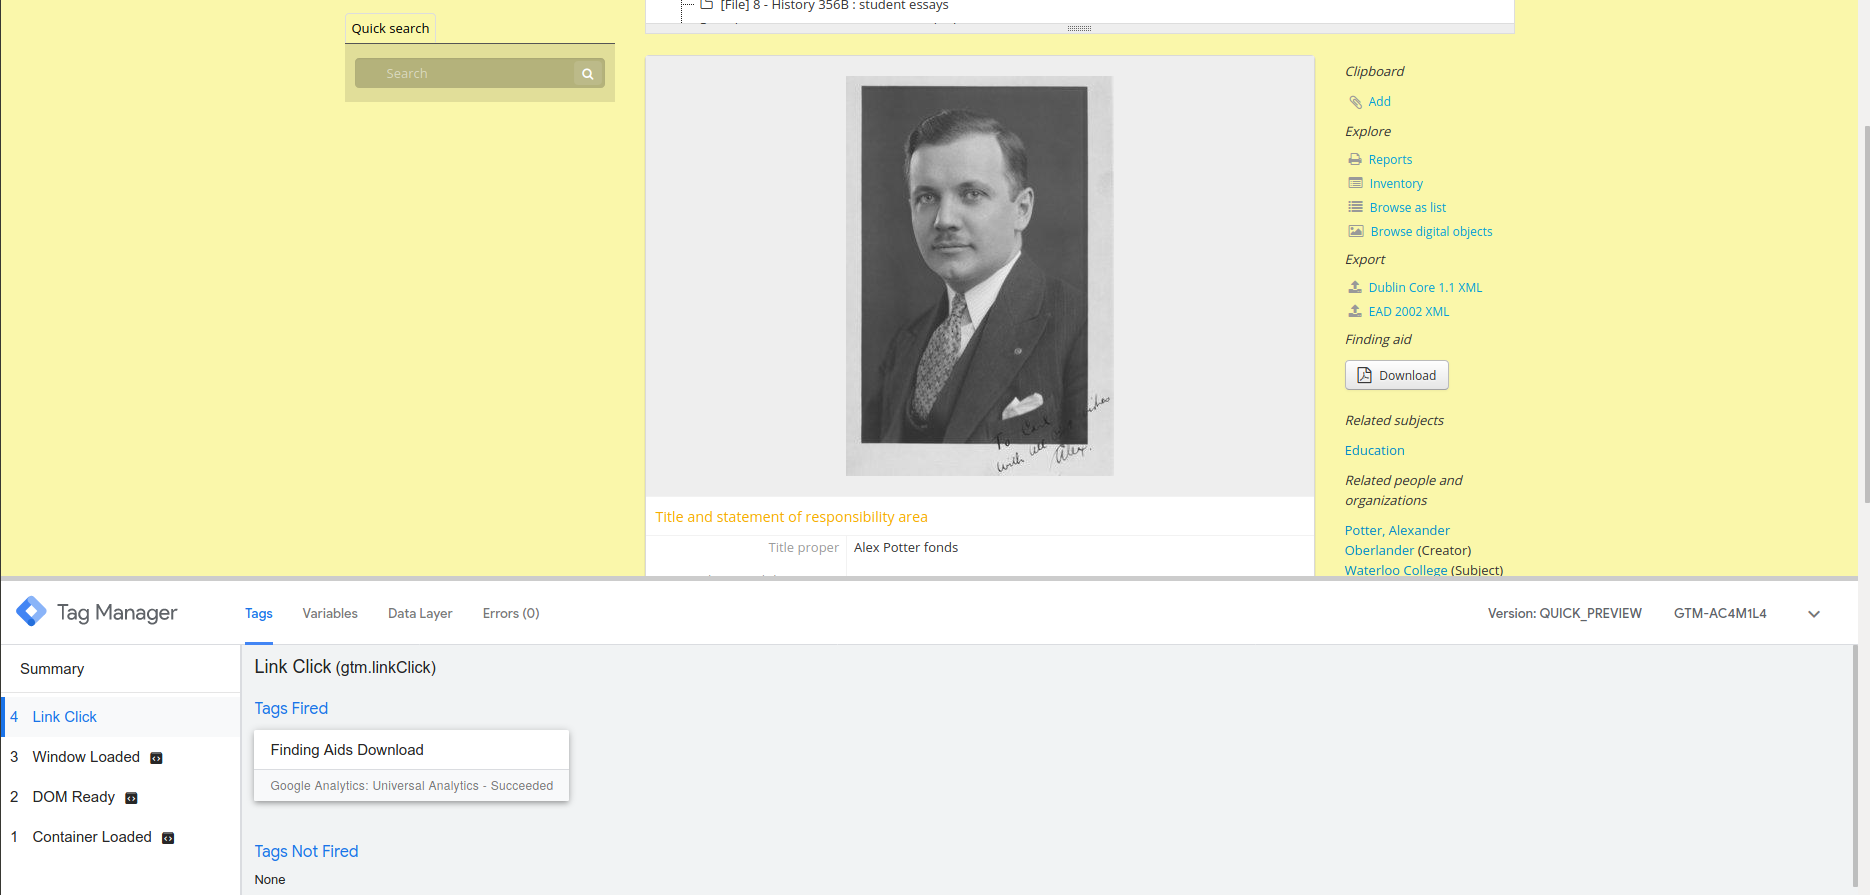
If you click the finding aid download button of an archival description, the PDF will be open in a new tab and you’ll see a new Click event in the Summary sidebar showing that the tag was successfully fired.
Publishing your tag and getting an Analytics event report
After you check that the tag works you can publish your workspace by clicking the “Submit” button in the Google Tag Manager Container dashboard. Set a name and description for the version changes and click the “Publish” button.

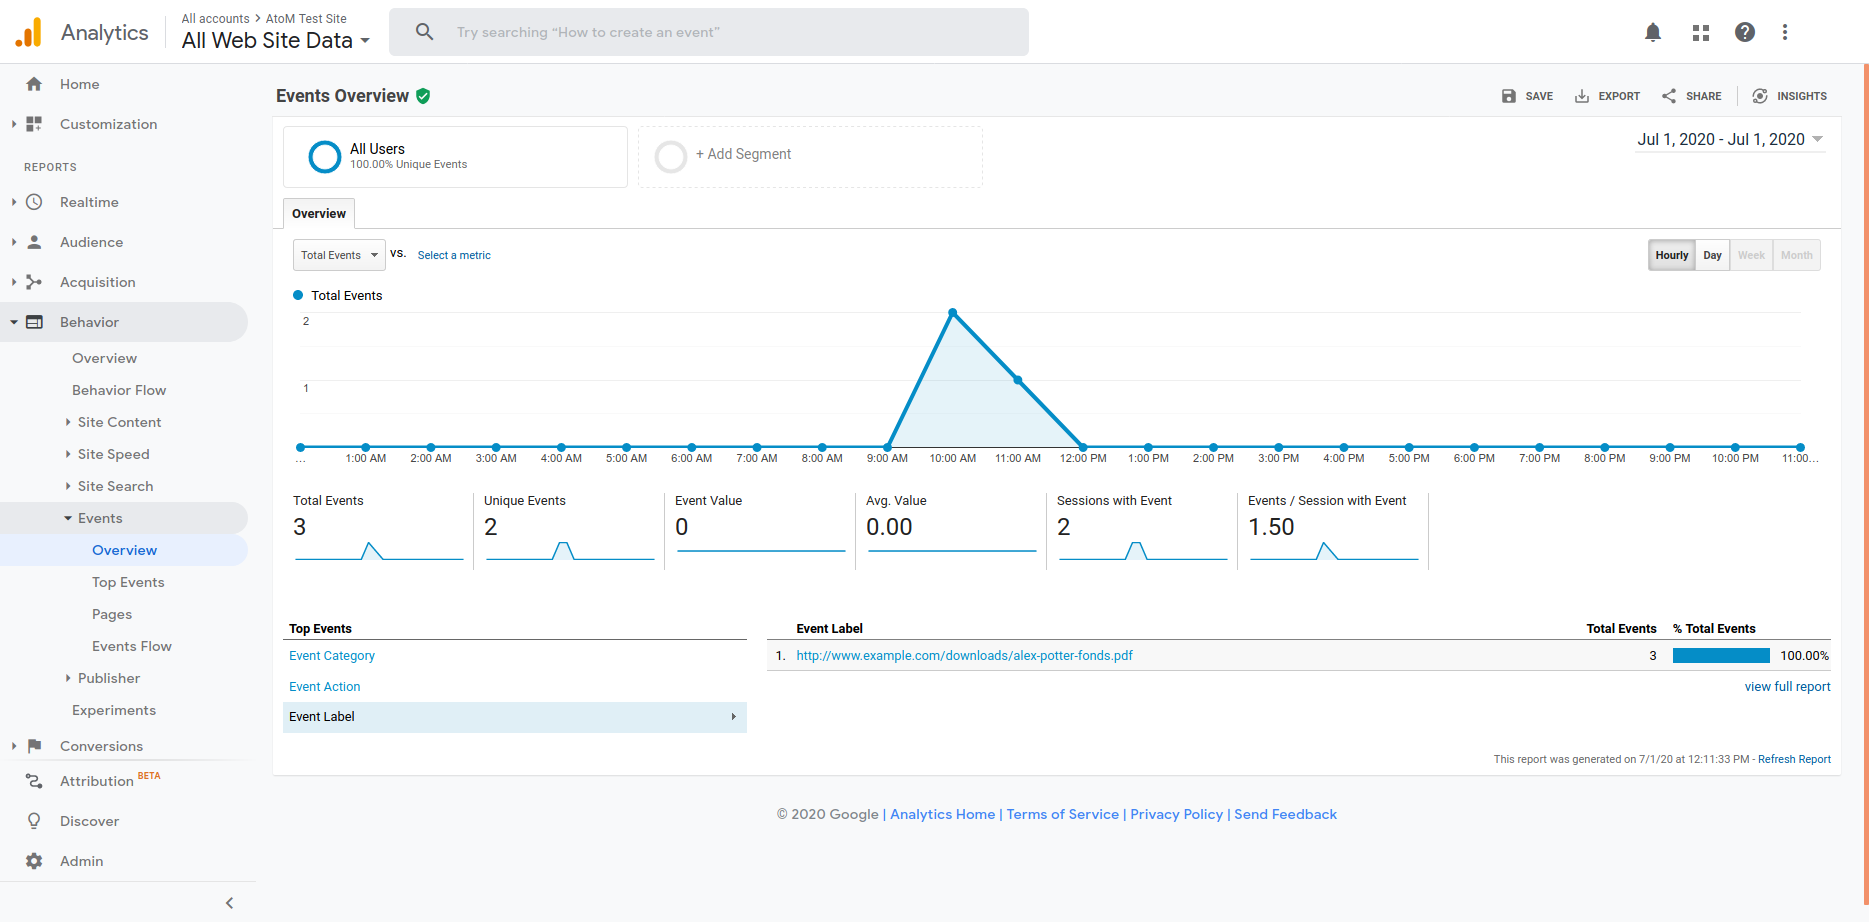
Now you can visit your web property in Google Analytics. You can either check the Realtime > Events report:
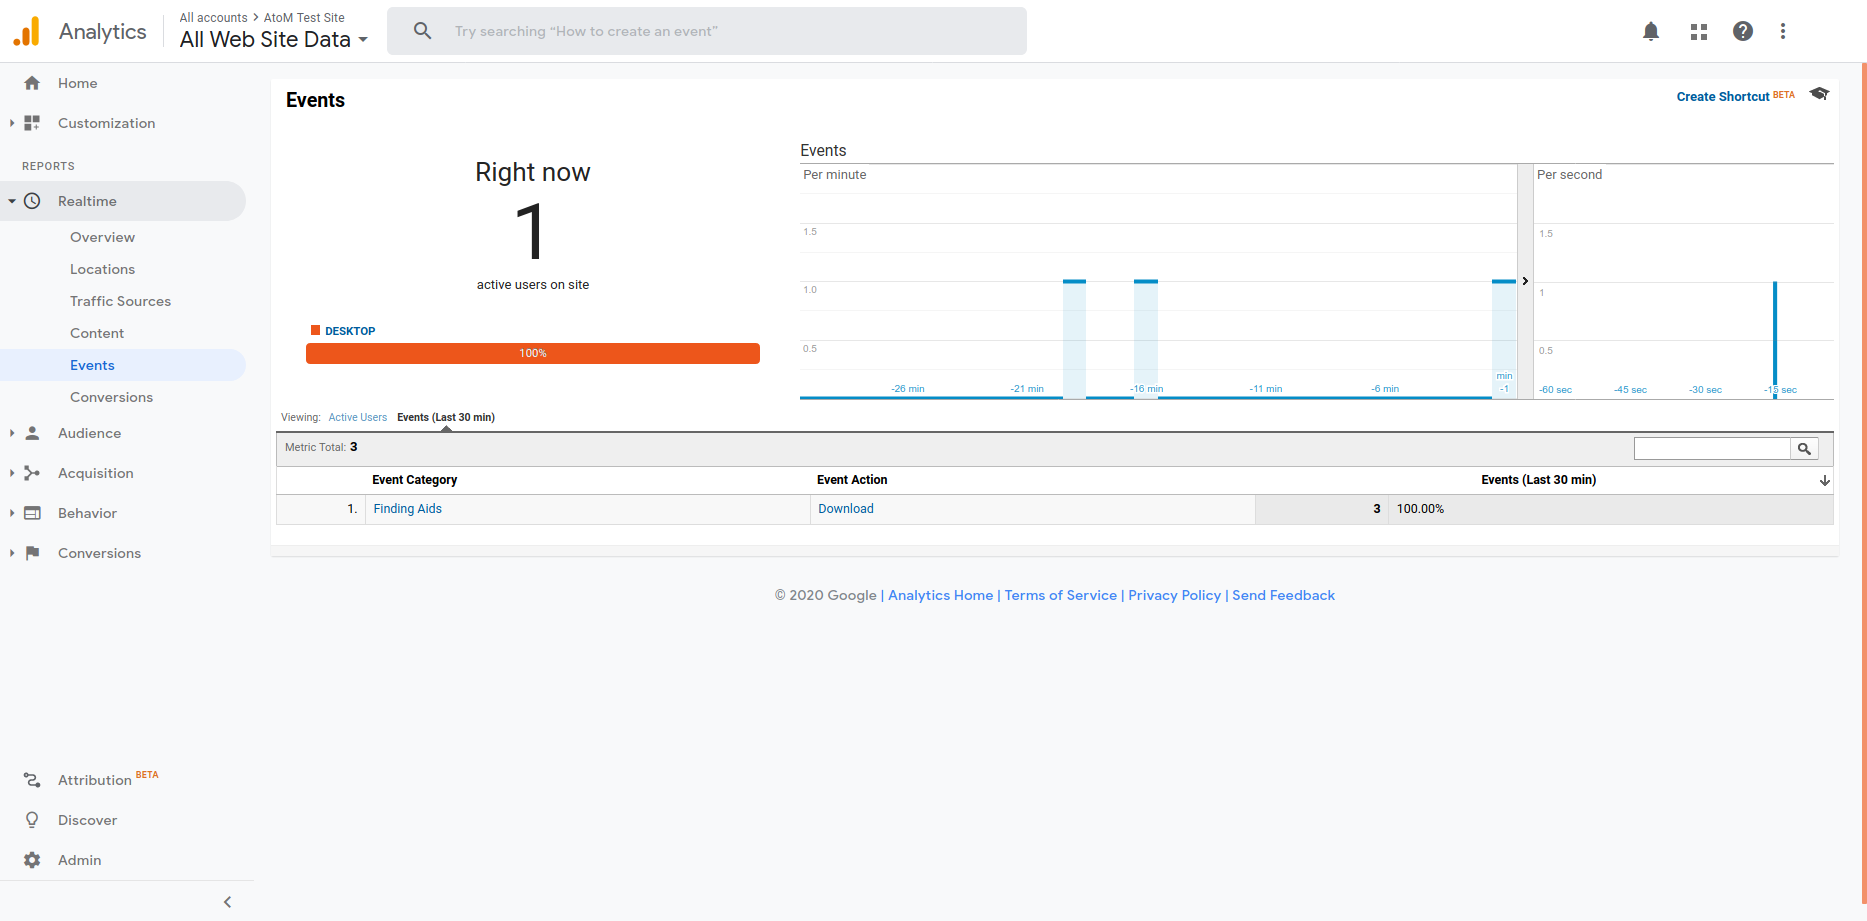
Or the Behavior > Events reports to see the dimensions you defined being tracked.