Common AtoM database queries
Occasionally, manually modifying the AtoM database is required, such as when data gets corrupted from timeouts or other bugs, or when no existing user interface functionality or Command line tools will help you accomplish the data changes you’d like to see.
In this page, we will include a few useful SQL queries based on common actions users wish to perform on their databases, which are not accommodated from the user interface. For all of these, you will need to execute them from inside MySQL, using the username and password you created during installation.
Warning
Use the following SQL queries at your own risk! This section of the documentation is recommended only for users already familiar with SQL, and an understanding of AtoM’s data model. We maintain copies of Entity Relationship Models of AtoM’s database on our wiki here, for reference:
We strongly recommend that you make a backup of your database before attempting to use any of the following SQL query examples. See below:
Additionally, we do not recommend running these queries on a production installation without first testing them elsewhere. The AtoM Docker and Vagrant development environments are an easy way to set up a local test instance - see:
While we make every effort to keep these examples up-to-date with each releases, future changes in AtoM’s data model could alter the outcome of some queries and lead to unexpected results - as could a typo in a query! Artefactual takes no responsibility for unexpected outcomes due to direct database manipulation, as this is not part of the intended use of the application. Once again, please proceed cautiously, and at your own risk!
Jump to:
- Backing up the database
- Accessing the MySQL command prompt
- SQL maintenance, tuning, and logging
- General AtoM entity SQL queries
- Archival description SQL queries
- Digital object SQL queries
- Authority record and event SQL queries
- Term and Taxonomy SQL queries
- Note and Property table SQL queries
See also
Backing up the database
See also
To back up a MySQL database, you can follow the structure of the following example command:
mysqldump -u myusername -p mydbname > /path/to/mybackupfile.sql
Where mysusername and mydbname represent the database username and
database name used during AtoM’s installation, and mybackupfile represents
the name you would like to assign to the MySQL backup file. Once you enter the
command, you will also be prompted for the database password you created for the
MySQL user during installation.
Tip
If you don’t recall the credentials you used during installation, see the section below for information on how you find them out:
To load a backup back into AtoM’s database, you can use the following command structure:
mysql -u myusername -p mydbname < /path/to/mybackupfile.sql
The database is now restored to the point when you dumped it.
Important
If you are loading a backup from an older version of AtoM into a newer one, there are some additional steps - most importantly, running the AtoM database upgrade task, which will execute a series of migration scripts to update your database schema to what AtoM expects for the latest version. Additionally, make sure that the MySQL version hasn’t changed between releases - if it has, make sure you’ve properly followed the latest installation instructions for the latest version, and check the Upgrading documentation for any addtional steps (such as dropping and recreating the database first, and possibly changing certain MySQL parameters).
Additionally, please note that finding aids, cached XML, and
digital objects are not stored in the database -
instead, these are typically found in the uploads and downloads
directories, found just below the root AtoM installation directory. If you are
loading your data into a different AtoM instance, you may need to migrate
these directories separately. Please see the Upgrading and Data backup
documentation for more information:
See also
Accessing the MySQL command prompt
To access the MySQL command prompt so we can run SQL queries, we will need to
know the MySQL username, password, and database name used during installation.
If you can’t recall the credentials you used, you can always check in
config/config.php - for example, to see this file you could run the following
from the root AtoM installation directory, which should be
/usr/share/nginx/atom if you have followed our recommended installation
instructions:
sudo nano config/config.php
You should see the database name and credentials listed near the top of the file.
You can also check your database username and password in /root/.my.cnf like
so:
sudo cat /root/.my.cnf
Once you have the database name, MySQL user name, and password, we can use these to access the MySQL command prompt. The basic syntax to access the MySQL command prompt is like so:
mysql -u username -pPASSWORD database-name;
Where:
usernamerepresents the database usernamePASSWORDrepresents the database passworddatabase-namerepresents the name of the database used during installation
An example: Assuming that your database name is atom and your user and
password are both root, you could access the prompt like so:
mysql -u root -proot atom;
Notice that there is a space between the -u and root, but NOT
between the -p and the root password. Alternatively, you can leave no
password following the -p, and you will be prompted to enter it by the command
prompt before proceeding.
Once submitted, your command prompt should now say something like mysql>.
You can now input a SQL query directly.
You can exit the MySQL command prompt at any time simply by typing exit. You
will be returned to the unix command-line interface.
Important
We strongly recommend that you back-up all of your data prior to manipulating the database! If possible, you should test the outcome on a cloned development instance of AtoM, rather than performing these actions on a production site without testing them in advance.
SQL maintenance, tuning, and logging
This section covers queries that are sometimes useful for database troubleshooting, tuning, logging, and maintenance activities.
Jump to:
- Check Server SQL modes
- Check the AtoM database schema version
- Enable the MySQL General Query Log
- Enable or disable the SSL security setting
- Kill a specific atom-worker job
Check Server SQL modes
From the MySQL documentation:
The MySQL server can operate in different SQL modes, and can apply these modes differently for different clients, depending on the value of the sql_mode system variable. DBAs can set the global SQL mode to match site server operating requirements, and each application can set its session SQL mode to its own requirements.
Modes affect the SQL syntax MySQL supports and the data validation checks it performs. This makes it easier to use MySQL in different environments and to use MySQL together with other database servers.
During installation, at the Create the database step,
we configure the global SQL mode in a separate file, added to
/etc/mysql/conf.d/mysqld.cnf. However, sometimes this step is missed, or
the mode settings aren’t configured properly, or you simply want an easy to
way to check on the current mode settings used in the database.
We can check the current SQL mode settings with the following query:
SELECT @@sql_mode, @@GLOBAL.SQL_MODE;
We do not recommend arbitrarily changing the SQL mode from those recommended in the Create the database step of the installation documentation. However, if you do need to make changes, there are two ways you can accomplish this.
The first method is via SQL. To change the global SQL mode settings, use the following general pattern:
SET GLOBAL sql_mode = 'MODE_1,MODE_2';
Where MODE_1,MODE_2 is replaced by the values you want to set. Use commas to
separate modes - an example:
SET GLOBAL sql_mode = 'ERROR_FOR_DIVISION_BY_ZERO,NO_ENGINE_SUBSTITUTION';
You can also use the following pattern to change the session SQL modes:
SET SESSION sql_mode = 'MODE_1,MODE_2';
Again, where MODE_1,MODE_2 is replaced by the values you want to set.
You may need to restart MySQL after making changes. Run the following after exiting the MySQL command prompt:
sudo systemctl restart mysql
The second way of changing the SQL mode is via the separate mysqld configuration file. These steps are performed via the unix command-line - if you have already entere the MySQL command prompt, exit now.
As noted above, our installation instructions recommend creating this file
at /etc/mysql/conf.d/mysqld.cnf. If you missed that step and have not
previously created a file in this location, you can do so with the following:
sudo touch /etc/mysql/conf.d/mysqld.cnf
You can then use the nano command-line text editor (or the text editor of
your choosing) to open the file for editing:
sudo nano /etc/mysql/conf.d/mysqld.cnf
You will need to restart MySQL after making changes to this file:
sudo systemctl restart mysql
See also
Check the AtoM database schema version
With any new AtoM release that includes changes to the database, we include a schema migration script that, when run, will make the necessary changes in the the database to conform to the expected schema. During the upgrade process, these migration scripts are typically executed when the upgrade task is run - see:
Often when users report issues following an upgrade, it’s because this step is missed - or has been missed during previous upgrades, and the issue is only now becoming apparent. When seeking support, it can be useful to first check the current schema version of your database, so it can be compared against the expected version for the release.
This can be checked via the user interface, in Admin > Settings > Global > Application version - the first number listed is the AtoM release version, while the second number is the database schema version. See: Application version for more information. However, in some cases you may want to check this via SQL query.
You can check the current schema version number with the following query:
SELECT name,value FROM setting s JOIN setting_i18n i18n ON s.id = i18n.id WHERE name='version';
This will return something like the following:
+---------+-------+
| name    | value |
+---------+-------+
| version | 179   |
+---------+-------+
1 row in set (0.00 sec)
Enable the MySQL General Query Log
From the MysQL documentation:
The general query log is a general record of what mysqld is doing. The server writes information to this log when clients connect or disconnect, and it logs each SQL statement received from clients. The general query log can be very useful when you suspect an error in a client and want to know exactly what the client sent to mysqld.
By default, this log is disabled in MySQL, and it is generally recommended to keep it disabled in a production installation, as it can rapidly grow quite large. However, for troubleshooting, development, and performance tuning, it can be useful to see all queries going through MySQL.
To enable the log, use:
SET GLOBAL general_log = 'ON';
To find out the location of the log, use:
SHOW VARIABLES LIKE 'general_log_file';
This should give you a file path and log name - you can exit the MySQL command prompt and use the unix command-line interface to navigate to the file and view its contents.
Important: remember to disable the log after you’ve run the queries you want to log! Left running, the log file will grow rapidly as AtoM is used and may consume valuable system resources. To disable the log:
SET GLOBAL general_log = 'OFF';
Enable or disable the SSL security setting
AtoM’s Security panel settings include an option that an administrator can enable, where valid HTTPS connections are required to be able to log into the application and perform administrative functions. If the setting is enabled, but the AtoM server is not properly configured to use SSL, then login attempts will redirect users back to the homepage. For more information, see:
Occasionally administrators will enable this setting without understanding the configuration prerequisites, and will find themselves locked out of the site, unable to disable the setting again to gain user interface access. When this happens, you can use SQL to disable the setting, thereby regaining access to your site.
To do so, we first need to figure out the ID of the setting:
SELECT name,id FROM setting WHERE name LIKE '%ssl%';
This query will return something like the following:
+-------------------------+----+
| name                    | id |
+-------------------------+----+
| require_ssl_admin       | XX |
+-------------------------+----+
1 row in set (0.00 sec)
Where XX will be an ID number. Replace XX in the following query with
the returned ID number, and check the current setting configuration:
SELECT * FROM setting_i18n WHERE id=XX;

+-------+-----+---------+
| value | id  | culture |
+-------+-----+---------+
| 1     | XX  | en      |
+-------+-----+---------+
If the value shows 0, the setting is not enabled. If it shows 1, then the
“require SSL” setting is currently enabled.
To update the database and disable the setting, we can use the following:
UPDATE setting_i18n SET value=0 WHERE id=XX AND culture='en';
Replace XX in the above example with the ID value returned in the first
step. Additionally, if your default installation culture is not English, then
change culture value in the example query above to the 2-letter ISO 639-1
language code of your culture.
The setting should now be disabled, and you should be able to log into your site again.
Kill a specific atom-worker job
AtoM relies on Gearman in order to execute certain long-running tasks asynchronously to guarantee that web requests are handled promptly and work loads can be distributed across multiple machines. Examples of operations in AtoM that are handled by the job scheduler include moving or publishing archival description records; generating reports or finding aids; managing PREMIS right inheritance, running most imports and exports via the user interface; and more. For more information, see:
Occasionally, the atom-worker may stall mid-process, or there is currently no worker available to handle the job. When this happens, users will typically see a 500 error message in the web browser. These issues can be often be resolved by restarting the job scheduler - for more information, see:
However, in some cases, the atom-worker may simply stall again - often when a particularly large job has been run, and available system resources have been exhausted before the job could complete. When this happens, the Manage jobs page will usually show the job status as “In progress”- though it never completes.
AtoM does include a command-line task that can clear all running and queued jobs, as well as clear the job history from the database. This can be run in unix command-line from AtoM’s root installation directory, like so:
php symfony jobs:clear
However, if you have other jobs in the queue, they will all be lost with this command - as will all previous job history. Instead, SQL can be used to target a specific problematic job and remove it from the queue, allowing other jobs to remain.
To do so, we first need to find the id of the job we want to kill, before deleting it from the database:
SELECT id,name,status_id,completed_at FROM job;
This will return a table like this:
+--------+--------------------------+-----------+---------------------+
|  id    |  name                    | status_id |  completed_at       |
+--------+--------------------------+-----------+---------------------+
| 149689 | arUpdateEsIoDocumentsJob |       184 | 2020-01-27 09:15:11 |
| 149690 | arUpdateEsIoDocumentsJob |       184 | 2020-01-27 09:18:28 |
| 155764 | arFileImportJob          |       183 | NULL                |
| 155800 | arUpdateEsIoDocumentsJob |       183 | NULL                |
| 155801 | arUpdateEsIoDocumentsJob |       183 | NULL                |
| 155802 | arObjectMoveJob          |       183 | NULL                |
| 155803 | arObjectMoveJob          |       183 | NULL                |
| 155804 | arUpdateEsIoDocumentsJob |       183 | NULL                |
| 155805 | arUpdateEsIoDocumentsJob |       183 | NULL                |
| 155808 | arUpdateEsIoDocumentsJob |       183 | NULL                |
+--------+--------------------------+-----------+---------------------+
1853 rows in set (0.00 sec)
In the example above, our arFileImportJob with an ID of 155764 appears
to be stalled - it started, but has no completed_at date, and is preventing
all the other queued jobs from running.
We can now use the id value of the target job to delete just that job from the database, like so:
DELETE FROM job WHERE id=155764;
You will need to restart the job scheduler afterwards. Note as well that AtoM’s job scheduler includes a fail limit of 3 restarts within 24 hours - if you’ve already tried restarting the job scheduler a couple times, you may also need to reset the fail count:
sudo systemctl reset-failed atom-worker
sudo systemctl start atom-worker
For more information, see:
General AtoM entity SQL queries
The following queries do not relate to a specific entity type in AtoM - rather, they provide general information or global actions that affect numerous entities, or do not relate to specific entities at all.
Jump to:
- Finding the Object ID of a record
- Delete slugs from AtoM
- Manually update the slug of a record
- See a count of all entity types
- Get the database creation or modification date of a record
Finding the Object ID of a record
Some tasks and SQL queries will require the use of an object ID as part of the criteria. These ID values are not typically accessible via the user interface - they are unique values used in AtoM’s database, with one assigned to every record. There are a few ways you can access the object IDs for your records.
For archival description records, the first method is to export the
target descriptions as a CSV file - on export, AtoM will populate the
legacyId column of the resulting CSV with the object ID value for each
row.
Alternatively, you can use SQL in the command-line to determine the ID of a record.
When you know the slug
The following example will show you how to use a SQL query to find the
object_id, if you know the slug of the record:
SELECT object_id FROM slug WHERE slug='your-slug-here';
The query should return the object_id for the record. Here is an
example:
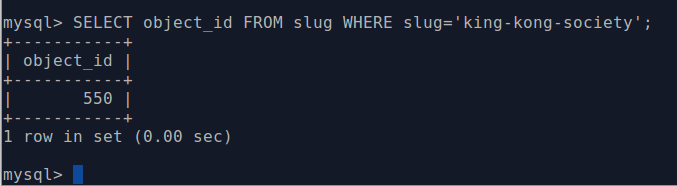
Note that we can also perform the opposite query, for cases where you know the object ID (perhaps from an earlier query against a related table), and you want to find the slug of the related record:
SELECT slug from slug WHERE object_id='XXXXX';
Replace XXXXX in the example above with the object ID of the target record.
When you know the title or authorized form of name
Typically, object IDs are used as keys in the primary entity tables, so
we can also retrieve the object ID by looking it up in the id field on the
entity’s primary tables.
In AtoM, most entities have two primary tables - the first (examples include
information_object, term, actor, accession, repository, etc)
contains the object ID in an id field, as well as ID’s from related tables
used as keys, non-translatable fields such as as identifier values, and more.
These entities will also have corresponding tables with an _i18n suffix
(short for “internationalization”) where all free-text translatable fields will
be stored (e.g. information_object_i18n, actor_i18n, etc).
Consequently, if we know the title or authorized form of name of the target record, we can use that to look up the ID value.
For example, with archival descriptions, you can use the following query to look up the object ID based on the title of the target description:
SELECT id FROM information_object_i18n WHERE title='TITLE HERE';
Replace TITLE HERE with the title of your target description.
Here is an example of looking up the object ID of an authority record when we know the authorized form of name:
SELECT id from actor_i18n WHERE authorized_form_of_name='Actor name here';
Replace Actor name here with the authorized form of name of the target
authority record.
Tip
In AtoM’s data model, an archival institution (AKA a repository record) is a subclass of actor - consequently, you can use the same example query above for authority records to look up the ID of a repository record when you know the authorized form of name.
The same is true of Donors, Rightsholders, Users, and contact information.
An example of using an accession number to look up the ID of an accession record:
SELECT id from accession WHERE identifier='2021-01-01/12';
Replace the example accession number 2021-01-01/12 in the query above with
the target accession number.
Delete slugs from AtoM
In some cases, you may wish to replace the existing slugs in AtoM - particularly if they have been randomly generated because the user-supplied data from which the slug is normally derived (e.g. the “Title” field for an archival description) was not entered when the record was created. For more information on how slugs are generated by AtoM, see Notes on slugs in AtoM. If you have since supplied the relevant information (e.g. added a title to your archival description), you may want to generate a new slug for it that is more meaningful.
In such a case, you will need to delete the slug in AtoM’s database first -
after which you can run the command-line task to generate slugs for those
without them. The AtoM Generate slugs task does include a
--delete option, which can be used if you don’t mind deleting all existing
entity slugs and regenerating them. However, if you have customized
your slugs (for example, by using AtoM’s
Rename module for descriptions), then you would lose
these by using the --delete task option.
For cases where you want to delete only a specific slug or subset of slugs
before using the slug generation task, SQL queries can be useful. AtoM slugs are
conveniently stored in a table named slug.
Deleting a single slug
If you know the slug you’d like to delete, you can use the following command
to delete it from AtoM’s database (replacing your-slug-here with the slug
you’d like to delete):
DELETE FROM slug WHERE slug='your-slug-here';
Important
Remember, you will run into problems if you don’t replace the slug! You can use the generate slugs task to do so; see Generate slugs. Remember as well: if you are trying to replace a randomnly generated slug, but you haven’t filled in the data field from which the slug is normally derived prior to deleting the old slug (see Notes on slugs in AtoM for more on how slugs are generated in AtoM), you will end up with another randomly generated slug!
Deleting a subset of slugs
If you wanted to delete all slugs associated with archival descriptions descriptions (e.g. information objects) in AtoM, you could use the following example SQL query to target just the description slugs:
DELETE s from slug s JOIN information_object io ON s.object_id = io.id WHERE io.id <> 1;
We can also modify this query for other entity types in AtoM as well.
In AtoM’s data model, each core entity has a root object, whose slug we
don’t want to delete - hence the root_id <> 1 in the above query for
descriptions.
The root ID for terms is 110. Therefore, if we wanted to delete all slugs from terms in AtoM, we can modify the above query like so:
DELETE s from slug s JOIN term t ON s.object_id = t.id WHERE t.id <> 110;
Accessions are a later addition to AtoM’s original data model, and are maintained in a plugin - consequently, they have no root ID that we need to worry about. We can delete all accession slugs with the following:
DELETE s from slug s JOIN accession a ON s.object_id = a.id;
Actors in AtoM’s data model are a superset, that include authority records, repository records, donor records, rightsholders, user accounts, and contact information. Actors have a root ID of 3 and repository records have a root ID of 6 - so while protecting those root IDs, the following would delete slugs from ALL those entity types at once:
DELETE s from slug s JOIN actor a ON s.object_id = a.id AND a.id NOT IN (3, 6);
If you wanted to delete ONLY actual authority record slugs, you can use the following:
DELETE s FROM slug s JOIN object o ON s.object_id = o.id WHERE o.class_name='QubitActor' AND o.id <> 3;
Change QubitActor in the above query to QubitDonor to delete only Donor
record slugs, or to QubitRightsHolder to delete only rightsholder record
slugs.
Because repository records have their own root ID, we will modify the query to protect the root ID of those records, like so:
DELETE s FROM slug s JOIN object o ON s.object_id = o.id WHERE o.class_name='QubitRepository' AND o.id <> 6;
Note
User account and contact information slugs are always randomly generated - they are not based on the user name. Generally, you shouldn’t need to delete these slugs - when they are regenerated, they will still be random. If you are experiencing problems that you suspect orginate from a missing user slug, try running the generate slugs task first.
Once you’ve made your deletions, you can then use the generate-slugs task to generate new slugs:
php symfony propel:generate-slugs
See Generate slugs for further documentation on this command-line task.
After you’ve updated your slugs, you will need to clear the application cache, restart PHP-FPM, and repopulate the search index. See:
Warning
Running a general command like DELETE * FROM slug is an extreme action,
and it will delete ALL slugs, including custom slugs for your static
pages - and may break your application. The
generate-slugs task will not replace fixtures
slugs - e.g. those that come installed with AtoM, such as for settings pages,
browse pages, menus, etc - or any static pages! We strongly recommend
against this, and instead suggest using SQL queries to selectively delete
slugs, only as needed.
As always, we strongly recommend backing up your database before attempting any SQL queries - see above, Backing up the database
Manually update the slug of a record
It’s also possible to manually update the slug of a record using SQL. For this query, we will first need to know the object ID of the target record. See:
Once we have the object ID, we can now use this to update the slug value in AtoM’s slug table. Assuming the object ID returned in step 1 was 82269:
UPDATE slug SET slug="my-new-slug" WHERE object_id=82269;
Where:
my-new-slugrepresents the new slug you would like to assign to the target record, and82269represents the object ID returned when you complete step one (finding the object id).
After you’ve updated your slug(s), you will need to clear the application cache, restart PHP-FPM, and repopulate the search index. See:
If you don’t want to reindex your entire site (which may take time), you can
use the search:populate task’s --slug option to update the index
just for the record whose slug you updated. See the
indexing task documentation for more
information.
Important
By default, AtoM sanitizes slugs, removing spaces, special characters, punctuation, and capital letters - see Notes on slugs in AtoM for more on how slugs are generated in AtoM. If you try to insert a slug that does not respect AtoM’s slug sanitization rules, you may cause unexpected problems in your database!
The slug sanitization behavior can be changed by an administrator to allow a more permissive slug generation pattern, where any UTF-8 character allowed by RFC 3987 in an Internationalized Resource Identifier (IRI) can be used. For more information, see:
See a count of all entity types
The following queries are useful for reporting and review - they will provide you a count of all major entity types in AtoM. For more information on entity types, see: Entity types.
To see a simple count of all entity types:
SELECT class_name, COUNT(class_name) FROM object GROUP BY class_name;
This will produce an output similar to the following example:
+-------------------------+-------------------+
| class_name              | count(class_name) |
+-------------------------+-------------------+
| QubitAccession          |             26607 |
| QubitActor              |              6627 |
| QubitDeaccession        |                64 |
| QubitDonor              |             12163 |
| QubitEvent              |           1264211 |
| QubitInformationObject  |            641039 |
| QubitObjectTermRelation |           5764131 |
| QubitRelation           |            243622 |
| QubitRepository         |                 2 |
| QubitStaticPage         |                 2 |
| QubitTaxonomy           |                47 |
| QubitTerm               |            346754 |
| QubitUser               |                 2 |
+-------------------------+-------------------+
13 rows in set (1 min 2.15 sec)
If you would also like to include first and last modification dates per entity type, use:
SELECT class_name, COUNT(class_name) as count, MIN(updated_at) as first, MAX(updated_at) as last FROM object GROUP BY class_name;
Note that the above queries will only include those entities that have
a row in the object table. If you would like to see a count of rows in all
tables across AtoM, use the following:
SELECT table_name, table_rows
FROM information_schema.tables
WHERE table_schema = 'atom'
ORDER BY table_name;
Get the database creation or modification date of a record
AtoM stores created_at and updated_at (i.e. last modified) dates in the
object table, where most entity types in AtoM have a base record. To
look these up, we will first need to know the object ID of our target record -
see:
Once we have the object ID value, we can use this to look up the created_at
date in the object table.
In the following example, the object ID we found in step one was 2003033. We can now use this in a query against the object table, like so:
SELECT created_at FROM object WHERE id="2003033";
Substitute in your object ID as needed. If we want to see the last date the
record was modified in the database, change created_at to updated_at,
like so:
SELECT updated_at FROM object WHERE id="2003033";
Archival description SQL queries
This section contains queries that can be used to manipulate archival description records in AtoM.
Jump to:
- Get description record counts
- Update draft archival descriptions to published
- Globally update archival description fields
- Move descriptions to a different repository
- Bulk change levels of description
- Delete translations
- Get the source name and ID of a description for import updating
- Output the OAI identifier values of descriptions
Get description record counts
The primary fields in the archival description templates are contained
in AtoM’s information_object and information_object_i18n tables -
free-text fields that can be translated are found in information_object_i18n,
while information_object contains primarily ID values linking to other tables,
and static non-translatable values like the description’s identifier. You can
see a list of the fields in each table with the following example queries:
DESCRIBE information_object;
DESCRIBE information_object_i18n;
Note
These two tables will not cover ALL fields available in an archival
description template. For example, many fields in templates like DACS and
RAD that have no ISAD(G) equivalent are stored in the property and
property_18n tables; note fields are all stored in separate tables, and
fields related to other entity types (such as authority records,
access points, etc.) will not be stored directly in
these tables.
For a more detailed look at how AtoM’s database is organized, see:
- https://wiki.accesstomemory.org/Development/ERDs
- https://www.slideshare.net/accesstomemory/constructing-sql-queries-for-atom
See also: Note and Property table SQL queries
If you’d like to see a count of all the archival description records currently in your database, you can use the following query:
SELECT COUNT(*) FROM information_object WHERE id <> 1;
Note that translations are stored in the information_object_i18n table, and
would not be counted using this query. You can change the above to use the i18n
table if desired - just be aware that if a single description has entries in
English, French, and Spanish for example, it will be counted 3 times.
We can also provide further criteria. For example, to count how many descriptions include a Scope and content statement:
SELECT COUNT(DISTINCT(id)) FROM information_object_i18n WHERE scope_and_content IS NOT NULL AND id <>1;
Alternatively, we can return a count of descriptions that are missing an Extent and medium statement with:
SELECT COUNT(DISTINCT(id)) FROM information_object_i18n WHERE extent_and_medium IS NULL AND id <>1;
Update draft archival descriptions to published
AtoM uses ID values in the status table to manage the publication status
of archival descriptions. A status ID of 159 means draft, and 160 means
published. In the status table, Publication has a type_id value of 158.
We can therefore use the following query to publish all draft descriptions in AtoM:
UPDATE status SET status_id=160 WHERE type_id=158 AND object_id <> 1;
If we wanted to set all descriptions in AtoM to draft, we can change the status_id value
of the above query from 160 to 159:
UPDATE status SET status_id=159 WHERE type_id=158 AND object_id <> 1;
You will need to rebuild the search index after making publication status changes. See:
Updating all draft descriptions from a particular repository
We can also target just those descriptions that are associated with a particular repository (AKA archival institution). To do so, we first need to retrieve the id of the repository, using the repository slug. See above for more information on how to get an object ID using a slug:
Assuming in this example the id returned is 123, you can then run the following query to perform the publication status updates, changing all descriptions associated with this repository record to published:
UPDATE status
SET status_id=160
WHERE type_id=158
AND object_id IN
(
  WITH RECURSIVE cte AS
  (
    SELECT io1.id, io1.parent_id
    FROM information_object io1
    WHERE io1.repository_id=123
    UNION ALL
    SELECT io2.id, io2.parent_id
    FROM information_object io2
    JOIN cte ON cte.id=io2.parent_id
    AND io2.repository_id IS NULL
  )
  SELECT id FROM cte
);
Don’t forget to rebuild the search index after you’ve performed your updates! You may want to clear the application cache and restart PHP-FPM as well, to ensure you are seeing updated results. See:
Globally update archival description fields
In some cases, you may want to make common edits across all your archival description records at once - for example, fixing a reoccurring typo, or adding the same default content to a field. Once again, SQL can help us.
Fixing typos globally in a field
For this example, let’s say we’ve accidentally entered “digtal image” instead of “digital image” throughout our descriptions. Now we want to replace all occurences of “digtal image” in the Extent and medium field across all our descriptions in English with the corrected version, “digital image”:
UPDATE information_object_i18n SET extent_and_medium=REPLACE(extent_and_medium, 'digtal image', 'digital image') WHERE culture='en';
Another example: let’s globally replace the word “tea” with the word “coffee” in the scope and content field of all English descriptions across AtoM:
UPDATE information_object_i18n SET scope_and_content=REPLACE(scope_and_content, 'tea', 'coffee') WHERE culture='en';
If we wanted to limit this change to a specific field in a specific description, we can include a join on the slug table, and then use the slug of the target description as a parameter:
UPDATE information_object_i18n io JOIN slug s ON s.object_id=io.id SET io.scope_and_content=REPLACE(scope_and_content, 'tea', 'coffee') WHERE io.culture='en'AND s.slug="my-new-slug";
Replace my-new-slug in the above example with the slug of your target
description.
Globally updating a field
Some of the fields in AtoM’s Description control area might have the same information across all descriptions. For example, if you wanted to add the same data to every “Rules and conventions used” field in your descriptions, we could use a query like so:
UPDATE information_object_i18n io18
LEFT JOIN information_object io ON io18.id=io.id
SET io18.rules="ISAD(G): General International Standard Archival Description, Second Edition, Ottawa, 2000."
WHERE io18.culture='en' AND io.id <> 1;
We could also add another parameter and limit this to top-level descriptions associated with a particular repository. In the following example, only the top-level descriptions will be affected, since they are the only ones that will have a repository ID associated directly with them (AtoM uses inheritance to associate the lower level descriptions with the repository, but these descriptions won’t have the associated repository ID stored directly in the database).
To do so, we will first need to know the object ID of the repository record - see above:
Once we know the related repository’s ID, we can modify the above example by adding the repository ID as an additional criteria. In this example, our repository’s object ID was 3169:
UPDATE information_object_i18n io18
LEFT JOIN information_object io ON io18.id=io.id
SET io18.rules="ISAD(G): General International Standard Archival Description, Second Edition, Ottawa, 2000."
WHERE io18.culture='en'
AND io.repository_id='3169'
AND io.id <> 1;
Important
Remember, after making data changes, you should restart PHP-FPM, clear the application cache, and re-populate your search index to ensure that all changes show up properly in AtoM. See:
Move descriptions to a different repository
The following query provides an easy way to move all archival description records from one repository (AKA archival institution) to another. As inputs, we will need the slug of the current and target repository records:
UPDATE information_object SET repository_id=(select r.id FROM repository r INNER JOIN slug s ON r.id=s.object_id WHERE s.slug='target-repo-slug') WHERE repository_id=(select r.id FROM repository r INNER JOIN slug s ON r.id=s.object_id WHERE s.slug='source-repo-slug');
In the above example query:
source-repo-slugrepresents the slug of the archival institution currently associated with the descriptions, andtarget-repo-slugrepresents the slug of the archival institution to which you would like to move your descriptions.
Important
Remember, after making data changes, you should restart PHP-FPM, clear the application cache, and re-populate your search index to ensure that all changes show up properly in AtoM. See:
Bulk change levels of description
If you wanted to change, for example, all “Item” level descriptions in your AtoM installation to “Part” levels, we can use SQL to accomplish this. First, we will need the term ID values for both the current (e.g. Item) and target (e.g. Part) levels of description. See the last example in this section:
In the following example query, we’ve learned that Part has an ID of 285, and Item has an ID of 227. We can now update all archival description records with an “Item” level of description to “Part” with the following:
UPDATE information_object SET level_of_description_id=285 WHERE level_of_description_id=227;
Delete translations
In AtoM, content can be translated into multiple languages - see:
We can see a count of how many descriptions we have in a specific culture, using
the ISO 639-1 two-letter culture codes as a parameter to perform a count on the
information_object_i18n table, where archival description fields
that are translatable are stored. For example, to see a count of all
descriptions in Catalan:
SELECT COUNT(*) FROM information_object_i18n WHERE culture='ca';
We can also delete all translations for a specific culture.
Warning
Make sure this is what you want to do! As always we strongly recommend that you make a database backup before you proceed.
For example, to delete all translations in French:
DELETE FROM information_object_i18n WHERE culture='fr';
Important
Remember, not all description data is stored in the information object
tables - there may also be translations in the note_i18n and
property_i18n, for example. However, these tables are used by other
entity types as well, so if you delete all translations in those tables,
you may end up removing translations from other entity types as
well, such as terms, authority records, and more. For more information on these tables, see:
Note and Property table SQL queries.
Additionally, this will not delete translations on other related entity types, such as authority records and events, terms, repository records, etc. You would need to separately delete translations from the relevant table(s) for each entity.
If you only want to delete a specific description’s translation, we can do so
by using the slug of the target description. In the following example
we are deleting Spanish translations from a description with the slug test-01:
DELETE io FROM information_object_i18n io
JOIN slug ON slug.object_id = io.id
WHERE io.culture = "es"
AND slug.slug = "test-01";
Once again, keep in mind that this will only delete translations for the
primary description fields. Any related data stored in the note_i18n and/or
property_i18n tables, or stored in related entities, will not be deleted.
Remember, after making data changes, you should restart PHP-FPM, clear the application cache, and re-populate your search index to ensure that all changes show up properly in AtoM. See:
Get the source name and ID of a description for import updating
AtoM supports the ability to run a CSV import as an update to existing
descriptions. Based on the way this logic is currently implemented, this works
best when the the descriptions were originally imported from a different system.
In this case, AtoM will store two values in the keymap database table, to be
used as matching criteria for future update imports:
- The
legacyIdvalues in the CSV will be stored in thesource_idcolumn. - The source name value will be stored in the
source_namecolumn. With the command-line CSV import task, there is an option where you can specify the source name - in the user interface there is no such option, so when a source name is not specified by the user, the filename of the CSV will be used by default.
See also
These stored values are not typically available via the user interface. Unless you have saved the original CSV, you may need a method to check the stored values, to ensure that your update import will be able to match the target descriptions.
The following query can be used to check the ID and source name of a target description, using the description’s slug as criteria:
SELECT source_name, source_id FROM keymap JOIN slug ON keymap.target_id=slug.object_id WHERE slug.slug='example-slug';
Replace example-slug in the above query with the slug of your target
archival description.
Output the OAI identifier values of descriptions
AtoM has an OAI Repository module, which allows it to expose XML metadata to harvesters using OAI-PMH. To use the Get record request to return the full XML metadata for an archival description, you first need to know the OAI identifier value associated with the target description. However, these OAI identifiers are automatically generated (not set by a user), and they are not visible in the user interface.
It’s possible to use other OAI verbs such as List identifiers to see the OAI identifier values, but this can also be done using SQL, with the following query:
SELECT slug, information_object.id, oai_local_identifier FROM `information_object` INNER JOIN slug ON information_object.id = slug.object_id;
This query will return the slug, object ID, and OAI identifier for every information object (AKA description) stored in AtoM. Additionally, because it is fetching the values directly from the database, this query can be used even if the OAI plugin is not currently enabled in AtoM.
Since the resulting output might be very large, we can use the LIMIT query parameter to limit the results returned as, needed. For example, to output only the first 10 results:
SELECT slug, information_object.id, oai_local_identifier FROM `information_object` INNER JOIN slug ON information_object.id = slug.object_id LIMIT 10;
To skip the first 10 results and output the next 15:
SELECT slug, information_object.id, oai_local_identifier FROM `information_object` INNER JOIN slug ON information_object.id = slug.object_id LIMIT 10, 15;
Digital object SQL queries
The following query examples deal with digital object management using SQL.
Jump to:
- Bulk update the Base URLs of linked digital objects
- Return the full OCR / text layer transcript based on a search
See also
Bulk update the Base URLs of linked digital objects
AtoM includes the option to link digital objects via URL, rather than locally uploading a file and storing it in AtoM. This might be useful if, for example, you already have a separate image server or digital asset management system, and don’t want to increase your storage usage by also storing a copy of the master digital object in AtoM.
However, what happens if you have to move your server, or otherwise update the base URL that was used when linking your digital objects?
Fortunately, we can use SQL to bulk update the base URL of our digital object’s path in AtoM, with the following query:
UPDATE digital_object SET path = REPLACE(path, 'http://Server1', 'https://Server2') WHERE path LIKE 'http://Server1%';
In this example, http://Server1 is the current base URL, and
https://Server2 represents the updated base URL.
Important
Remember, after making data changes, you should restart PHP-FPM, clear the application cache, and re-populate your search index to ensure that all changes show up properly in AtoM. See:
Return the full OCR / text layer transcript based on a search
When digital objects with a text layer (for example, a PDF) are uploaded in AtoM, the first 64K of the text layer is added to the search index, so that users can find results based on the contents of the digital object text.
If you’re not sure the quality of the OCR layer in your text document or, for long documents, you’re not sure if later pages are indexed or not, you can fetch matching text transcripts based on a keyword search, like so:
SELECT property_i18n.value FROM property_i18n
WHERE property_i18n.value LIKE "%search string%";
Replace search string with the value you are searching for (leave the %
percent signs in place around the query string).
Authority record and event SQL queries
The following query examples deal with authority records and events - i.e. relationships with archival description records bounded by time (for example, dates of creation, accumulation, etc).
Jump to:
See also
Upate the history field of an authority record
The following example covers how the biographical or administrative history field (ISAAR-CPF 5.2.2) can be updated via SQL.
We will first need to know the object ID of the authority record - see above:
Once we have our object ID, let’s first confirm that we can select the correct authority record history, before making any changes:
In the following example, the ID returned in step one was 35715. Replace this in
the query example below with your target ID. If you are making an update to a
description in a different culture, remember to update the en culture
parameter at the end of the query with the ISO 639-1 two-letter culture code of
your language.
SELECT history FROM actor_i18n WHERE actor_i18n.id='35715' AND actor_i18n.culture='en';
If this query does in fact return the history you want to update, then we can proceed. We can use the following query to update the history field of the target authority:
UPDATE actor_i18n SET history = 'This is the new history!' WHERE actor_i18n.id='35715' AND actor_i18n.culture='en';
Replace This is the new history! in the example above with the text you
would like to add.
Important
Remember, after making data changes, you should restart PHP-FPM, clear the application cache, and re-populate your search index to ensure that all changes show up properly in AtoM. See:
Term and Taxonomy SQL queries
The following query examples deal with terms and taxonomies In AtoM. Terms are elements of controlled vocabulary, maintained in a taxonomy for use throughout AtoM - primarily to provide values in drop-down menu lists, or for use as access points.
Jump to::
- See the ID and names of taxonomies in AtoM
- See the ID values of terms in a taxonomy
- Change the name of a taxonomy
- Count how many times an access point is used in AtoM
See also
See the ID and names of taxonomies in AtoM
Some queries may require the use of taxonomy ID values as an input. We can output the taxonomy ID and name in a specific culture with the following:
SELECT id, name FROM taxonomy_i18n WHERE culture='en';
The example above uses English as the target culture. Swap en in the above
query example for any other ISO 639-1 two-letter language code as needed.
We can also use SQL to see the translated name of a taxonomy in another culture
and compare it against the default installation English names, by adding an
OR clause to the above query. The following example will output both the
English and French taxonomy names:
SELECT id, culture, name FROM taxonomy_i18n WHERE culture='fr' OR culture='en';
See the ID values of terms in a taxonomy
Once we have the ID of a taxonomy, we can then use it to return the ID values of specific terms stored in a taxonomy, which we may need for further querying. For example, supposing the ID returned for the “Levels of description” taxonomy is 34. We can now see the ID of each term in that taxonomy with the following:
SELECT term.id, term_i18n.name FROM term LEFT JOIN term_i18n ON (term.id = term_i18n.id) WHERE term.taxonomy_id=34 AND term_i18n.culture='en';
This will return something like the following:
+---------+--------------+
| id      | name         |
+---------+--------------+
|     193 | Sous-fonds   |
|     194 | Collection   |
|     195 | Series       |
|     196 | Subseries    |
|     197 | File         |
|     198 | Item         |
|   69884 | Record group |
| 2000004 | Part         |
| 2002760 | Fonds        |
+---------+--------------+
9 rows in set (0.01 sec)
The example above uses English as the target culture. Swap en in the above
query example for any other ISO 639-1 two-letter language code as needed.
If we don’t already have the Taxonomy ID but we know the name of the taxonomy, we can nest a taxonomy ID lookup in our query. The following example uses the “Genre” taxonomy as an example:
SELECT term.id, term_i18n.name FROM term LEFT JOIN term_i18n ON (term.id = term_i18n.id) WHERE term.taxonomy_id = (SELECT id FROM taxonomy_i18n WHERE culture = 'en' AND name = 'Genre') AND term_i18n.culture = 'en';
Finally, we can also look up the individual ID of a specific term if we know the term’s name - though for this, we’ll need the ID of the related taxonomy. See the section above for instructions on how to use SQL to fetch a taxonomy’s ID:
In the following example, we’ll fetch the ID of the “Item” term, found in the Levels of description taxonomy. Assuming we have discovered that the ID for the Levels of description taxonomy is 34, we can used the following to return the ID of the term “Item”:
SELECT t.id FROM term t INNER JOIN term_i18n ti ON t.id=ti.id WHERE name='Item' AND t.taxonomy_id=34 AND ti.culture='en';
Change the name of a taxonomy
There is no way in the user interface settings to edit the installed name of a taxonomy - nor is there any way to add a translation to the default English installation name, if one is not already loaded. However, we can use SQL to edit the name of a taxonomy.
For example, the “Material Type” taxonomy is used to manage terms associated with the Canadian RAD standard template’s “General material designation” drop-down menu options. If we wanted to rename this taxonomy in English to “General Material Designation”, we first need to know the ID of the target taxonomy. See above:
In the following example, we’ve learned that the Id of the Material Type taxonomy is 50, and now we want to update the English title:
UPDATE taxonomy_i18n SET name='General Material Designation' WHERE culture='en' AND id=50;
Important
AtoM includes a number of locked taxonomies, whose terms are used by the application’s underlying code. Generally, these taxonomies are not visible via the user interface - but you should not update the names of these taxonomies using SQL, as it could break the underlying code!
You can see a list of locked taxonomies in AtoM’s code, here:
AtoM also includes some locked terms - for more information, see:
Adding taxonomy name translations
Translations for taxonomy names are managed as fixtures in AtoM, but currently, upgrading users will not see new translations provided by our translator community to fixtures applied to existing taxonomies. If you’d like to add your own translations (or modify one of the provided ones), you can use SQL to do so.
First, we need to know the ID of the target taxonomy. We also need to know whether or not a translation already exists in the target culture, as this will determine whether we are performing an INSERT or an UPDATE query. See the second query example in the section above:
Let’s say we want to add a Spanish translation for the Genre taxonomy, which we’ve determed has an ID of 78 in our installation.
If there is already a Spanish taxonomy name present in the database, we can update it with:
UPDATE taxonomy_i18n SET name='new Spanish taxonomy name' WHERE culture='es' AND id=78;
Replace new Spanish taxonomy name with your translation.
If no Spanish translation currently exists, then we can insert a new one like so:
INSERT INTO taxonomy_i18n (name, id, culture) VALUEs ('New Spanish taxonomy name', '78', 'es');
Important
Remember, after making data changes, you should restart PHP-FPM, clear the application cache, and re-populate your search index to ensure that all changes show up properly in AtoM. See:
Count how many times an access point is used in AtoM
Terms in AtoM are regularly linked to other entities, either as access points or when used as controlled value lists in drop-down menu fields appearing in edit templates.
When terms are linked as access points, a relation is made via the
object_term_relation table. If you would like to know how often a term has
been linked to other entity types in AtoM as an access point,
we first need to know the ID of the target term. See above:
In the following example, we have determined that that the term “Correspondence” in the Genre taxonomy has an ID of 2001200. We can now use that ID to return a usage count in English:
SELECT DISTINCT term_id, term_i18n.name, count(term_id) AS CountOf
FROM object_term_relation
JOIN term_i18n ON term_i18n.id = term_id and term_i18n.culture = 'en'
WHERE term_id = 2001200;
If we wanted to return a general overview of terms used as access points in AtoM, we can use the following:
SELECT DISTINCT term_id, term_i18n.name, count(term_id) AS CountOf
FROM object_term_relation
JOIN term_i18n ON term_i18n.id = term_id and term_i18n.culture = 'en'
GROUP BY term_id
ORDER BY CountOf desc;
The results returned will include term IDs, name, and a usage count, ordered by most to least frequently linked to other entities.
Note and Property table SQL queries
To make the fields reusable where relevant across entity types, notes are stored in their own tables. Additionally, the property tables are used to extend the basic data model to support additional fields - for example, the information object (AKA archival description) database schema was modeled against the ICA’s ISAD(G) standard, but the Canadian RAD standard (which was originally adapated from the AACR2 library cataloguing standard) includes many additional fields. These were instead added to the property tables as key-value pairs, linked by ID back to the information object tables as needed.
The following queries will help you explore the note and property tables, which can be useful for reporting, data review, and cleanup.
Jump to::
Note queries
The note and note_i18n tables include fields such as:
- The Source note, Scope note, and Display note fields from the Terms module;
- Note fields found in the Control areas of various entity types (such as descriptions and authority records);
- Notes particular to certain standards templates, such as the Canadian RAD standard template (exmaples include Physical description note, Conservation note, Sources of title proper, etc)
The actual field labels for each note type are stored in the term tables, so if we want to see a list of note types, we need to join several tables in our query.
The following will return the note ID, note field label, and a count of how many populated notes we have for each type in a given culture:
SELECT term.id, term_i18n.name, COUNT(note.type_id) FROM term JOIN term_i18n ON term.id = term_i18n.id INNER JOIN note ON term.id = note.type_id WHERE culture='en' GROUP BY note.type_id;
Notice that we have used culture as a parameter in the above example, and are
currently returning English field label names and counts. Change the culture
value to a different ISO 639-1 two-letter code as needed (e.g. fr
for French; es for Spanish, etc). The query will return something like the
following:
+-----+------------------------------+---------------------+
| id  | name                         | COUNT(note.type_id) |
+-----+------------------------------+---------------------+
| 121 | Source note                  |                2767 |
| 122 | Scope note                   |                   6 |
| 123 | Display note                 |                  10 |
| 124 | Archivist's note             |                   1 |
| 125 | General note                 |                5816 |
| 126 | Other Descriptive Data       |                  10 |
| 127 | Maintenance note             |                2539 |
| 174 | Language note                |                   4 |
| 188 | Actor occupation note        |                  24 |
| 243 | Physical description         |                 141 |
| 244 | Conservation                 |                  27 |
| 245 | Accompanying material        |                  26 |
| 247 | Alpha-numeric designations   |                  28 |
| 248 | Rights                       |                   3 |
| 250 | Variations in title          |                 242 |
| 251 | Source of title proper       |                1425 |
| 253 | Continuation of title        |                   2 |
| 254 | Statements of responsibility |                   1 |
| 255 | Attributions and conjectures |                  32 |
+-----+------------------------------+---------------------+
19 rows in set (0.04 sec)
We can now use these ID values to return individual counts regardless of culture, and even explore the data contained in these fields. For example, to return a count of term Scope notes across all cultures:
SELECT COUNT(*) FROM note WHERE type_id = 122;
To output the data stored in the Scope notes field for review:
SELECT i18n.* FROM note INNER JOIN note_i18n i18n ON note.id = i18n.id WHERE note.type_id = 122;
If our target field has a lot of data, we can use the LIMIT clause to only return a small subset. For example, to review only the first 10 General notes:
SELECT i18n.* FROM note INNER JOIN note_i18n i18n ON note.id = i18n.id WHERE note.type_id = 125 LIMIT 10;
If we now want to skip the first 10, and see the next 15 results:
SELECT i18n.* FROM note INNER JOIN note_i18n i18n ON note.id = i18n.id WHERE note.type_id = 125 LIMIT 10, 15;
Property queries
The property and property_18n tables have typically been used to extend
the data models of entity types over time - for example, when new
standard-based templates are added that include fields that don’t readily map
to the existing data model. Examples of data contained in the property tables
include:
- Language and script values set by users in the metadata templates;
- Many of the Canadian RAD standard’s unique fields (such as the cartographic, philatelic, architectural, publishing, and edition fields);
- The “Technical access” field found in the U.S. DACS (one of the few fields in DACS that does not map directly to the ISAD(G) standard, upon which AtoM’s archival description data model was originally based);
- The text transcript extracted from uploaded text-based digital objects, such as PDFs; and
- The background color associated with a record based on the associated archival institution theming settings (see: Change the background color of an archival institution).
To see an output of the fields in use in the property table:
SELECT DISTINCT NAME FROM property;
This will output a table like the following example:
+-----------------------------------------------------+
| NAME                                                |
+-----------------------------------------------------+
| language                                            |
| script                                              |
| editionStatementOfResponsibility                    |
| issuingJurisdictionAndDenomination                  |
| noteOnPublishersSeries                              |
| numberingWithinPublishersSeries                     |
| otherTitleInformation                               |
| otherTitleInformationOfPublishersSeries             |
| parallelTitleOfPublishersSeries                     |
| standardNumber                                      |
| statementOfCoordinates                              |
| statementOfProjection                               |
| statementOfResponsibilityRelatingToPublishersSeries |
| statementOfScaleArchitectural                       |
| statementOfScaleCartographic                        |
| titleStatementOfResponsibility                      |
| titleProperOfPublishersSeries                       |
| languageOfDescription                               |
| scriptOfDescription                                 |
| displayAsCompound                                   |
| transcript                                          |
| backgroundColor                                     |
| htmlSnippet                                         |
| technicalAccess                                     |
+-----------------------------------------------------+
24 rows in set (0.22 sec)
If we want to see how often a field is used, we can use the name value to
submit a COUNT query. For example, to see how many times the
RAD “Standard number” field has been used in English:
SELECT COUNT(*) FROM property WHERE NAME='standardNumber' AND source_culture='en';
We can now review the data in this field as well. For example, to see the first 10 unique English entries in the “Standard number” field:
SELECT value, count(*) FROM property LEFT JOIN property_i18n i18n ON property.id = i18n.id WHERE name='standardNumber' AND source_culture='en' GROUP BY value LIMIT 10;
To skip the first 10 values, and see the next 15 unique values in English:
SELECT value, count(*) FROM property LEFT JOIN property_i18n i18n ON property.id = i18n.id WHERE name='standardNumber' AND source_culture='en' GROUP BY value LIMIT 10, 15;