Description Updates
AtoM includes a module, available in the Admin menu, that helps an administrator search for new and updated records in AtoM. Only an authenticated (i.e. logged-in) administrator can search for updates via this module. The Description updates page (historically referred to as “Search updates” and “Newest additions” as well) includes a number of filters that can be used to narrow results, as well as clipboard pins so administrators can easily add new updates to the clipboard for export.
To search for new updates:
- Click on the
 Admin menu in the main
menu located in the header bar and select ‘Description updates’ from
the drop-down menu. AtoM will redirect you to the Description
updates view page.
Admin menu in the main
menu located in the header bar and select ‘Description updates’ from
the drop-down menu. AtoM will redirect you to the Description
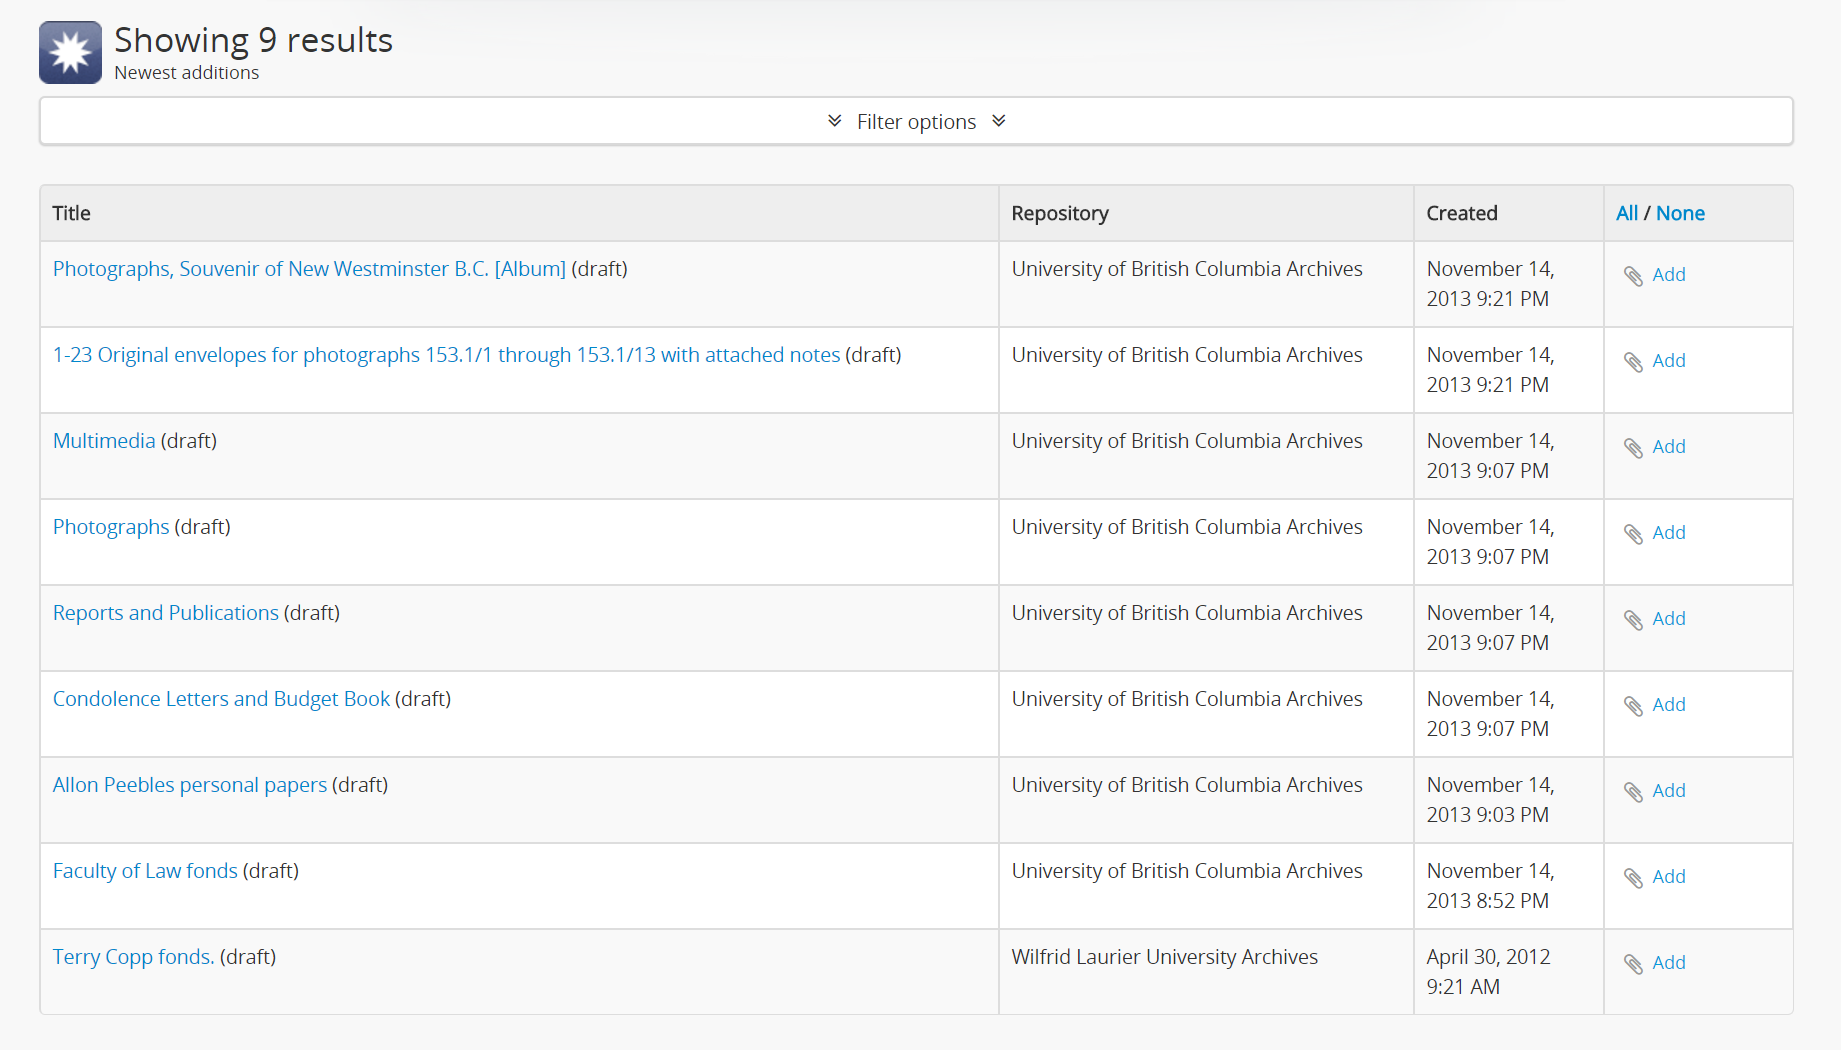
updates view page. - By default, the Description updates module will display results of archival descriptions that have been either newly created or edited (modified) in the last 30 days. However, this can be changed using the Filter options available on the page. To reveal the filter options (which are hidden by default when first landing on the page), click the larger header at the top of the page that says “Filter options.” The options will open to reveal the available filters.
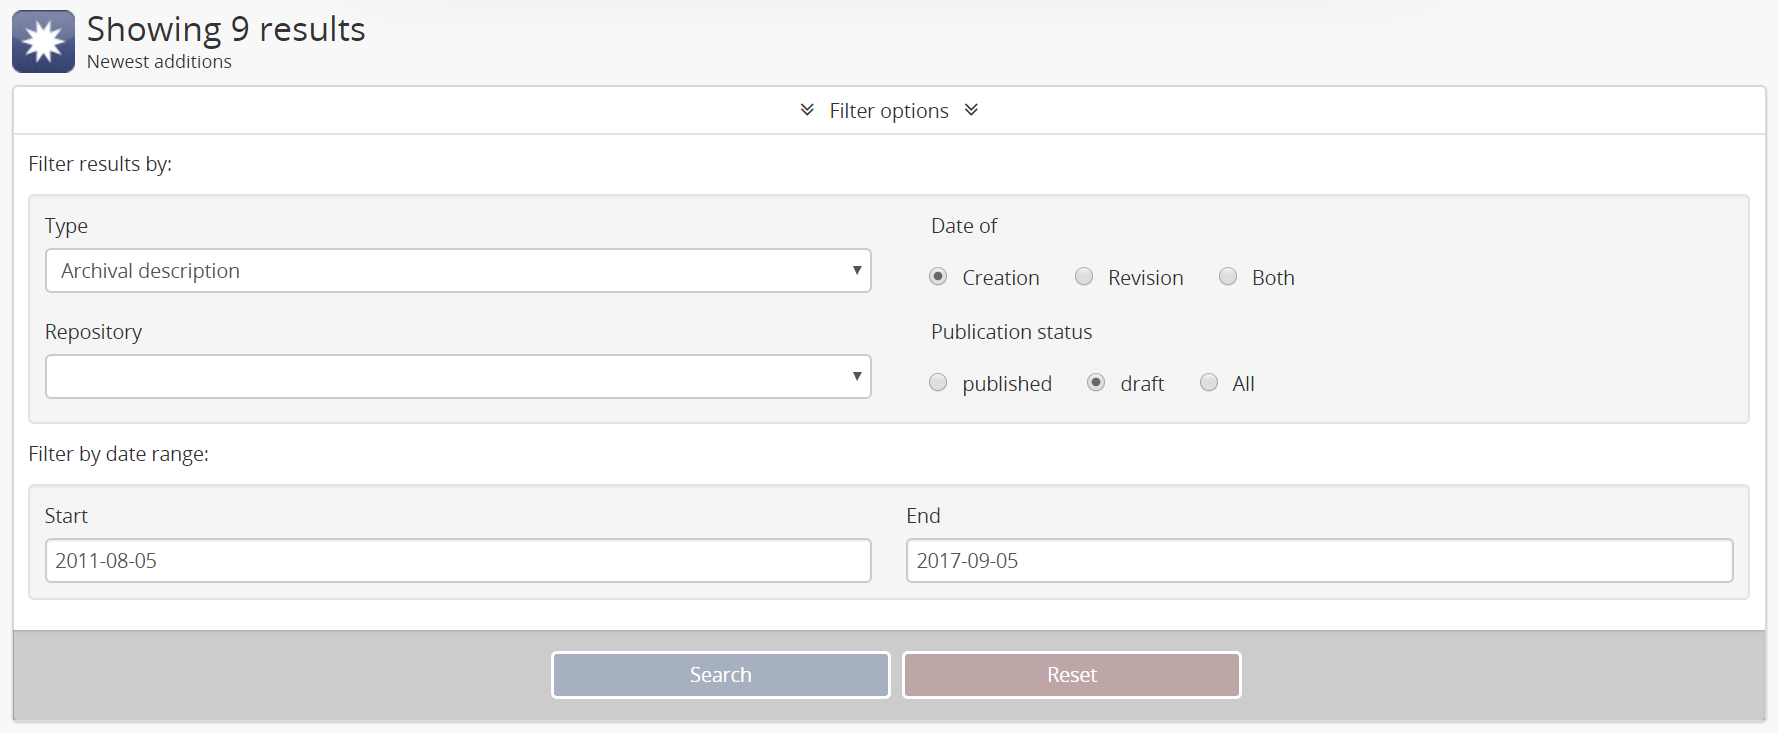
- In the Filter options menu, select a type of record to display from the
“Type” drop-down menu. Options include:
- Archival description
- Authority record
- Archival institution
- Term
- Function
- Beside the “Type” drop-down, select the type of date used to filter the
results:
- Select Creation for new records
- Select Revision for updated records, or
- Select Both for both.
- You can limit the results to records associated with a specific archival institution using the repository filter. Note that currently this filter only works with archival description records - if you flip the “Type” to a different entity, the Repository filter will be hidden.
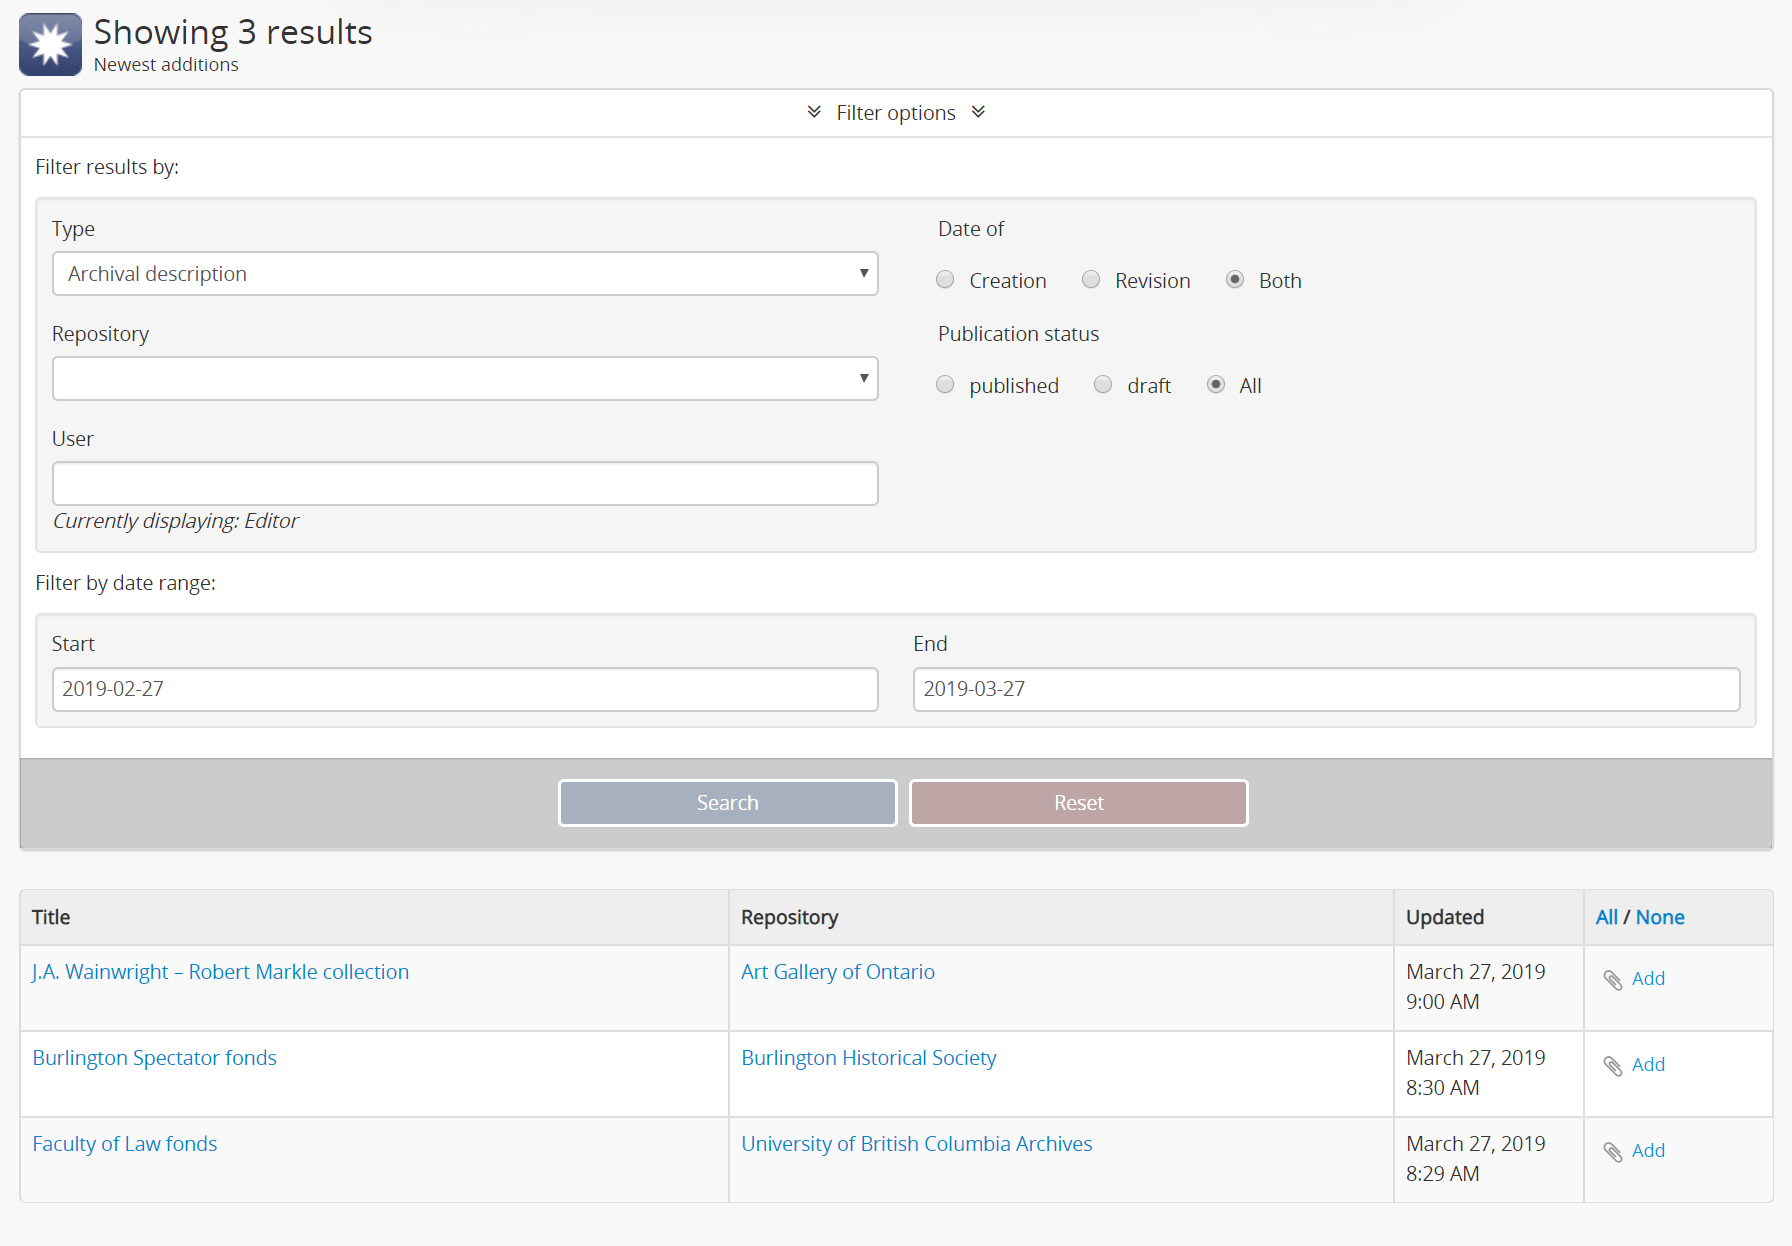
- If an administrator has enabled the archival description audit log
(via the Enable description change logging setting in Admin > Settings
> Global), then an additional “User” filter will be available. This is an
autocomplete field linked to user accounts, that will allow you to filter
the results returned based on the modification history of a specific user.
To filter results by a specific user, start typing the target username
into the autocomplete field, and select the matching result from the
drop-down field that will appear below.
Note
The User filter will not be visible on the Description updates page if the audit log has not first been enabled via the Global settings. Only changes that have occurred after the audit log has been enabled will return results when the User filter is used on Description updates. For more information, see: Enable description change logging.
- If searching for Archival description, set “Publication status” to either published or draft records, or both (i.e. All).
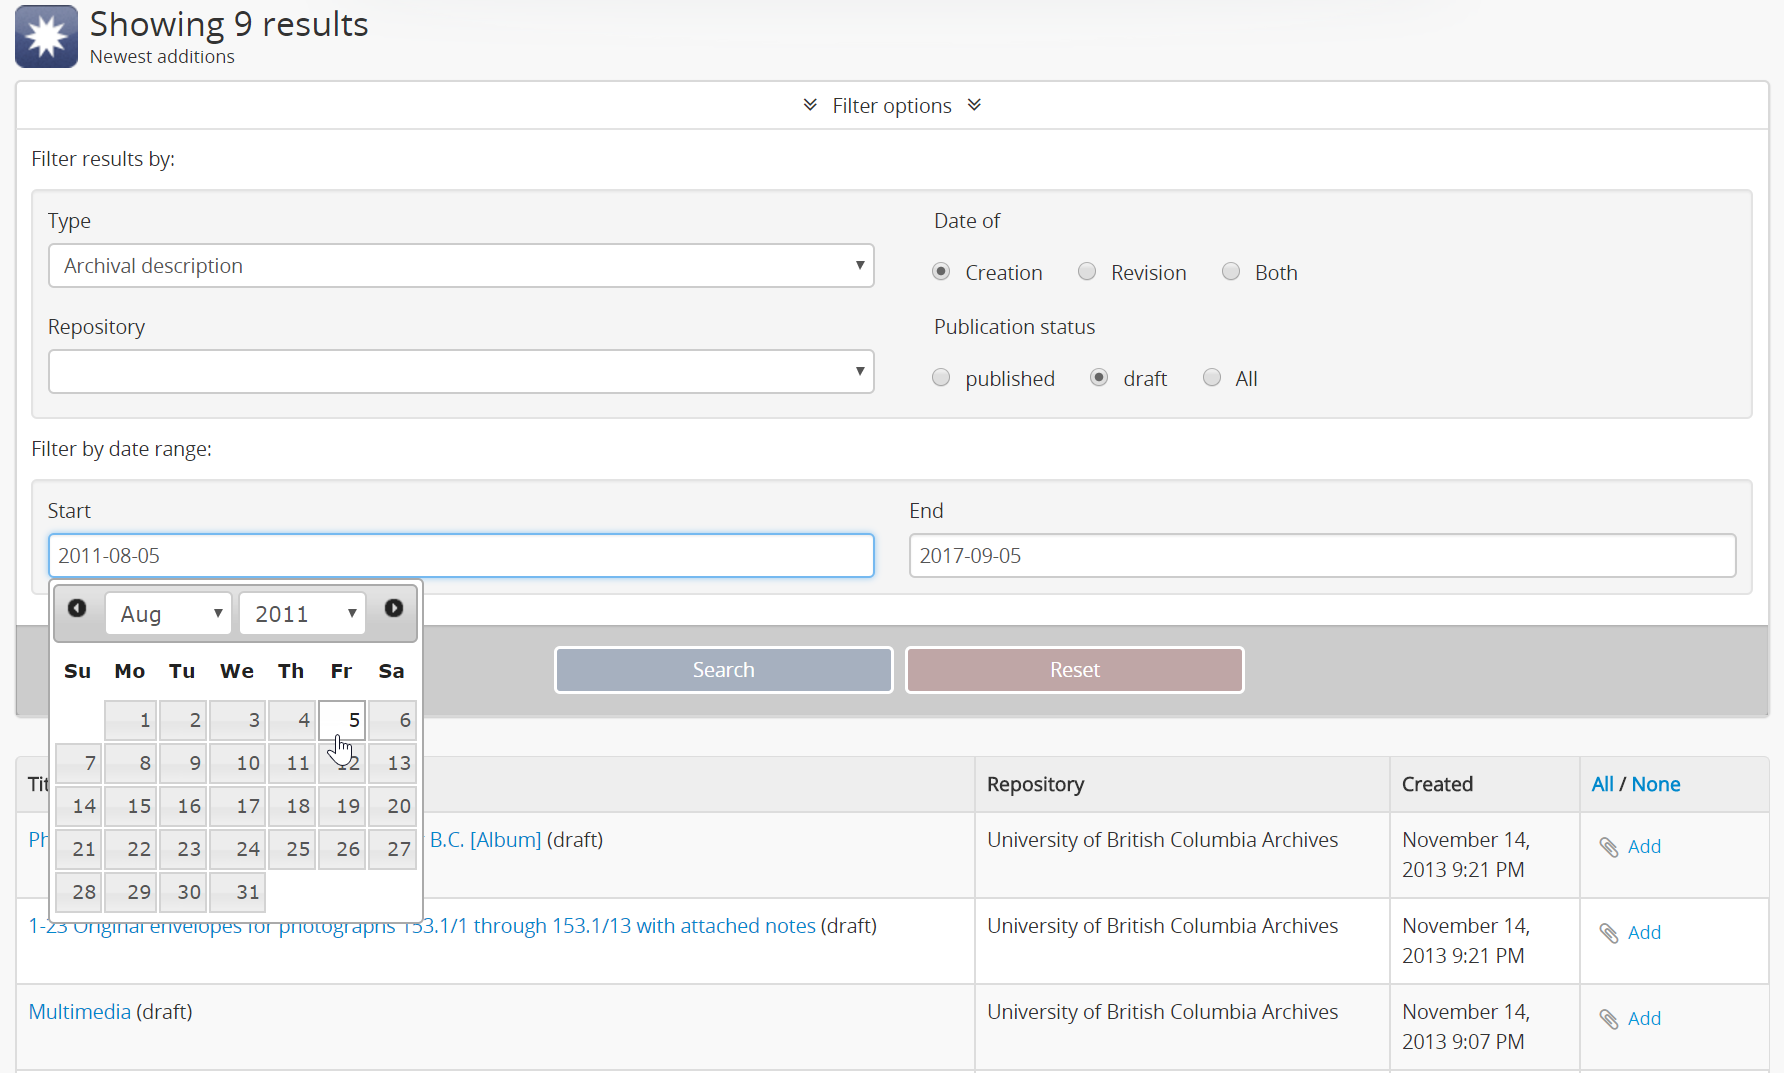
- Select the range of time you for which you want to return results, using the Start and End date fields in the Date range area. When you click into one of the fields, AtoM will display a drop-down graphical date-picker you can use to select the desired date; alternatively, you can type a date into the field using the ISO 8601 Date format (YYYY-MM-DD).
- When you have configured the filter options as you wish, click the “Search” button to apply them - AtoM will reload the page and display your results below the filters. Alternatively, you can click the “Reset” button to clear the existing values from the filters.
Tip
The number of results per page is controlled by the Results per page
setting in Admin > Settings. By default, this setting shows 10
results per page, but an administrator can change this. For more
infomation, see: Results per page.
- You can add results directly to the Clipboard using the links in the right-hand column of the results table. To add all the results displayed on a page, click the “All” link at the top of the column. For more information on working with the Clipboard, see: Clipboard.
- You can click on the blue hyperlinked names in the Title column to navigate directly to a specific record.
See also