Generate, upload, download, and print finding aids
AtoM allows logged-in users to generate printer-friendly finding aids in either PDF or RTF format. The format and some other parameters can be set by administrators in the finding aid settings. Alternatively, authenticated users can choose to upload locally created finding aids instead of generating them from existing descriptions. Once the finding aid is generated or uploaded, it can be downloaded by any user, via a link provided in the right-hand context menu.
Finding aids in AtoM are generated asynchronously in the background using
Gearman, AtoM’s job manager. You will need to make sure
that Gearman is properly configured during installation to be able to generate
finding aids - for more information, see: Asynchronous jobs and worker management.
Additional information about the status of any Finding aid generation job
can also be seen via  Manage > Jobs - for more information on the Job
management page in AtoM, see: Manage jobs.
Manage > Jobs - for more information on the Job
management page in AtoM, see: Manage jobs.
Important
At this time, the finding aids being generated have only been formatted to use the Canadian Rules for Archival Description (RAD) template. If you are using another template, you can still generate finding aids - but they will be formatted according to the RAD standard. We hope to be able to add further options in the future. For more information on the RAD standard, see: Rules for Archival Description. For an overview of all data entry templates in AtoM, see: Data entry / templates and Descriptive standards.
Below you’ll find information on how to configure the finding aid settings, generate or upload a finding aid, view information on the status of your finding aid generation request, and how users can view the finding aid after it has been successfully generated or uploaded.
Jump to:
- Finding aid settings
- Generate or upload a finding aid
- Delete an existing finding aid
- Finding aid layout
- Troubleshooting finding aid issues
Finding aid settings
Before generating your finding aids, you will want to carefully review the
settings for finding-aid generation. These can be accessed by an
administrator by navigating to  Admin > Settings, and
clicking on “Finding aid” in the settings menu on the left side of the page.
Admin > Settings, and
clicking on “Finding aid” in the settings menu on the left side of the page.
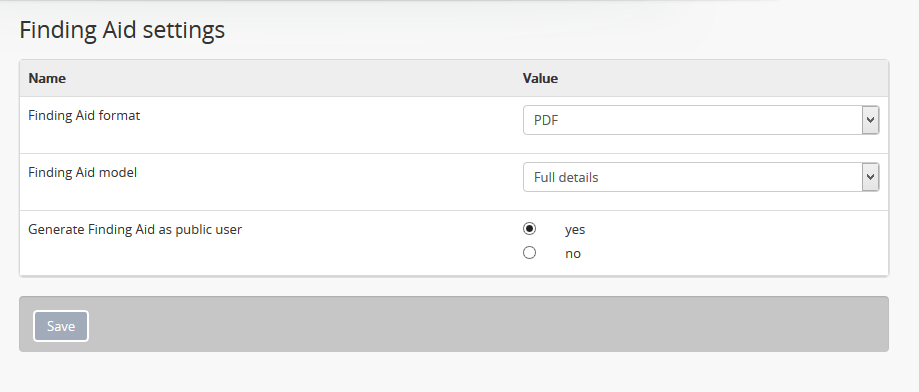
Finding aid format: AtoM can generate finding aids in either Portable Document Format (PDF), or in Rich Text Format (RTF). Choose whether you would like finding aids generated in PDF or RTF - essentially, if you would like users to have the ability to easily edit your finding aids locally after download, choose RTF, and users should be able to open the finding aid with any common document editor such as LibreOffice or Microsoft Word. If you prefer that the finding aids remain static and cannot be as easily edited by users, PDF will be a better choice. Note that most modern browsers include a PDF reader (meaning that once a user clicks the download button for a PDF-formatted finding aid, the finding aid will usually open in a new tab and be visible immediately to the user), while RTF finding aids will require local download to access, and will need to be opened in a separate application.
Note
Even if you are uploading pre-existing finding aids instead of generating them from your descriptions, you will need to set the format. During the upload process, AtoM will check that the uploaded format matches this setting, and will not allow you to upload other formats.
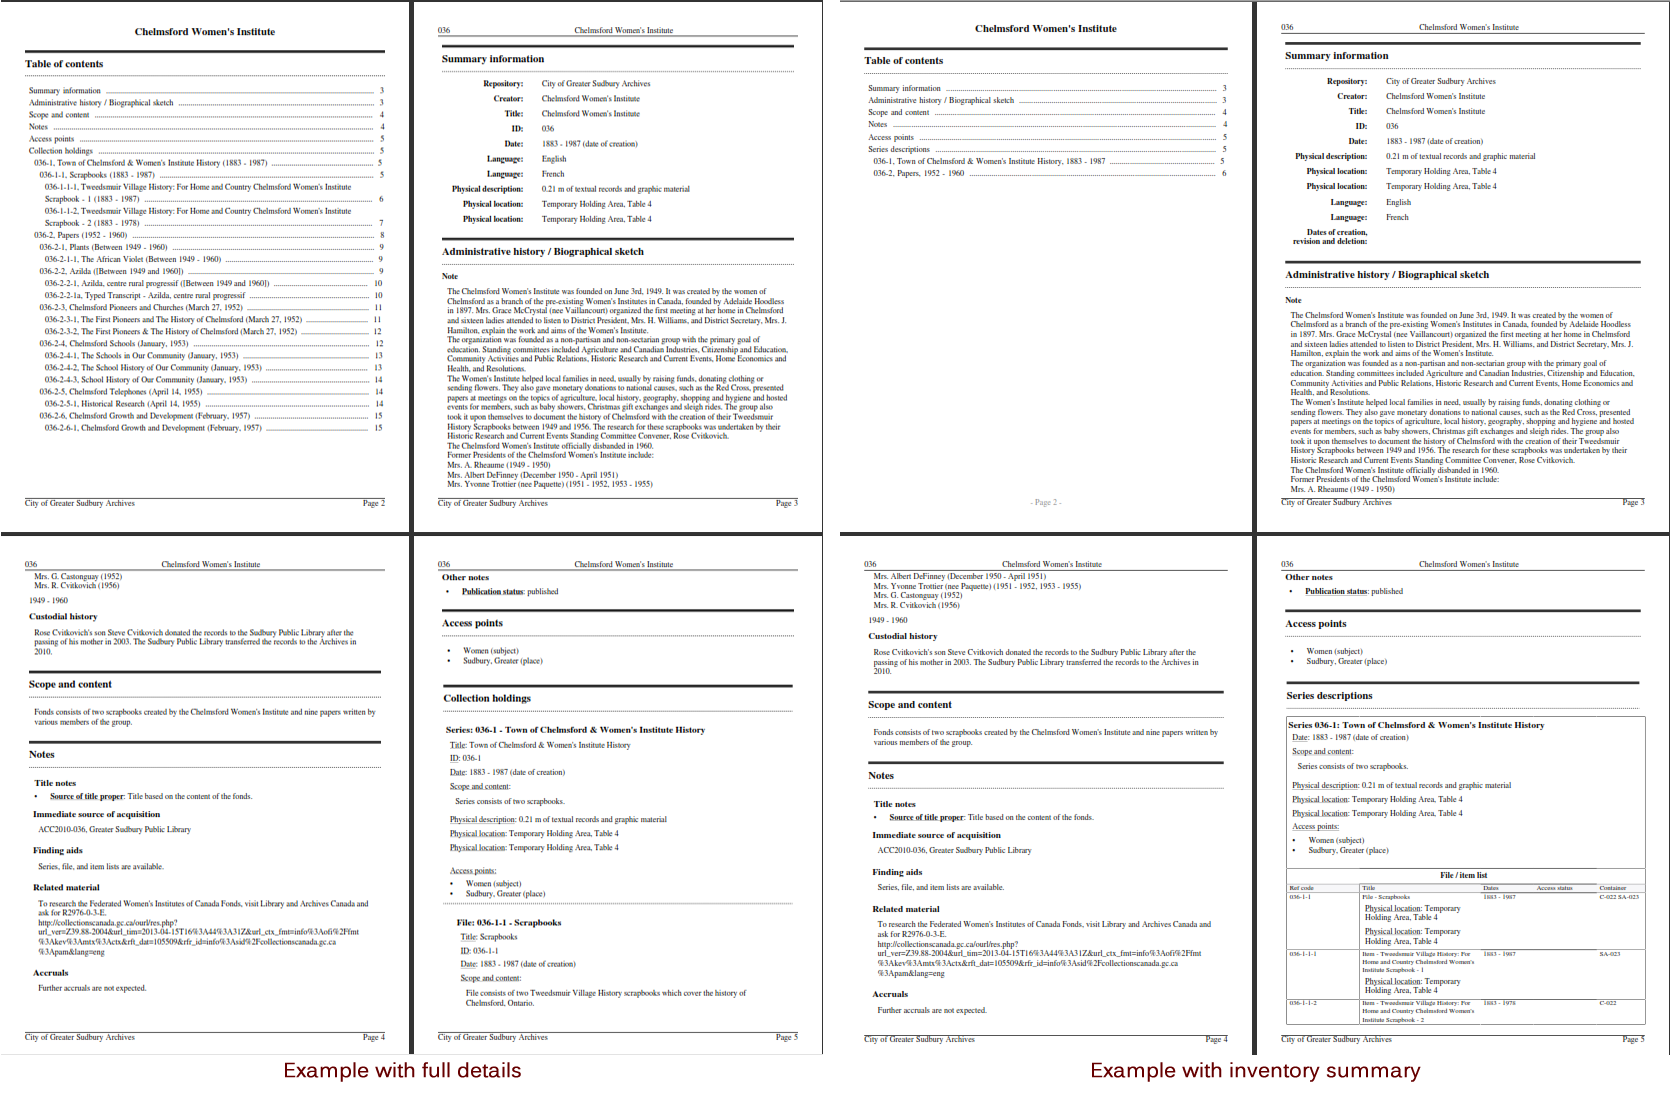
Finding aid model: At present, this setting will change how lower-level descriptions (e.g. children, such as files and items) are presented in the finding aid. You can choose between “Full details” and “Inventory summary.” Hover your cursor over the Finding aid model field label to see a brief tooltip:
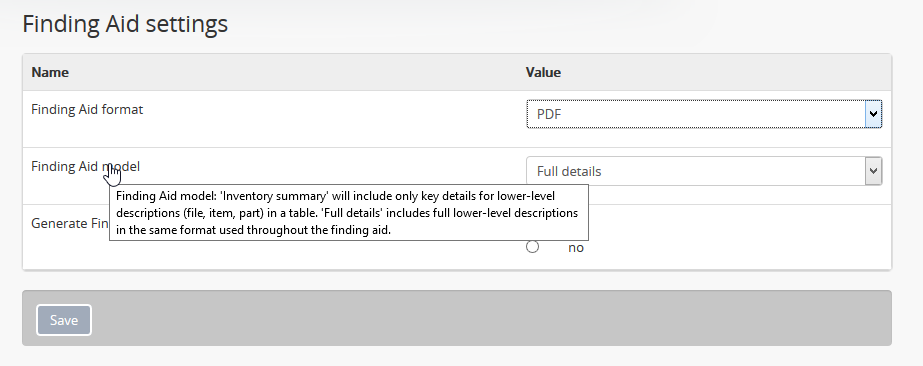
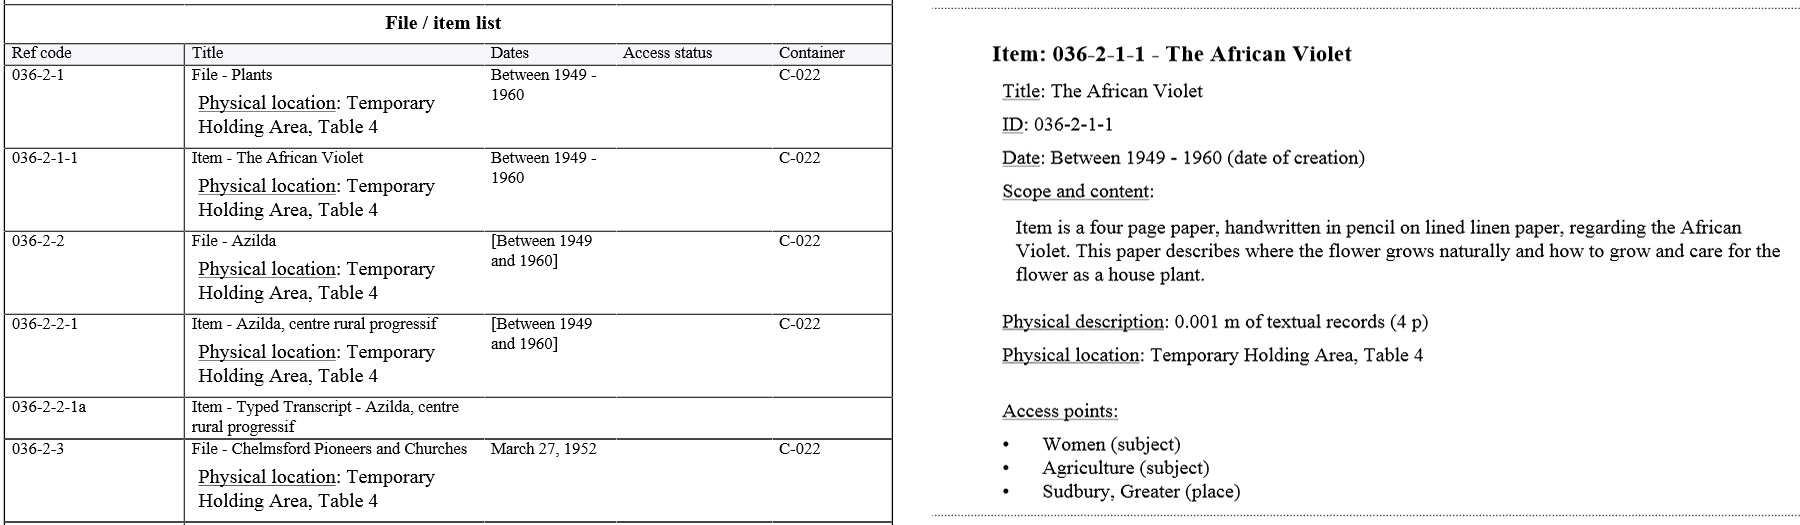
The “Inventory summary” option is best used when your lower-level descriptions do not include a lot of detail - it includes lower-level descriptions (such as files and items) in a summary table beneath each parent record, such as a series, sub-series, subfonds, etc. When lower-level descriptions include more detail, such as a scope and content description, you may want to include this information in the finding aid - choose “Full details,” and each level of description will display all fields available. A comparison image is included below, with the Inventory summary on the left, and a sample item description with full details on the right:
Generate Finding Aid as public user: This setting determines whether or not Draft records are included in the PDF generated, as well as physical storage information, depending on your Visible elements settings for physical storage.
When set to “Yes,” draft descriptions are excluded from the finding aids generated. If you have hidden physical storage information via the Visible elements module, it will also be excluded from new finding aids generated.
For more information on the publication status and setting records as draft or public, see: Publish an archival description. For more information on using the Visible elements module, see: Visible elements.
Important
At this time, no other Visible elements settings are affected by this finding aid setting - only physical storage information. This means that even with the public setting engaged, any other fields you have hidden via the Visible elements module will still be included in your finding aid! Be sure to review your finding aids carefully.
Tip
If you have the “Generate Finding Aid as public user” setting set to “Yes,” the option to generate a finding aid will not appear on any draft descriptions in AtoM. You will have to publish the description before you can generate a finding aid. You will still have the option to upload a finding aid - but remember, if the associated description is in Draft mode, users won’t be able to access it, or your uplaoded finding aid until it’s published.
Generate or upload a finding aid
Once you have configured the finding aid settings, you can now begin to either generate or upload finding aids for your archival descriptions. While the settings can only be configured by an administrator, at present any authenticated user can generate or upload a finding aid for a description they have permission to view. An administrator can review all finding aid generation requests via the Jobs page - for more information on managing jobs in AtoM, see: Manage jobs.
To generate or upload a finding aid:
- Navigate to the archival description for which you would like to generate a finding aid. You can do this by browsing or searching for the archival description - see Access content for more information on navigation in AtoM.
Tip
You can only generate or upload one finding aid per archival unit (that is, one descriptive hierarchy), but you can generate or upload from any level of description in the hierarchy, not just the parent description.
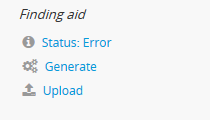
In the right-hand context menu, you will see a section titled “Finding aid”. For logged-in users, this menu may include status information, and if a finding aid has already been generated or uploaded, a download button for the current finding aid. Status messages are never shown to public users - the finding aid section will only appear in the context menu if a finding aid has been successfully generated or uploaded.
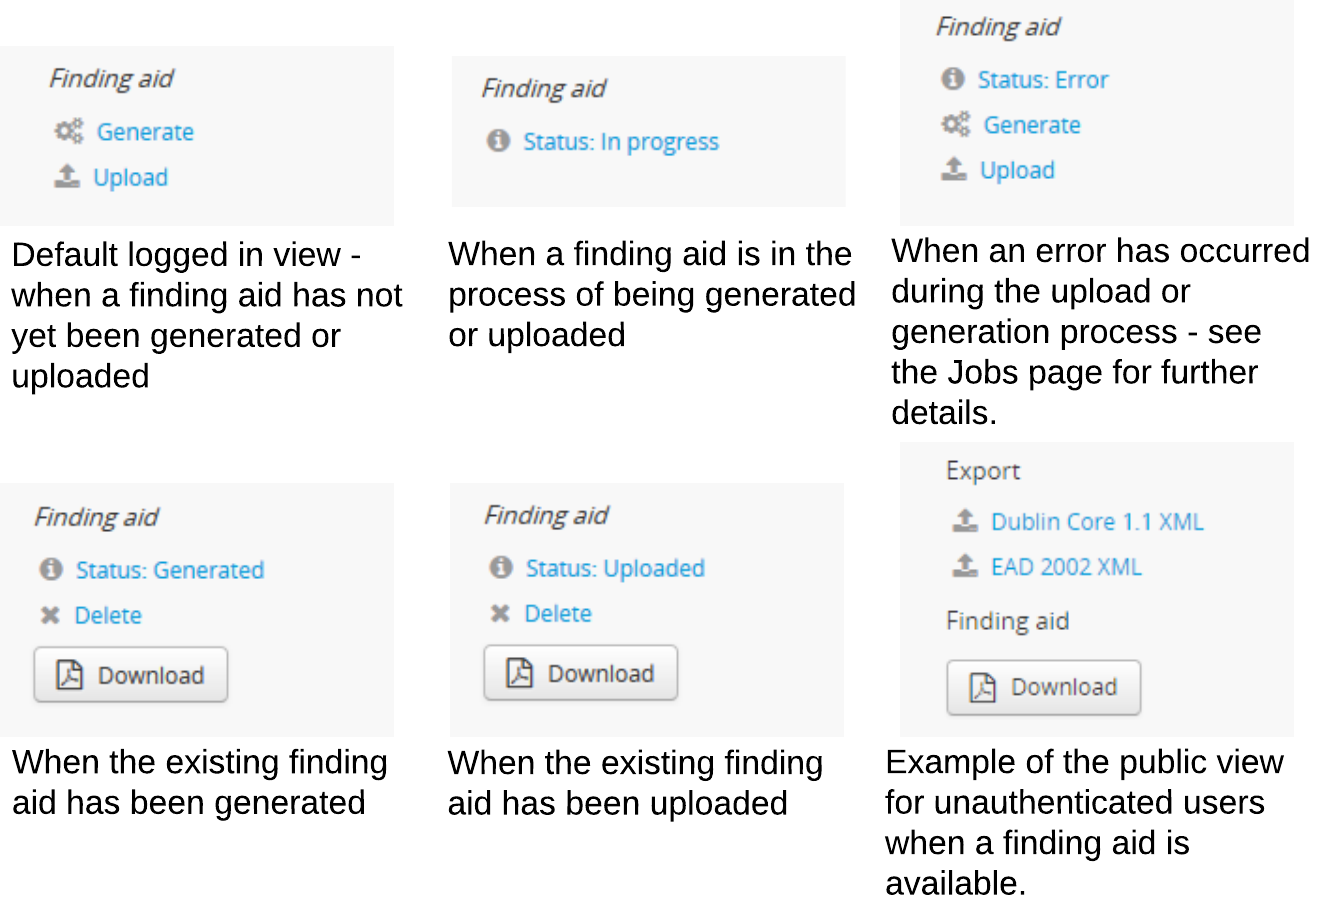
Finding aid statuses and their meanings
- No status: No finding aid has been generated or uploaded for this description.
- In progress: The job is underway and the finding aid is generating or being uploaded. Refresh the page for an updated status, and/or visit the Jobs page - see: Manage jobs
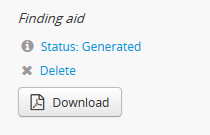
- Generated: A finding aid that has been generated is available.
- Uploaded: A finding aid that has been uploaded is available.
- Error: Something went wrong with the finding aid generation. See the Troubleshooting finding aid issues section below, and try generating a new finding aid.
Tip
Don’t see the option to generate a finding in the right-hand context menu? It could be because your archival description is still in draft status, and your Finding aid settings are set to “Generate Finding Aid as public user.” AtoM will hide the link to generate finding aids from any draft descriptions when this setting is engaged. You can either change your settings (see above), or you can publish the description - see: Publish an archival description. You’ll still be able to upload a finding aid to a draft description, but remember: your public users will not be able to see the descriptions or the finding aid until the descriptions are published!
- To generate a finding aid from your archival descriptions, click the “Generate” link in the Finding aid section of the right-hand context menu. AtoM will reload the page, and the Finding aid section will display a status message of “In progress”.
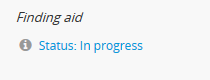
- To upload a finding aid, click the “Upload” link in the Finding aid section of the right-hand context menu. AtoM will redirect you to a page where you can select a finding aid from your local computer. When ready, click the “Upload” button. After upload, AtoM will redirect you to the archival description view page - you’ll see the status message in the finding aid section of the right-hand context menu will read “In progress” as your finding aid is uploaded.

- To update the status and determine if your finding aid was successfully generated or uploaded, wait a moment for the process to execute, and then refresh the browser. Alternately, you can navigate to the jobs page for more details about the status of a job - see: Manage jobs for more information.
- If the finding aid has failed to generate, you will see an “Error” status
message in the right-hand context menu. You can also navigate to
Manage > Jobs to see if further details on the cause of the error are
available. See the troubleshooting section
below for suggestions on how to resolve
errors.
- If the finding aid has generated successfully, you will see a Download button when you refresh the page. The status message (visible only to logged-in users) will indicate if the existing finding aid was generated or uploaded. Click on the Download button to view your finding aid. If your description is published, unauthenticated (e.g. public) users will now be able to see this Download link as well - they will not see the status messages or delete options, however.
- You can re-generate or re-upload a new finding aid at any time by first deleting the existing finding aid (covered below, and then following steps 1-6 again. This can be useful if you make edits to your archival description or its children, or if you change the format of the finding aid in the settings. The finding aids are not automatically updated when you make edits to your descriptions. Be sure to re-upload or regenerate a new finding aid if you have made changes.
Tip
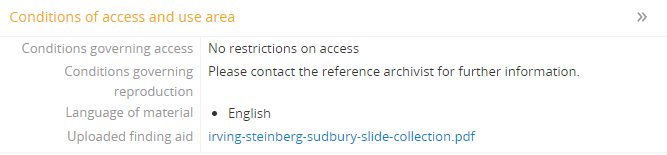
In addition to providing a button to view the finding aid in the right-hand context menu, AtoM will also automatically add a link in the body of the related description, appearing below the free-text “Finding aids” field. The link description text will also specify whether the finding aid is uploaded or generated. Here is an example of a generated finding aid link in the view page of an archival description:

And here is an example of an uploaded finding aid link:
Delete an existing finding aid
Each archival unit (i.e. descriptive hierarchy) can only have one finding aid associated with it, and finding aids are not automatically updated when descriptions are edited. If you wish to generate or upload a new finding aid to an archival unit that already has a finding aid, you will need to delete the existing finding aid first. You must be authenticated (e.g. logged in) to be able to delete existing finding aids or add new ones.
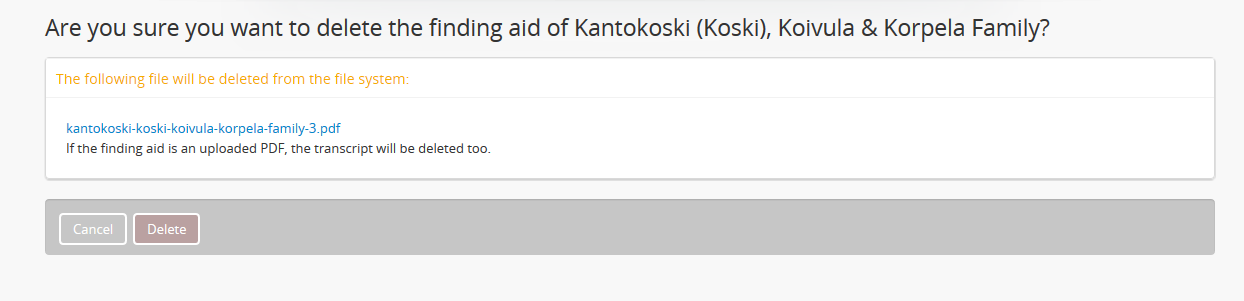
To delete an existing finding aid:
- Navigate to the archival unit whose finding aid you wish to delete, and locate the Finding aid section in the right-hand context menu. You can do this from any level of description in the hierarchy.
- The Finding aid section will include a status message indicating whether the current finding aid was uploaded or generated, a Delete link, and a Download button to view the current finding aid:
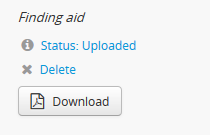
- In the Finding aid section, click on the “Delete” link.
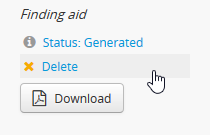
- AtoM will redirect you to a confirmation page. Click the “Delete” button if you are certain you would like to delete the existing finding aid. Alternatively, you can click the “Cancel” button to abort the delete operation.
Finding aid layout
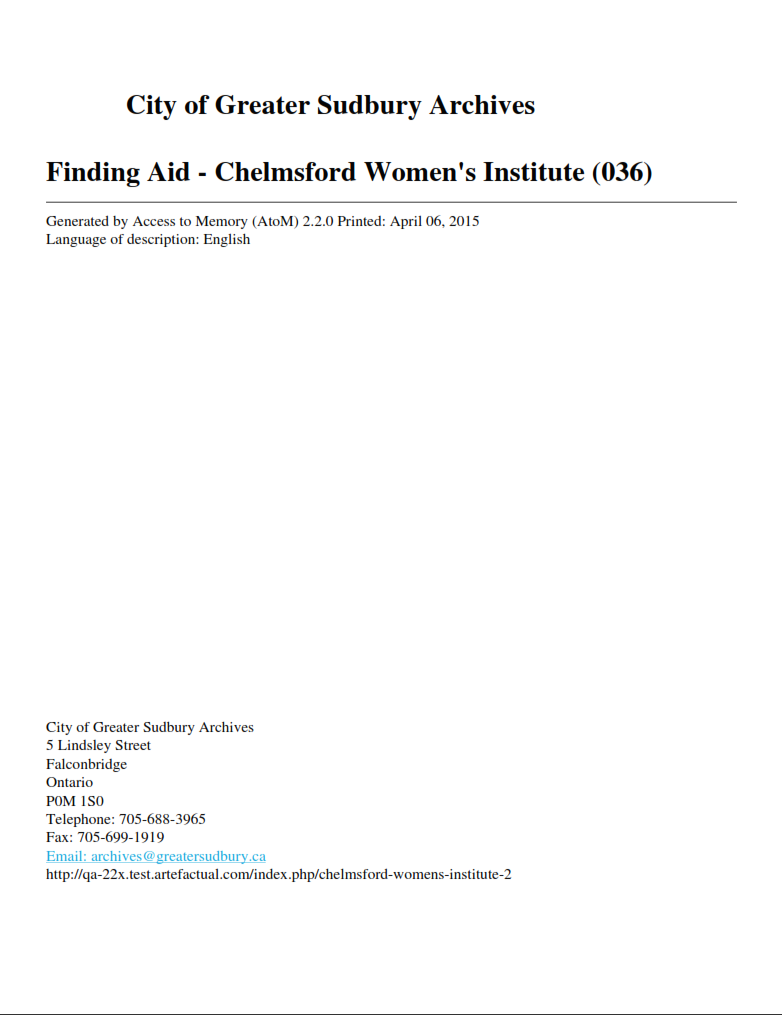
AtoM’s finding aid generation includes a simple cover page, a table of contents, and some basic styling to separate areas of the finding aid.
The cover page includes the name of the archival institution linked to the description, the title of the archival unit (e.g.title of the fonds, collection, etc), The date the finding aid was generated, the language of the description, the address of the archival institution, and the URL from which the source description originates in AtoM. An example cover is pictured below:
The table of contents will be automatically generated, and includes hyperlinks to the related section. In a PDF, this means that bookmarks to each main section of the finding aid are included by default.
Note
The numbering of the table of contents has been known to display occasional problems when generated in RTF and then viewed in Microsoft Word. This is a problem with Word’s display of RTF rather than a problem with the file. The table of contents displays in other document viewers correctly, such as OpenOffice and LibreOffice.
Each page includes a simple header and footer. The header includes the title of the archival unit, and the identifier. The footer includes the name of the related archival institution, and a page number.
At present, AtoM has two primary layout options for the printable finding aids: “Full details,” and “Inventory summary.” These options are managed via the Finding aid settings - see: Finding aid settings.
The Inventory summary option is best used when there has been minimal description added to lower levels, such as file and item-level records. AtoM will display these lower levels in a summary table beneath each parent series (or sub-series, etc). The Full details will treat each lower-level record similar to the higher-level ones, and all fields will be displayed. A sample first few pages of each, minus the cover page, has been included in an image below for comparison.
Troubleshooting finding aid issues
Below are a few common questions and problems users might encounter in generating finding aids, and some suggestions on how to address them.
Before proceeding, make sure that you have followed all the installation requirements for job scheduling in AtoM - for more information, see: Asynchronous jobs and worker management.
The AtoM Jobs page can possibly supply you with more information on any errors encountered, as finding aid generation is a job handled asynchronously in AtoM. For more information on the Jobs page, see: Manage jobs.
Jump to:
- Physical storage information is not included in my finding aid
- I don’t want to display physical storage information in my finding aid
- Draft descriptions are being shown in my finding aid
- There’s no option in the context menu to generate a finding aid
- My scope and content is not included for file and item level descriptions
- Finding aid generation error; the jobs page says that “Exporting EAD has failed”
Physical storage information is not included in my finding aid
Physical storage information is excluded from the Finding aid if:
- The “Generate Finding Aid as public user” setting is set to YES, and
- The Visible elements module for your template is set to hide physical storage information from public users (e.g. the box is unchecked).
If you have included physical storage information with your descriptions via
AtoM’s Physical storage module, and would like it included in your finding aids,
you will also need to display it in the public view pages for
your descriptions. To do so, navigate to Admin > Visible elements and
make sure that the Physical storage option is  checked.
Now you can re-generate your finding aids, following the steps above, Generate or upload a finding aid.
I don’t want to display physical storage information in my finding aid
Physical storage information is excluded from the Finding aid if:
- The “Generate Finding Aid as public user” setting is set to YES, and
- The Visible elements module for your template is set to hide physical storage information from public users (e.g. the box is unchecked).
If you have included physical storage information with your descriptions via
AtoM’s Physical storage module, and do not want it included in your finding aids,
you will also need to hide it in the public view pages for
your descriptions via AtoM’s Visible elements module. To do so, navigate to
Admin > Visible elements and make sure that the Physical storage
option is  unchecked.
You will then need to check the finding aid settings, and make sure that the “Generate Finding Aid as public user” option is set to “yes”. See above for more details on the finding aid settings.
Now you can re-generate your finding aids, following the steps above, Generate or upload a finding aid.
Draft descriptions are being shown in my finding aid
If you don’t want draft descriptions shown in your finding aid, navigate to
Admin > Settings, and click the “Finding aid” section in the menu
on the left. AtoM will load the finding aid settings, described in detail
above.
Make sure that the “Generate Finding Aid as public user” option is set to “yes”, and remember to click the “Save” button in the button block if you make any changes.
Now you can re-generate your finding aids, following the steps above, Generate or upload a finding aid.
Tip
Don’t see the option to generate a finding in the right-hand context menu? It could be because your archival description is still in draft status, and your Finding aid settings are set to “Generate Finding Aid as public user.” AtoM will hide the link to generate finding aids from any draft descriptions when this setting is engaged. You can either change your settings (see above), or you can publish the description - see: Publish an archival description. You’ll still be able to upload a finding aid to a draft description, but remember: your public users will not be able to see the descriptions or the finding aid until the descriptions are published!
My scope and content is not included for file and item level descriptions
This could be because you have selected the “Inventory summary” option in the “Finding aid model” settings. AtoM has two different stylesheets for finding aids. One includes only an inventory table with minimal details for lower-level descriptions such as files and items (the “Inventory summary” option); the other includes full details at all levels of description. A comparison image is included below, with the Inventory summary on the left, and a sample item description with full details on the right:
If you want all fields present in your lower-level descriptions to be available in the finding aid you generate, we suggest changing this setting to “Full details.” Remember to save your changes after making settings changes.
Now you can re-generate your finding aids, following the steps above, Generate or upload a finding aid.
See also
Finding aid generation error; the jobs page says that “Exporting EAD has failed”
First, check if you have a working internet connection. AtoM will attempt to reach the EAD XML DTD kept at http://lcweb2.loc.gov/xmlcommon/dtds/ead2002/ead.dtd and if there is no internet connection the task may fail, with a message like this in the Job details page:
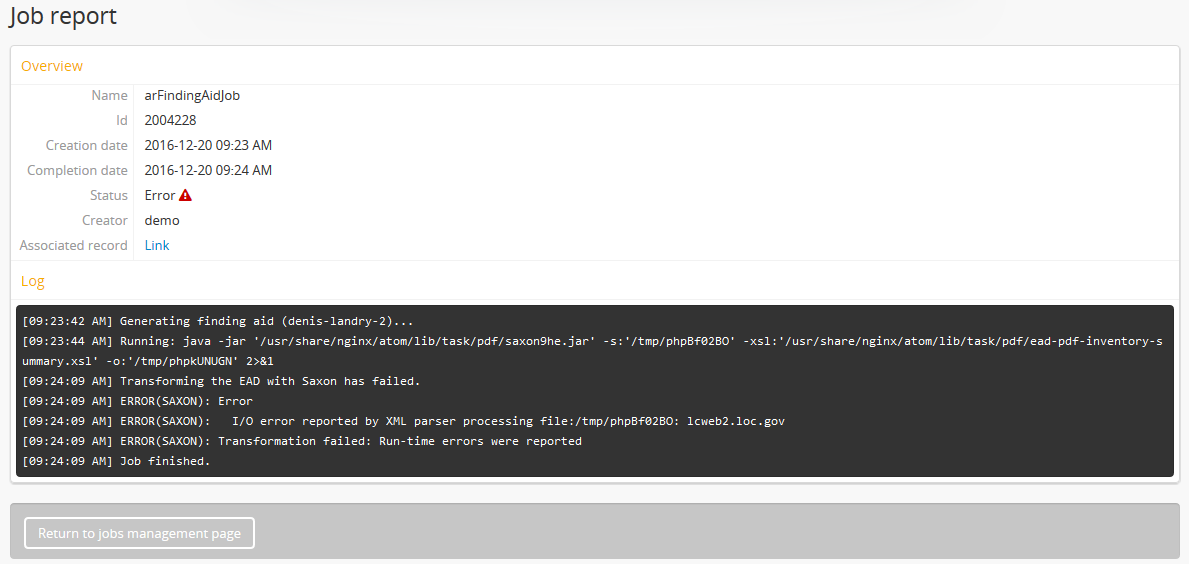
If you restore your internet connection, you can try again - the issue may now be resolved.
If not, it may have to do with the content you have added to your archival description.
AtoM generates its PDF finding aids by first exporting the archival description as EAD XML, and then transforming that EAD XML using an XSLT into the desired format (PDF or RFT).
For this process to work, the EAD XML must first be able to export - which means it must first be valid XML.
This means your EAD may fail to export properly if:
- You’ve used unescaped special characters, such as ampersands
&or<and>. - You’ve used inline HTML elements to style the display of some fields in AtoM -
for example, using
<em>or<i>elements for emphasis or italics. - You’ve cut and pasted non UTF-8 encoded characters into AtoM - a common example
would be the curvy quotation marks used in many word processing applications like
Microsoft Word, instead of the standard UTF-8
straight quotes
"
We suggest you try reviewing your description(s) in edit mode and look for some of these common errors that can affect EAD export. Remove any HTML you have added inside AtoM’s edit fields. Make sure that you replace any non-standard punctuation cut and pasted from common word processor applications.
Now you can re-generate your finding aids, following the steps above, Generate or upload a finding aid.