Manage digital object storage
Digital objects are computer files that can be uploaded into and displayed by AtoM. They include scanned images, digital photographs, sound and moving image files, and other scanned or born-digital items.
Digital objects can only be edited and added by an authenticated (i.e. logged- in) administrator.
For more information on digital objects, see Upload and manage digital objects or Set digital object upload limit for an archival institution.
Manage digital object storage per institution
- Navigate to the archival institution whose digital object storage you would like to manage. You can do this by browsing or searching for the archival institution - see Access content for more information on navigation in AtoM.
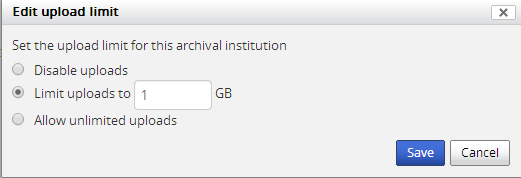
- In the “Upload limit” menu, click the “Edit” link. A dialogue box will apear
that will allow for 1 of 3 options:
- Disable uploads will prevent users from uploading any digital objects.
- Limit uploads to _____ GB will allow an administrator to set a specific upload limit per archival institution.
- Allow unlimited uploads is the default setting in AtoM that places no restrictions on an authenticated user’s digital object uploads.
- You can quit the edit process at any time by clicking the “Cancel” button; any data already entered will not be saved.
- Once the administrator has configured the choices, click “Save.” You will
then be redirected to the Archival institution’s view page. The
changes made will be displayed accordingly:
- If you selected Disable uploads, the Upload limit bar will automatically be removed and the Upload limit section will indicate that the uploads have been disabled.
- If you selected Allow unlimited uploads, the Upload limit bar will automatically be removed and the Upload limit section will indicate the institution’s current uploaded amount, as well as the limit, which will be Unlimited (e.g. “2.65 GB of Unlimited”).
- If you selected a specific number of GB as an upload limit, that number will appear below the Upload limit bar, alongside the institution’s current uploaded amount (e.g. “2.56 of 10 GB”).
- Additional changes to the Upload limit can be made at any time by following these steps.