Manage user accounts and user groups
This section describes how to manage User accounts and User groups in AtoM. User accounts and user groups are used to define user roles, which define levels of access, or access privileges to functions in AtoM, ranging from view-only access to full administration rights. Anyone who wishes to use and interact with AtoM must have a user account, and only an authenticated (i.e. logged-in) administrator can add, edit and delete a user or a group in AtoM.
Below you’ll find instructions on how to:
- Add a new user
- Edit an existing user
- Add a new group
- Edit an existing group
- Mark a user “Inactive”
- Delete a user
- Delete a group
- Change login security
See also
Add a new user
This section contains instructions on how to Add a new user in AtoM. There are
two ways to add a new user in AtoM - doing so via the  Admin menu is the easiest, but to accommodate different
workflows, users can also be added from the view page of another
user’s profile. Below are instructions to add a new
user:
Admin menu is the easiest, but to accommodate different
workflows, users can also be added from the view page of another
user’s profile. Below are instructions to add a new
user:
Every user who wishes to add, edit, or delete content within the database must have a registered user account. Only an authenticated (i.e. logged in) administrator can add a new user account.
For more information on user roles, see: User roles.
Add a new user from the main menu
A new user can be added in AtoM at any time, from anywhere in the application, via the main menu.
To add a new user in AtoM:
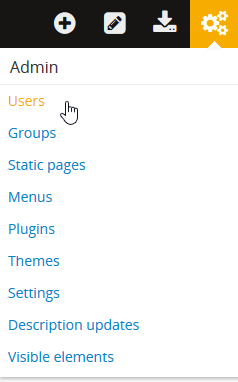
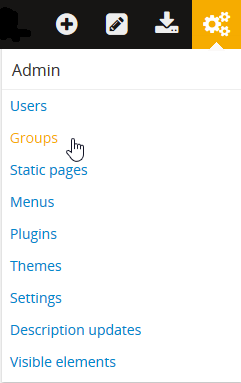
- In the main menu located in the header bar, click the
Admin menu and select “Users” from the
drop-down menu. This will take you to a list of current user
accounts.
- AtoM will redirect you to the List users page, where you can find, edit, and delete existing users, as well as add new users.
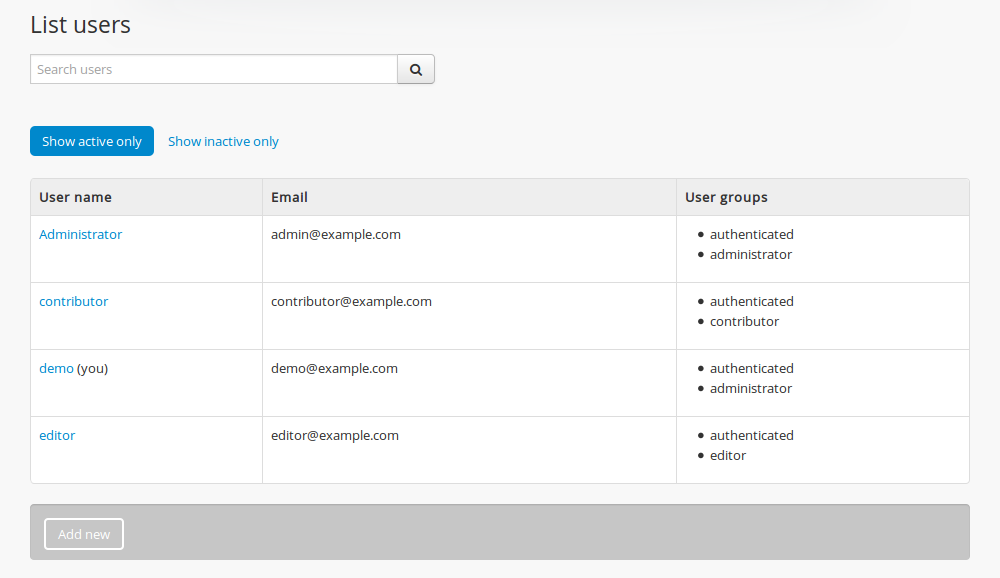
Note
The List users page has two presentation options: “Show Active only” and “Show Inactive only” which allow the administrator to view active users and inactive users in the system. For more information on inactive users, see below, Mark a user “Inactive”.

- Scroll to the bottom of the “List users” page and click the “Add new” button in the button block. AtoM will direct you to a blank User edit page.
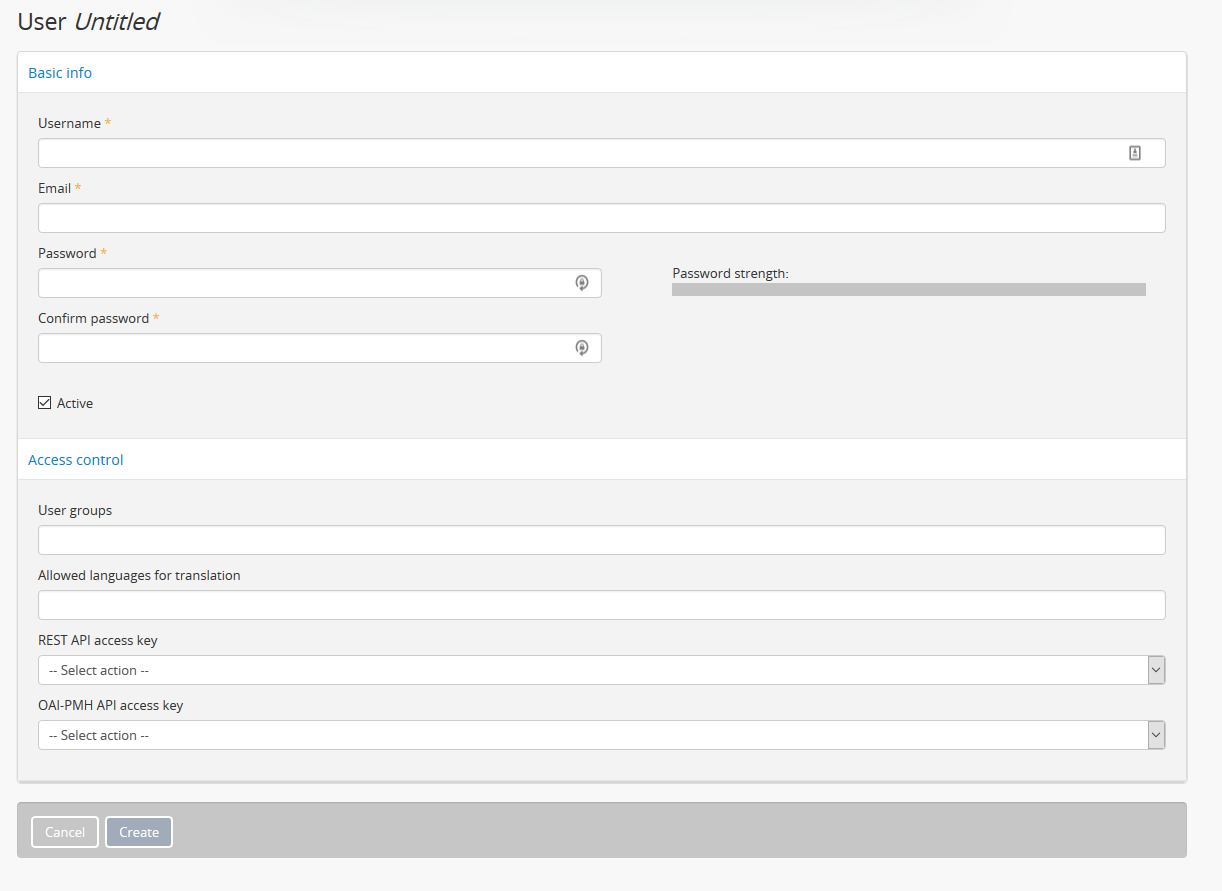
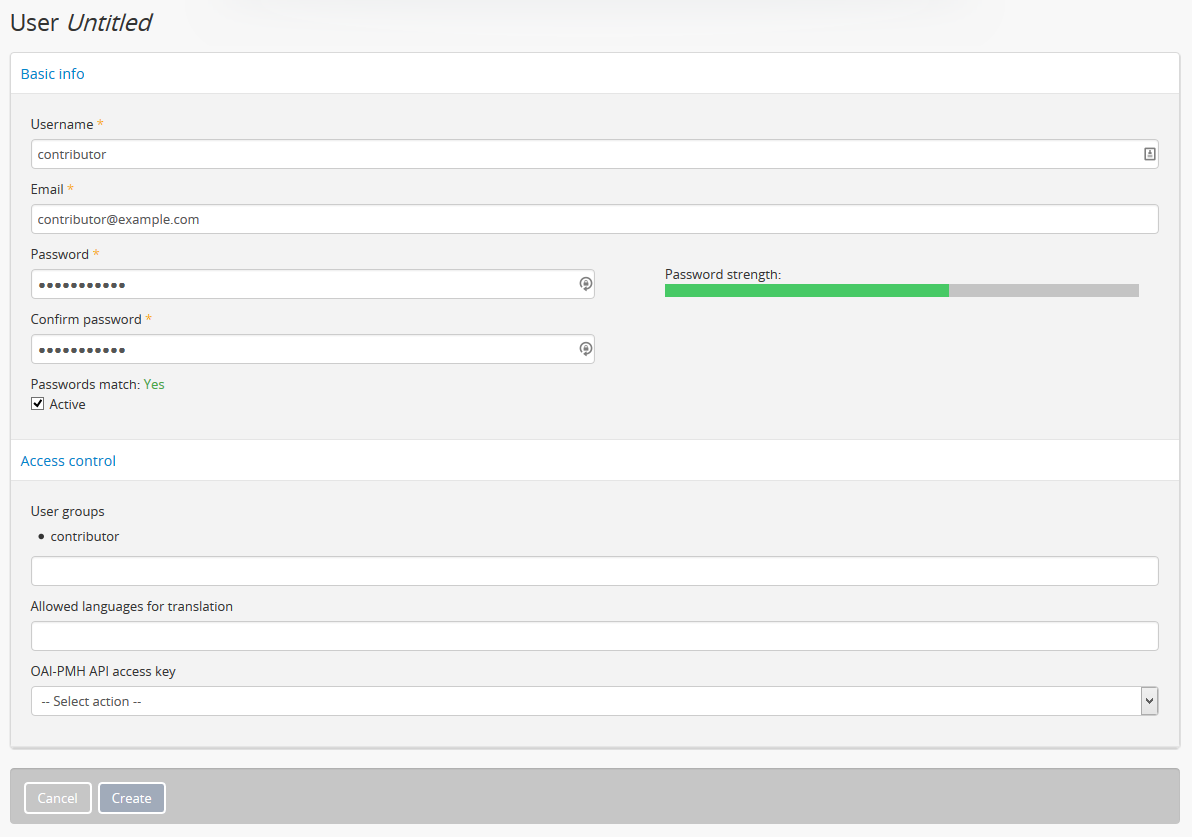
- In the “Basic info” information area, enter the following data:
- In “Username”, enter the user’s name;
- In “Email”, enter the user’s email address. The email address (rather than the username) is used when logging in. For more information on logging in, see: log in;
- In “Password”, enter the user’s default password. Users can later change their own password. For more information, see: Change password.
- In “Confirm password” enter the password again.
Note
Although only an authenticated (i.e. logged-in) administrator can edit a user’s profile, users can view their own profiles and change their passwords) by going through the header bar. For more information, see: Change password.
- In the “Access control” information area, type the appropriate “User groups”. As you type, matching results will load in a drop-down menu below the field. See below for more information on user groups.
Important
The user group, or user role determines the user’s access privileges. This will control the way the user can interact with AtoM. The user role of a specific user can be changed at any time by an authenticated (i.e. logged-in) administrator. For more information on user roles, see: User roles. For more information on editing user access privileges and a list of the default permissions per group, see Edit user permissions.
See also
If you are using the OAI repository functionality in AtoM, you can also generate an API key per user account in this “Access control” area. For more information, see: Set AtoM to require an API key for OAI-PMH requests.
- Under the “Allowed languages for translation” section, type the appropriate “language” for translation. As you type, matching results will load in a drop-down menu below the field. For more information on adding/removing languages, see: Add/Remove languages. For more information on translating, see: Translate.
Tip
Multiple user roles and languages can be added to one user. A user may need to have both editor and translator access privileges, or may be able to translate in both “English” and “Spanish”.
Once one user role has been selected, it will appear in bullet form under “User groups” and a second group can then be added. To remove a selected user group, simply hover over the user group you would like to select; click on the “X” that will appear next the group name. The same instructions can be applied to the “Allowed languages for translation” information area.
- You can quit the creation process at any time by clicking the “Cancel” button, or exiting (i.e. clicking “X”) the window. Any changes made will not be saved.
- When you have completed entering all information for your new user, click the “Create” button in the button block.

- Once the new user has been saved, AtoM will direct you to the user’s profile view page, where you can review your work. Clicking “Edit” in the button block at the bottom of the user profile will re-open the user’s profile in edit mode.
- The user profile will also display the following permission information areas: “Information object permissions”, “Actor permissions”, “Taxonomy permissions”, and “Archival institution permissions”. You can navigate through these sections to customize the user’s access privileges if you are not satisfied with those established by the user group, or if a user group was not selected. For more information on user permissions, see Edit user permissions.

Note
By default, the user will be automatically Active once the new user account
has been created. You must enter edit mode and un-check the box
next to “Active”  in order to make a user “Inactive”. For more
information, see: Mark a user “Inactive”.
in order to make a user “Inactive”. For more
information, see: Mark a user “Inactive”.

For more on user roles, see user roles. For more information on user role (e.g. group) default permissions and how to customize user access privleges, see: Edit permissions.
Add a new user from a user’s profile view page
A new user can also be added to AtoM from the view page of any other user’s profile view page via the Add new button in the button block. To do so:
- In the main menu located in the header bar, click the
Admin menu and select “Users” from the
drop-down menu. This will take you to a list of current user
accounts.
- AtoM will redirect you to the List users page, where you can find, edit, and delete existing users, as well as add new users.
- Select a user from the list that appears on the page by clicking on the username. AtoM will direct you to that user’s profile view page.
- At the bottom of the user’s profile view page, you will see the button block with several options (Edit, Delete, and Add new). Click the Add new button.

- AtoM takes you to a blank edit page for data entry. Enter data as required. For further guidance on specific fields, see steps 4-6 in the section above.
- You can quit the creation process at any time by clicking the “Cancel” button in the button block; any data already entered will not be saved, and no new user record will be created. Note that simply navigating away from the page by any other means, without first clicking “Create” will also result in no new record being created.
- To save the new user record, click the “Create” button located in the button block at the bottom of the record.
- Once the new user has been saved, AtoM will direct you to the user’s profile view page, where you can review your work. Clicking “Edit” in the button block at the bottom of the user profile will re-open the user’s profile in edit mode.
- The user profile will also display the following permission information areas: “Information object permissions”, “Actor permissions”, “Taxonomy permissions”, and “Archival institution permissions”. You can navigate through these sections to customize the user’s access privileges if you are not satisfied with those established by the user group, or if a user group was not selected. For more information on user permissions, see Edit user permissions.
Edit an existing user
This section contains instructions on how to edit an existing user, after they have been created.
Note
Only an authenticated (i.e. logged in) administrator user can edit or update a user. For more information on edit privileges and user roles see: User roles.
A user can be edited at any time by an authenticated administrator.
To edit a user in AtoM:
- First, navigate to an existing user in AtoM. You can do this by click the
Admin menu in the main menu located
in the header bar and selecting “Users” from the
drop-down menu. This will take you to a list of current user groups.
- Select the user you wish to edit from the list of users that appears on the page. If you have many users, AtoM may limit the results per page; you can navigate through the list of users by scrolling to the bottom of the “List users” page and clicking through the page numbers.
Note
The List users page has two presentation options: “Show Active only” and “Show Inactive only” which allow the administrator to view active users and inactive users in the system. For more information on inactive users, see below, Mark a user “Inactive”.
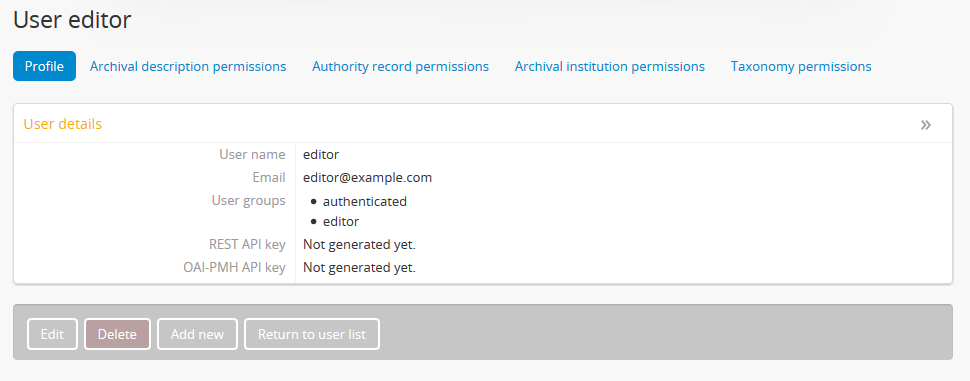
- By clicking on the username of the user you wish to edit, AtoM will direct you to that user’s profile view page.
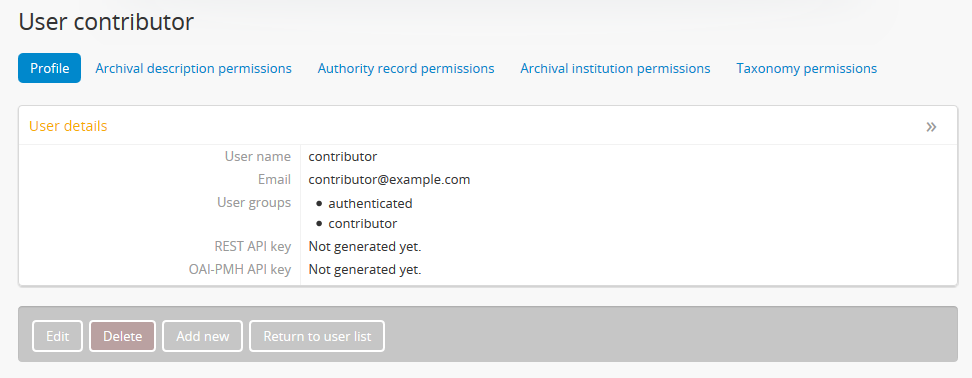
- Switch from view mode to edit mode by clicking the “Edit” button in the button block, or by clicking on the “User details” heading; this takes you to the user’s edit page.
- On loading, the edit page displays the user profile information areas; add and/or revise data as required.
- You can quit the process at any time by clicking the “Cancel” button in the button block; any changes made will not be saved. Note that simply navigating away from the page by any other means, without first clicking “Save” will also result in no changes being saved to the user profile.
- To save your edits, click the “Save” button located in the button block.

You will be redirected to the view page for the edited user where you can review your work. Follow steps 3 through 6 if you are not satisfied with your changes.
See also
If you are using the OAI repository functionality in AtoM, you can also generate an API key per user account in this “Access control” area. For more information, see: Set AtoM to require an API key for OAI-PMH requests.
Add a new group
This section contains instructions on how to Add a new user group in AtoM. There
are two ways to add a new user group in AtoM - doing so via the
Admin menu is the easiest, but to accommodate
different workflows, user groups can also be added from the view page
of another group’s view page. Below are instructions on how to add a
new group:
In AtoM, only an authenticated (i.e. logged in) administrator may add a new “Group” or “user group” to the database. Administrators are then able to link these groups with users, either at the point a user is created or at a later time, by editing the user. These user groups determine user access privileges; linking a user to a specific user group thus establishes the user’s access privileges within AtoM. This will control the way the user can interact with the system.
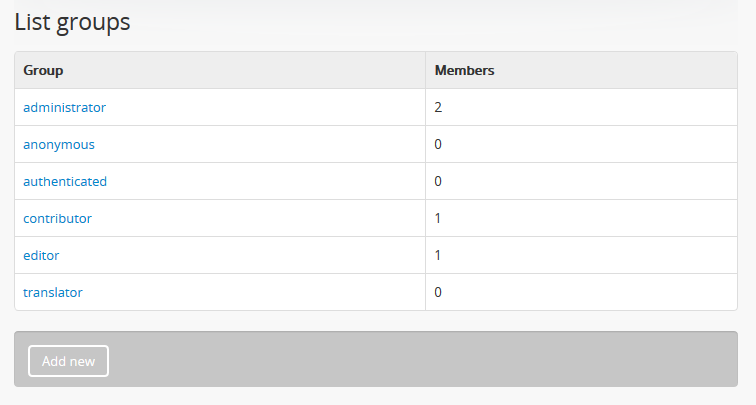
The following 5 user roles are established as default “Groups” in AtoM:
When creating a new user in AtoM, administrators can select from these 5 groups by default, as well as other “Groups” that may have been added by an administrator. These default “Groups” contain default access privileges that define levels of access to functions in AtoM; for more information on these, see Edit permissions.
These default groups can be deleted at any time by an authenticated (i.e. logged-in) administrator, and new user groups can also be added at any time.
For more information on user roles, see: User roles.
Add a new user group from the main menu
A new group can be added in AtoM at any time, from anywhere in the application, via the main menu. To do so, follow these instructions:
- In the main menu located in the header bar, click the
Admin menu and select “Groups” from the
drop-down menu.
- AtoM will redirect you to a list of current groups and the number of members within each group.
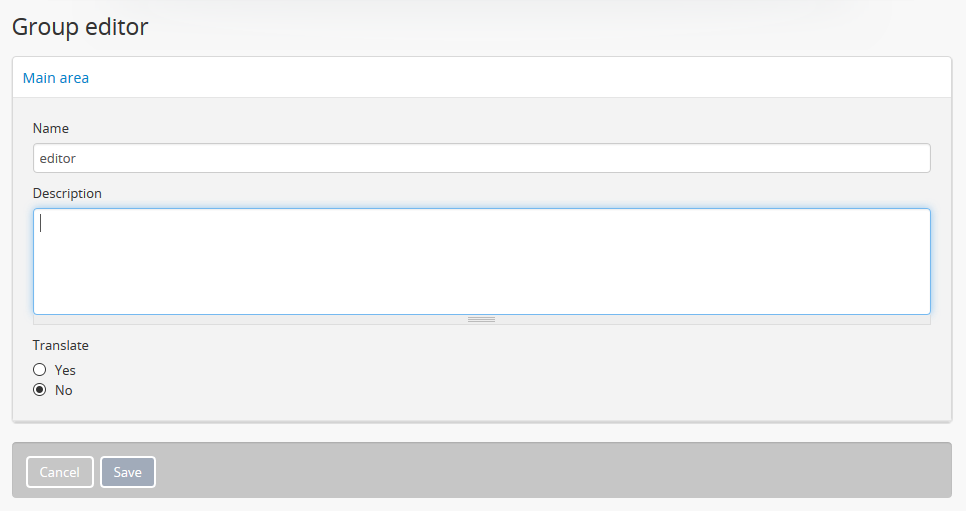
- Scroll to the bottom of the “List groups” page and click the “Add new” button in the button block. AtoM will direct you to a blank Group edit page.
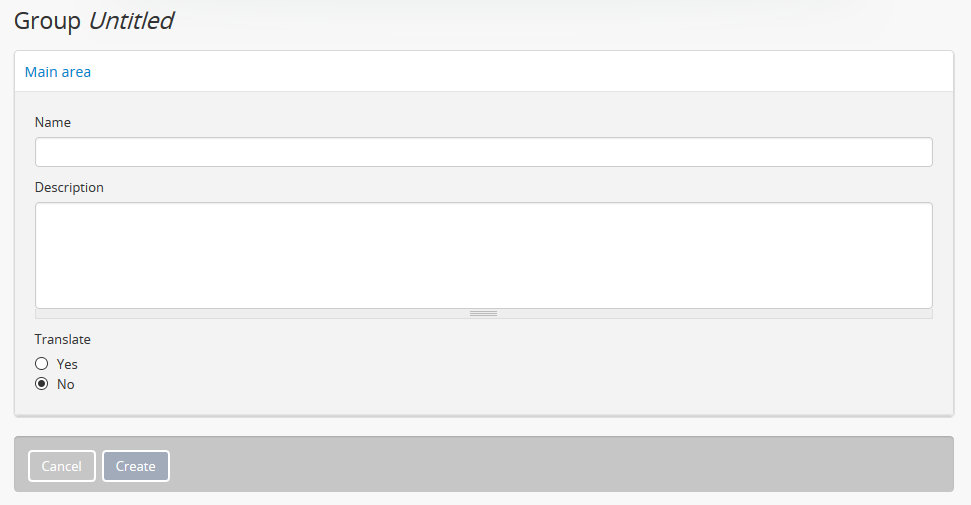
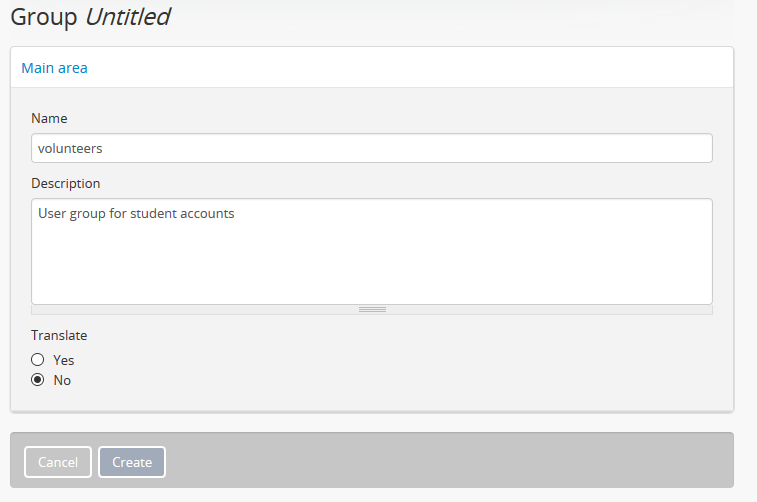
- In the “Main area” information area, enter the “Name” and the “Description” of the group, and select whether or not the group will have the access privilege permission to “Translate”. For more information on user roles, see: User roles.
- You can quit the process at any time by clicking the “Cancel” button, or exiting (i.e. clicking “X”) the browser tab. Any changes made will not be saved.
- When you have completed your data entry, click the “Create” button in the button block at the bottom of the page. AtoM will be direct you to a view page where the new user profile will be displayed. Clicking “Edit” in the button block at the bottom of the group profile will re-open the group in edit mode if you need to make changes.
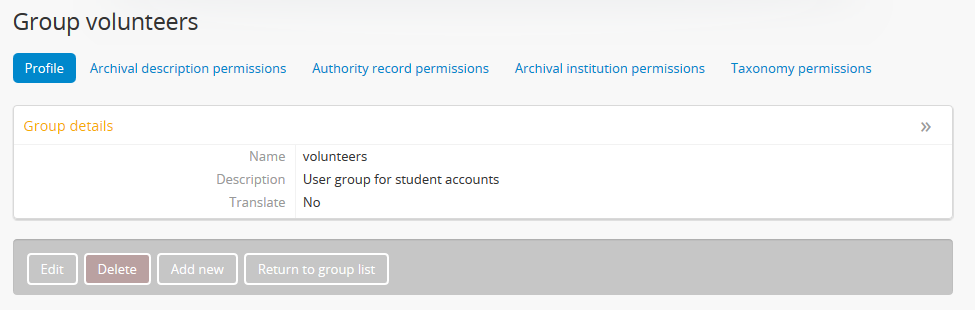
The group profile will also display the following permission information areas: “Information object permissions”, “Actor permissions”, “Taxonomy permissions”, and “Archival institution permissions”. Navigate through these sections to customize the group’s access privileges. For more information on user permissions, see Edit user permissions.

Add a new group from the view page
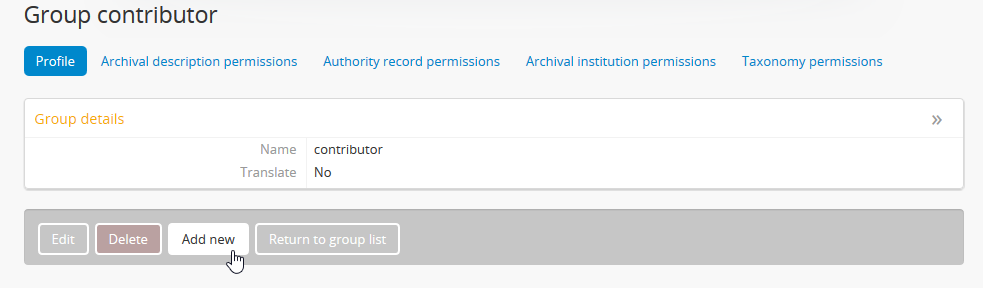
A new group can also be added to AtoM from the view page of any other user group via the Add new button in the button block. To do so:
- Navigate to an existing group in AtoM. You can do this by click the
Admin menu in the main menu located
in the header bar and selecting “Groups” from the
drop-down menu. This will take you to a list of current user groups.
- Select a group from the list that appears on the page by clicking on the group name. AtoM will direct you to that user group’s view page.
- At the bottom of the group’s view page, you will see the button block with several options (Edit, Delete, Add new, and Return to group list). Click the Add new button.
- AtoM takes you to a blank edit page for data entry. Enter data as required.
- You can quit the creation process at any time by clicking the “Cancel” button in the button block; any data already entered will not be saved, and no new user record will be created. Note that simply navigating away from the page by any other means, without first clicking “Create” will also result in no new record being created.
- To save the new user record, click the “Create” button located in the button block at the bottom of the record.
Once the new user has been saved, AtoM will direct you to the :group’s view page, where you can review your work. Clicking “Edit” in the button block at the bottom of the user profile will re-open the user in edit mode.
Edit an existing user group
This section contains instructions on how to edit an existing group, after they have been created in AtoM.
Note
Only an authenticated (i.e. logged in) administrator user can edit or update a user group. For more information on edit privileges and user roles see: User roles.
A user group can be edited at any time by an authenticated administrator.
To edit a group in AtoM:
- First, navigate to an existing group in AtoM. You can do this by click the
Admin menu in the main menu located
in the header bar and selecting “Groups” from the
drop-down menu. This will take you to a list of current user groups.
- Select the user group you wish to edit from the list that appears on the page by clicking on the group name. AtoM will direct you to that user group’s view page.
- Switch from view mode to edit mode by clicking the “Edit” button in the button block, or by clicking on the “Group details” heading; this takes you to the group’s edit page.
- On loading, the edit page displays the user group’s information areas; add and/or revise data as required.
- You can quit the process at any time by clicking the “Cancel” button in the button block; any changes made will not be saved. Note that simply navigating away from the page by any other means, without first clicking “Save” will also result in no changes being saved.
- To save your edits, click the “Save” button located in the button block.
You will be redirected to the view page for the edited user group where you can review your work. Follow steps 3 through 6 if you are not satisfied with your changes.
Mark a user “Inactive”
By default, all users created in AtoM are set as “Active” users. Marking a user as “Inactive” will block the user from being able to access the system (i.e. he/she will not be able to sign in to AtoM). An authenticated (i.e. logged-in) administrator may still edit that user’s profile, and the user can be changed back to an “Active” status at any time.
Users can either be marked as “Inactive” at the point that their profile is created, or later, by navigating to that user’s edit page. A user can only be marked as “Active” or “Inactive” by an authenticated (i.e. logged-in) administrator user. For more information on user roles, see: User roles.
To mark a user “Inactive” in AtoM:
- First, navigate to the In the main menu located in the header
bar, click the Admin menu and select
“Users” from the drop-down menu. This will take you to a list of
current users accounts (i.e. the “List users” page). By default, the list
that appears will be of all “Active” users (i.e. “Show Active only”).
- Select the user you wish to mark as “Inactive” from the list of users that appears on the page. You can navigate through the list of users by scrolling to the bottom of the “List users” page and clicking through the page numbers.
- Click on the username of the user you wish to mark as “Inactive”; AtoM will direct you to that user’s profile view page.
- Switch from view mode to edit mode by clicking the “Edit” button in the button block, or by clicking on the “User details” heading; this takes you to the user’s edit page.
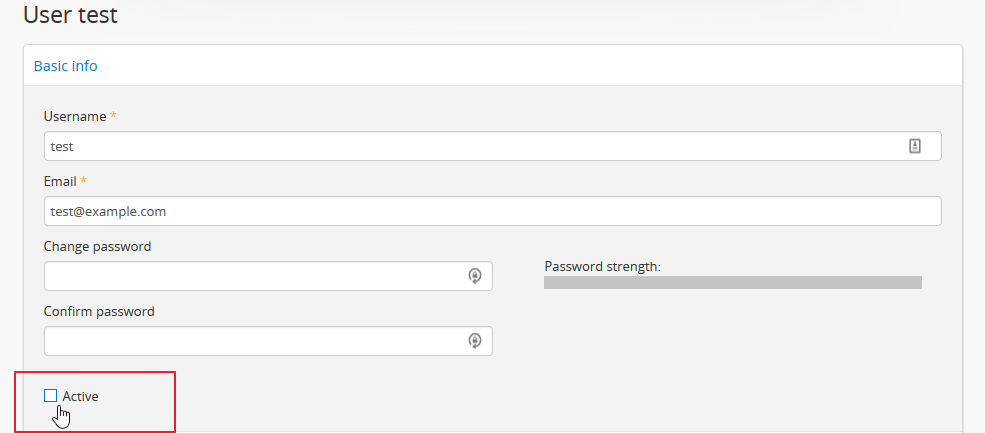
- Mark the user as “Inactive” by unchecking the box next to “Active”
in the “Basic info” information area of the user’s profile; a blank box will set that user’s status as “Inactive”.
Tip
To mark a new user as “Inactive” at the point that their profile is created, follow the instructions in Step 5.
- You can quit the process at any time by clicking the “Cancel” button in the button block; any changes made will not be saved. Note that simply navigating away from the page by any other means, without first clicking “Save” will also result in no changes being saved to the user profile.
- To save your edits, click the “Save” button located in the button block.
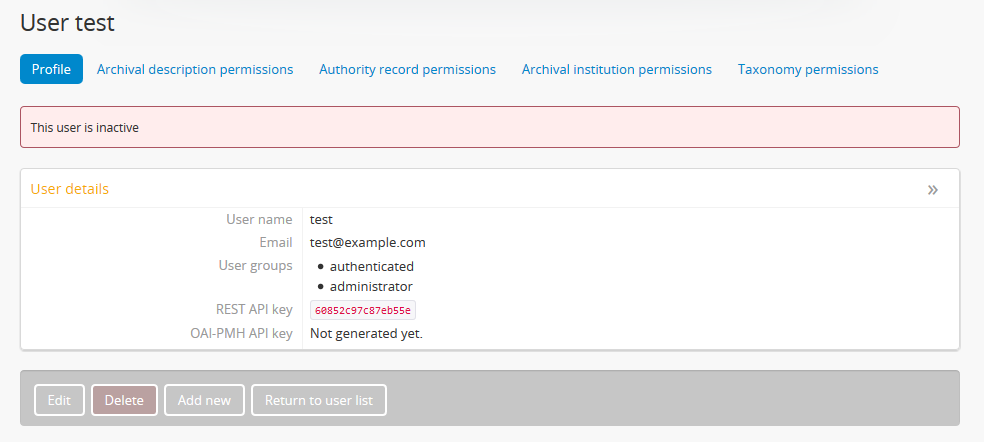
AtoM will be redirected to the view page for the edited user where you can review your work. You’ll note the big red warning at the top of the page indicating that the user is now inactive. Inactive users will no longer be able to log in with their existing credentials, until an administrator marks their account as active again. Follow steps 3 through 7 if you would like to reverse the changes made.
Delete a user
Follow the instructions below to delete a user in AtoM:
Warning
If you delete a user from AtoM, you are deleting them permanently from the system; both the user and the user profile will be deleted. It might be better suited to render a user’s status as “Inactive” rather than deleting them from AtoM permanently. For more information on marking a user’s status as “Inactive”, see: Mark a user “Inactive”.
- Navigate to the user you wish to delete from AtoM. You can do this by
clicking the Admin menu in the main
menu located in the header bar, and selecting “Users” from the :term
:drop-down menu. This will take you to a list of current users accounts
(i.e. the “List users” page).
- Select whether you wish to view “Active” users (i.e. “Show Active only”) or “Inactive” users (i.e. “Show Inactive only”).
- The list will appear in alphabetical order. Find and click on the username of the user you wish to delete. You can navigate through the list of users by scrolling to the bottom of the “List users” page and clicking through the page numbers.
- Once you click on the username, AtoM will direct you to the user’s profile view page. To delete the user, click the Delete button in the button block.
- AtoM prompts you to confirm the delete request: click “Delete” to proceed (or you can click “Cancel” to return to the user’s profile view page).
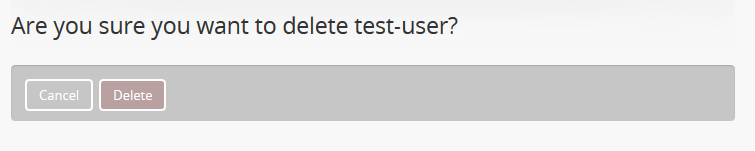
- AtoM will delete the user and redirect you to the “List users” page.
Delete a group
Follow the instructions below to delete a user group in AtoM:
Warning
Deleting a user group in AtoM will remove that group from any user profile it has been linked to. Be careful, as this might alter a user’s access privileges in AtoM.
- Navigate to the group you wish to delete from AtoM. You can do this by
clicking the Admin menu in the main
menu located in the header bar, and selecting “Groups” from the
drop-down menu. This will take you to a list of current groups
(i.e. the “List groups” page).
- Click on the name of the group you wish to delete.
- AtoM will direct you to the group’s view page. To delete the group, click the Delete button in the button block.
- AtoM prompts you to confirm the delete request: click “Delete” to proceed (or you can click “Cancel” to return to the group’s view page).
- AtoM will delete the user and redirect you to the “List groups” page.
Login security features
Administrators have the ability require logged-in users to have strong passwords, as well as limit administrator functionality by IP address or require SSL for all administrator functionality. These settings are found in Admin -> Settings -> Security. See Security panel for more information.