Manage Menus
AtoM includes a menu customization feature that allows authenticated (i.e. logged-in) administrators to manage menu labels; menus can be edited, created, moved to different positions on the page, and some menus can be deleted as necessary.
To view a list of menus, click the  Admin menu
in the main menu located in the header bar and select “Menus”
from the drop-down menu.
Admin menu
in the main menu located in the header bar and select “Menus”
from the drop-down menu.
Below, you will find instructions on how to:
Note
Changing the menu labels will not automatically change the corresponding labels in the user interface. To change the user interface labels, go to Admin > Settings > User interface labels. See the User interface labels page for more information.
Add a new menu
An authenticated (i.e. logged in) administrator with edit privileges can edit or update a menu type at any time. Users may add new menus to link to items such as new static pages or external URLs. Users could also add menus to link to new actions or modules (such as new edit templates), but such actions or modules would need to be created first by developers working directly with the code.
For more information on edit privileges and user roles see: User roles. For information on logging in, see: Log in.
To add a menu in AtoM:
- Navigate to the menu list: click on the Admin menu in the main menu located in the
header bar and select “Menus” from the drop-down menu.
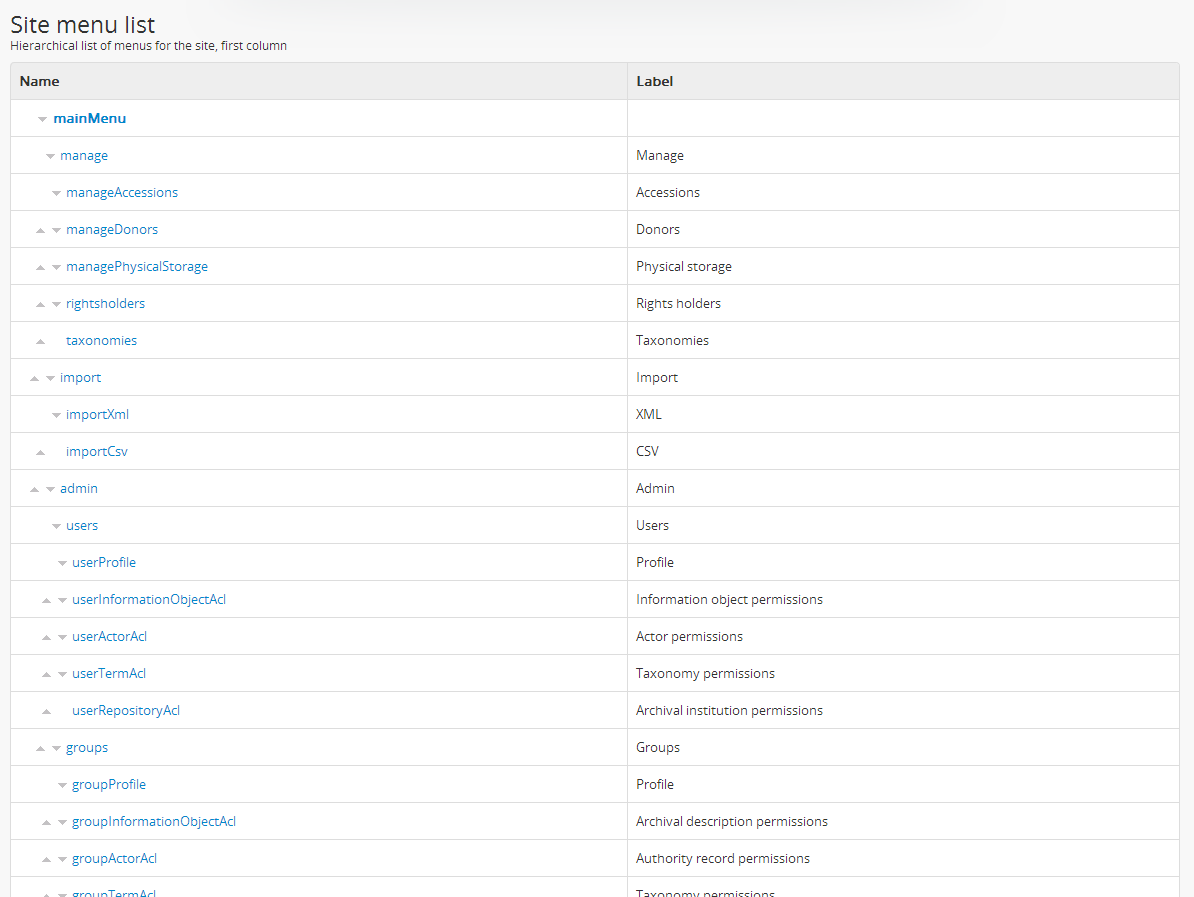
AtoM will direct you to the “Site menu list” view page.
- Scroll to the bottom of thepage and click on the Add new button in the button block.
- AtoM takes you to a blank edit page for data entry. On loading, the edit page displays all the information areas.
- Enter data in the blank field located below the information area headings.
- In the “Name” field, enter a name for the menu.
- In the “Label” field, enter a label (this does not need to be the same as the “Name”).
- In the “Parent” field, select a parent menu from the drop-down menu.
- In the “Path” field, enter the URL for the menu.
- In the “Description” field, enter descriptive information about the menu if desired.
- You can quit the creation process at any time by clicking the “Cancel” button in the button block; any data already entered will not be saved, and no new menu will be created. Note that simply navigating away from the page by any other means, without first clicking “Create” will also result in no new record being created.
- To save the new menu, click the “Save” button in the button block.
- AtoM will redirect you to the main page. The new menu should be visible and should link to your static page or external URL.
Edit an existing menu
To edit an existing menu in AtoM:
- Navigate to the menu list: click on the Admin menu in the main menu located in the
header bar and select “Menus” from the drop-down menu.
AtoM will direct you to the “Site menu list” view page.
- Click on the blue menu name you wish to edit to be directed to that menu’s edit page.
- On loading, the edit page displays the menu name with all information areas and editable fields grouped under them.
- Add or edit data as required.
- You can quit the create process at any time by clicking the “Cancel” button in the button block; any changes made will not be saved. Note that simply navigating away from the page by any other means, without first clicking “Save” will also result in no changes being saved to the menu type.
- To save your edits, click the “Save” button located in the button block at the bottom of the record. You will be redirected to the main page.
Move an existing menu
There are two ways to move an existing menu in AtoM. Start by navigating to the
menu list page. You can do this by clicking on the Admin menu in the main menu located in the
header bar and select “Menus” from the drop-down menu.
AtoM will direct you to the “Site menu list” view page.
From here you can either:
Click on the up or down arrow located to the left of each menu link;
or
Click on the blue menu name you wish to edit to be directed to that menu’s edit page where you can change the “Parent” field to select a new parent menu. For example, if you wish to make the “Archival institution” menu a sub-menu of the admin menu in the main menu, select “Admin” from the drop-down menu.
Delete an existing menu
To delete an existing menu:
- Navigate to the menu list by clicking on the Admin menu in the main menu located in the
header bar and selecting “Menus” from the drop-down menu.
AtoM will direct you to the “Site menu list” view page.
- Click on the blue menu name you wish to delete to be directed to that menu’s edit page.
- Scroll to the bottom of the edit page and click the delete button in the button block.
- AtoM will provide a warning and prompts you to confirm that you really wish to delete the institution. To delete the record, click the delete button.
- AtoM will delete the record and opens the menu list page.
Note
This action cannot be undone. However, the menu can be restored as a new menu. For more information, see add a new menu.