CSV import
Most often understood as an acronym for “comma-separated values” (though sometimes called “character-separated values” because the separator character does not have to be a comma), CSV is a file format that stores tabular data in plain-text form. Information with common properties that can be expressed as a sequence of fields sharing a common header can be stored in plain-text using the CSV format, making it application agnostic and highly transportable.
A CSV file consists of a number of records (rows), that have identical fields, separated by commas (or in some cases, another separator). Often a header column (i.e. the cell values in first or top row of a CSV file) is included, naming each column and indicating what kind of data the column contains. Data is then entered using a separator or delimitor (such as a comma) to indicate a separation of fields (or cells), and a line break or carriage return to indicate rows (i.e. different records). Most spreadsheet applications (such as OpenOffice Calc or MS Excel) can open CSV files and express them as a spreadsheet. See Wikipedia for more information on CSV.
In AtoM, the CSV import function allows user to import data from a spreadsheet, or another database (so long as the export from the database is made to conform with the AtoM CSV template format). Artefactual has created a number of CSV templates that can be used to import various different entity types. AtoM expects the column headers used in the templates and imports that do not conform to this pattern will fail or cause unexpected results.
CSV imports peformed via the user interface in AtoM are are executed as jobs and performed asynchronously in the background to avoid timeouts in the web browser. Jobs in AtoM are handled by Gearman, and the status of AtoM jobs can be seen in the user interface via the Manage > Jobs page. For more information, see: Manage jobs and Asynchronous jobs and worker management.
To import CSV files, a user must be logged in as an administrator. For more information on user groups and permissions, see:
In addition to importing new records, AtoM can also attempt to identify matches on existing records and either update them in place, or delete the matches before importing the new records as replacements. This functionality will be described in greater detail below, along with other import options.
Jump to:
- Before you import
- Map legacy IDs to express hierarchical data
- Prepare archival descriptions for CSV import
- Import new archival descriptions via CSV
- Update existing descriptions via CSV import
- Prepare events for CSV import
- Import events via CSV
- Prepare archival institution records for CSV import
- Import new archival institutions via CSV
- Update archival institutions via CSV import
- Prepare authority records for CSV import
- Import new authority records via CSV
- Update authority records via CSV import
- Prepare accession records for CSV import
- Create new accession records via CSV import
See also
All AtoM CSV templates can be found on the AtoM wiki:
CSV imports can also be completed by a system administrator via the command-line interface. For more information, see The Administrator’s Manual:
For other import options, see:
Before you import
Before you start importing records, there are a number of things you’ll need to do to prepare. You’ll likely want to determine import complexity to see how much technical resources need to be allocated and you’ll want to make modifications to your import data to ensure that it imports properly. Below are some guidelines to help you prepare your data for import into AtoM via CSV.
Important
We strongly recommend that imports never be carried out in your production environment, if possible. Instead, consider deploying a development/test version of your AtoM instance, performing the import(s) there, reviewing the data for any problems and making any required edits via the user interface, and then migrating this data to your production server. For more information, please see our section on Server migration in the Administrators manual.
Determining import complexity
To quickly gauge the complexity of CSV data you wish to import, the
csv:check-import command can be used in the command-line. This command
displays the following:
- The number of rows of data (useful when estimating the amount of processing time needed to perform the import, and whether or not you can use the user interface to perform the import)
- The number of columns (useful when estimating the amount of developer time needed to map the columns to AtoM data - see: CSV Column mapping below)
- How many instances of pipe (|) characters are found in each column (pipe characters are used by some systems to put multiple values in a single cell of data)
- Sample column values
You will need access to the command-line of the server on which AtoM is installed, and you will need to know the file path where your CSV is currently located. Run the command from the root directory of your AtoM install.
Example use:
php symfony csv:check-import lib/task/import/example/rad/example_information_objects_rad.csv
CSV Column mapping
AtoM was originally built to encourage broad adoption and use of the ICA’s international standards, and expanded to support other recognized standards. Consequently, all of the description templates in AtoM correspond to a recognized content or metadata exchange standard, and many of the fields in our underlying database model are also inspired by ICA standards. For your data to import successfully into AtoM, you will first need to map it to one of our existing CSV templates, which are derived from the various standards-based templates available in AtoM for description.
Mapping your data to the supplied CSV templates below implies a familiarity with the standards used in AtoM, so you can make appropriate decisions on which fields in your data map to which fields in AtoM, and how to proceed if your data does not easily map 1:1 with the standard upon which our templates are based.
For further information and source links to the standards used in AtoM, see:
The cell values in the top row of a CSV data file conventionally name each column. The name indicates what kind of data the column contains. If the CSV data you wish to import doesn’t include a row like this, you should insert one. You should then make the names correspond to AtoM-friendly names using the top row of data in the example CSV file(s) appropriate to your import.
Available example files are:
- ISAD archival description CSV template
- RAD archival description CSV template
- Authority record CSV template
- Authority record aliases CSV template
- Authority record relationships CSV template
- Accessions CSV template
- Deaccessions CSV template
- Events CSV template
- Repository CSV template
All CSV templates can be found on the AtoM wiki:
You can also find all example CSV import templates included in your AtoM
installation, in: lib/task/import/example.
The order of the columns in the example CSV files is the same as the order in the AtoM interface, and should be maintained. Having the correct names in the cell values of the first row of your CSV data enables AtoM to import values in each column to the correct AtoM fields.
Tip
A good way to make sure your column mapping is correct is to create a blank row after the top row and populate this with test values. You can then do an import, stop it after the first row (using CTRL-C), and make sure that all the values from the CSV row are present in AtoM. Including, in each field of a row, the letter corresponding to the corresponding spreadsheet column (including, for example, the text “(A)” for data in spreadsheet column A) makes it easy to quickly determine if a field is showing up on the AtoM side after import.
Verify character encoding and line endings
For your CSV files to import properly, you will need to ensure two things prior to importing: that the character encoding of your CSV file is set to UTF-8, and that the end-of-line characters used in your CSV conform to the Unix/Linux style of newline character.
Important
Your import will likely fail if you don’t ensure these two things are are correctly set prior to import! Please review the sub-sections below for further details.
Character encoding (UTF-8)
For a CSV file to upload properly into AtoM (and display any special characters such as accents contained in the data), your CSV file must use a UTF-8 character encoding. If you have used a Windows or Mac spreadsheet application (such as Excel, for example), it’s possible that the default character encoding will not be UTF-8. For example, Excel uses machine-specific ANSI encoding as its defaults during install, so an EN-US installation might use Windows-1252 encoding by default, rather than something more universal such as UTF-8 (the default encoding in AtoM). This can cause problems on import into AtoM with special characters and diacritics. Make sure that if you are using Excel or another spreadsheet application, you are setting the character encoding to UTF-8. Many open source spreadsheet programs, such as LibreOffice Calc, use UTF-8 by default, and include an easy means for users to change the default encoding.
Tip
For Excel users, here is an eHow guide on converting CSV files to UTF-8: http://www.ehow.com/how_8387439_save-csv-utf8.html
Line endings
“In computing, a newline, also known as a line ending, end of line (EOL), or line break, is a special character or sequence of characters signifying the end of a line of text. The actual codes representing a newline vary across operating systems, which can be a problem when exchanging text files between systems with different newline representations.” (Wikipedia)
Here are some of the differences:
- Unix / Linux / FreeBSD / OS X use LF (line feed,
\n, 0x0A) - Macs prior to OS X use CR (carriage return,
\r, 0x0D) - Windows / DOS use CR+LF (carriage return followed by line feed,
\r\n, 0x0D0A)
AtoM’s CSV import will expect Unix-style line breaks ( \n ). If you have
been using a spreadsheet application (such as Excel) on a Mac or Windows, you
may encounter import issues. There are many command-line utilities and free
software options out there to convert newline characters. Please ensure that
your spreadsheet is using the correct line endings prior to upload, otherwise
the upload will fail.
Data transformation
If you are working with a CSV export from another system (such a different database), you may need to do further pre-processing to prepare your CSV. If your previous system was designed for standards-compliance to a standard that AtoM supports (see: Descriptive standards), the mapping process might be simple - but if your system used custom data fields, mapping to one of the supported standards could be trickier.
You may, for example, want to combine multiple CSV column values, that don’t cleanly map conceptually to AtoM-compatible CSV columns, into single columns so they can be put into AtoM as notes. So ColumnA and ColumnB could be combined into a generalNote column. This requires you to transform the data before importing.
Depending on the size of your import data, this work can be done manually using a spreadsheet program - simply cut and paste your data into the corresponding cell in the provided import templates. However, for larger data sets, data transformation can be done with custom programming (for example, a Python script written by a developer), existing tools such as the open source Pentaho Data Integration application, or by use of a CSV transformation script.
We have included some guidelines for creating custom CSV transformation scripts. See:
Note
Creating custom CSV scripts is an activity generally performed by a developer.
Estimating import duration
Once you’ve mapped the columns names in your CSV export to the corresponding AtoM-compatible CSV column names you may wish to perform a test import.
A test import gives you an idea how long the import will take to complete on your hardware. To estimate how long it will take to import 20,000 rows of CSV data, for example, you could time the import of the first 1000 records and multiply that by 20.
If your test import proves to be too slow on your hardware, or you don’t have hardware to spare, you can consider using cloud computing resources, such as Open Hosting, Amazon EC2, or Rackspace Cloud.
Testing your import
Once you’ve prepared your import, you may want to clone your AtoM site and test your import on the clone before importing to your production AtoM installation. This prevents you from having to delete any improperly imported data. During import testing if you want to delete all imported data you can use the command-line purge tool.
See: Purging all data in the Administrator’s manual for more information.
Legacy ID mapping: dealing with hierarchical data in a CSV
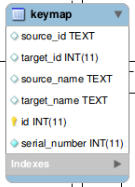
A representation of the keymap table in AtoM, from an Entity Relationship Diagram of AtoM’s MySQL database.
The legacyId column in imports is used to associate specific legacy data to AtoM data using ID columns. Why would you need to associate this data? Let’s say you’re importing a CSV file of description data you’ve exported from a non-AtoM system. If the imported descriptions are in any way hierarchical – with a fond containing items for example – a column in a child description will have to specify the legacy ID of its parent. The parent’s legacy ID can then be used to look up the AtoM ID of the parent that was imported earlier. With the AtoM ID discovered, the parent/child relationship can then be created. In addition to hierarchical description data, supplementary data such as events must specify a legacy parent ID when imported.
When CSV data is imported into AtoM, values in the legacyID column are stored in AtoM’s keymap table, in a column named source_id. A system administrator or developer can access this information, either via the command-line, or by using a graphical application such as phpMyAdmin to look up exising legacy ID values in the source_id column of the MySQL keymap table.
Note
Even if you are importing your descriptions as top-level records, we still
recommend using a legacyId value during import. Simply leave both the
parentID and qubitParentSlug columns blank for any row you want to
import as a top-level description.
In cases where data is being imported from multiple sources, legacy IDs may
conflict. Two datasets, for example, may have objects with an ID of 3. When
importing, you can use the command-line option --source-name to only record
or reference mappings for a specific data source. This will add a value in
the source_name column of AtoM’s keymap table, which can then be used for
mapping subsequent imports.
Tip
There is no way to set the --source-name during an import conducted via
the user interface. Instead, the file name of the import is used as
the source name value by default.
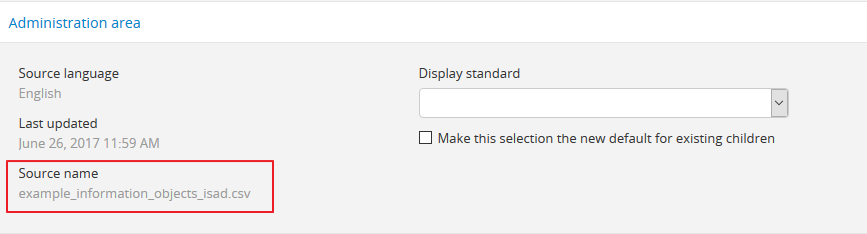
You can always check what source name was used for records created via an import by entering into edit mode and navigating to the Administration area of the edit page - the source name used will be diplayed there:
The following example shows an import of information objects that records a specific source name when mapping legacy IDs to AtoM IDs:
php symfony csv:import information_objects_rad.csv --source-name=collection_name
In the above example, collection_name represents the value added by the user
during import - now collection_name will be added to the source_name column
of the keymap table for all records imported. Given the above example, the
subsequent import of events using the following
command would make sure that they get associated with information objects from
the specific source identified as collection_name:
php symfony csv:event-import events.csv --source-name=collection_name
Tip
If you use the --source-name command-line option during your CSV
import and you want to use spaces in the source name you add, you will
need to enclose it in quotation marks. For example, both of the following
are valid:
php symfony csv:import information_objects_rad.csv --source-name=collection_name
or:
php symfony csv:import information_objects_rad.csv --source-name="collection name"
The --source-name option can also be used to keep larger imports that
have been broken into multiple CSV files related. Adding the --source-name
option to each CSV import, with a common name added for each, will prevent
AtoM from duplicating import data, such as terms and actors
(authority records) during import.
Prepare archival descriptions for CSV import
The AtoM CSV import allows you to map CSV columns with specific headers to
AtoM data. Example RAD and ISAD CSV template files are available in AtoM source
code (lib/task/import/example/rad/example_information_objects_rad.csv and
lib/task/import/example/isad/example_information_objects_isad.csv) or you
can download the files here:
The following section will introduce some of the relevant CSV columns so you can prepare your archival descriptions for import.
Hierarchical relationships
Information objects often have parent-child relationships - for example, a series may be a child of the fonds to which it belongs; it has a parent fonds. If you want to import a fonds or collection into AtoM along with its lower levels of description (i.e. its children - series, files, items, etc.), you will need a way to specify which rows in your CSV file belong to which parent description.
There are two basic ways to specify which information object is the parent of an information object being imported in your CSV - either through the use of the legacyID and parentID columns (generally used for new descriptions being imported, or from descriptions being migrated from another access system), or by using the qubitParentSlug column to import new child descriptions to an existing description in AtoM.
Warning
Note that if you set both the parentId and qubitParentSlug in a single row, the import will default to using the qubitParentSlug. In general, only one type of parent specification should be used for each imported information object (i.e. each row in your CSV).
You can use a mix of legacyId/parentId and qubitParentSlug in the same CSV, just not in the same row. So, for example, if you wanted to import a series description as a child of a description already in AtoM, as well as several files as children of the series description, you could set a legacyID for the series, use the qubitParentSlug to point to the parent fonds or collection already in AtoM, and then use the parentID column for all your lower-level file descriptions. However, using both parentID and qubitParentSlug in the same row will cause a conflict, and AtoM will prefer the qubitParentSlug so the import does not fail.
Both methods of establishing hierarchical relationships are described below.
Note
If you want your records to import as top-level descriptions, simply
include a legacyID value, and leave both the parentID and
qubitParentSlug columns blank for that row.
LegacyID and parentID
One way to establish hierarchical relationships during a CSV import involves the use of the parentId column to specify a legacy ID (referencing the legacyId column of a previously imported information object). This way is most often used for migrations from other access systems. Using this method, parent descriptions (e.g. fonds, collections, etc) must appear first (i.e. above) in your CSV and must include a legacyID - while child records must appear after (i.e. below) their parent records in your CSV, and must include the legacyID of the parent record in the parentID column.
Here is an example of the first three columns of a CSV file (shown in a spreadsheet application), importing a Fonds > Series > Item hierarchy:

Important
When the CSV is imported, it progresses row by row - meaning, if your CSV is not properly ordered with parent records appearing before their children, your import will fail!
Records in a CSV are imported sequentially, row by row. As each row is
imported, the legacyID value is added to AtoM’s keymap table in the
database. When a parentID is encountered, AtoM will check the keymap table
for the corresponding legacyID. If a parentID value doesn’t refer to the
legacyID of a previously imported description, AtoM’s import logic will fall
back to check for an existing description with that internal object ID.
If there is still no match, then a warning will be included in the console output (shown on the Job details page), and the record will be imported as a top-level description. Be sure to double-check the results post-import!
qubitParentSlug
The other method of importing hierarchical data into AtoM enables you to specify an existing archival description that doesn’t have a legacyID (one, for example, that has been manually created using the AtoM web interface), and import descriptions as children of the target description(s).
To specify a parent that exists in AtoM, you must first take note of the parent information object’s slug. The “slug” is a textual identifier that is included in the URL used to view the parent description. If the URL, for example, is http://myarchive.com/AtoM/index.php/example-fonds then the slug will be example-fonds. This slug value would then be included in your import in the qubitParentSlug column in the rows of children of the parent description.
Alternately, if you are using the command-line to perform your import, you can
use the --default-parent-slug option in the command-line to set a default
slug value, that will be used when no qubitParentSlug or parentID values
have been included for the row. For more information, see the details in the
Administrator’s manual on command-line CSV export:
Importing archival descriptions.
Here is an example of the first few columns of a CSV file (shown in a spreadsheet application), importing a new series to an existing fonds, and importing two new file-level descriptions to an existing series:

If desired, you can mix the use of the qubitParentSlug column with the use of the parentID column in the same CSV - for example, you could attach a new series to an existing fonds by giving it a legacyID and the slug for the existing fonds in the qubitParentSlug column, and then including lower-level files attached to the new series by adding the legacyID of the new series to the parentID column of the new files.
Important
You should not add both a parentID and a qubitParentSlug to the same row - AtoM expects one or the other. When the import encounters both columns populated in a single row, AtoM will default to use the qubitParentSlug value. In general, each row must have only one or the other - either a parent slug, or a parent ID.
Creator-related import columns (actors and events)
The eventActors, eventActorHistories, eventTypes, eventDates, eventStartDates, and eventEndDates columns are related to the creation of actors and events. In AtoM’s data model, an archival description is a description of a record, understood as the documentary evidence created by an action - or event. It is events that link actors (represented in AtoM by an authority record) to archival descriptions - see Entity types for more information.
The most common use for these columns is to add creation dates associated with an actor via an authority record - in this case, the eventType is Creation, the eventActor is the creator, and the various eventDates fields are the dates of creation associated with the description.
However, some standards support other types of events as well. For example, the ISAD(G) template in AtoM also supports Accummulation as an event type, while the Canadian RAD template allows direct association between actors and events, and includes many other event types, such as contribution, broadcasting, manufacturing, and more.
A brief summary of the fields is included below, followed by a longer discussion of their use:
eventActors: Add the associated creator or other actor name here. AtoM will link to an existing authority record or create a new one. For details on linking behavior, see below: On Authority records, archival descriptions, and CSV imports.eventActorHistories: Add the associated creator or other actor’s administrative or biographical history here. Equivalent to ISAD(G) 3.2.2, RAD 1.7B, and/or DACS 2.7 - Administrative/Biographical history. This will be mapped to the related authority record.eventTypes: Type of event. Values include:- ISAD: Creation, Accumulation
- RAD: Creation, Accumulation, Contribution, Collection, Broadcasting, Manufacturing, Custody, Publication, Reproduction, Distribution
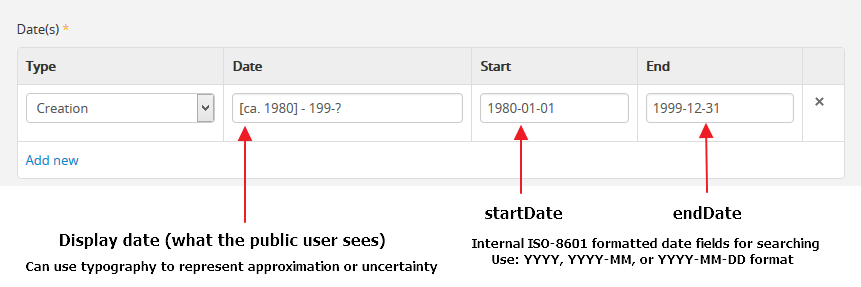
eventDates: Display dates shown in public user interface for event onarchival description view page. May use free-text, including typographical conventions to express approximation or uncertainty (e.g. [190-?]; [ca. 1885]).
eventStartDates: Internal ISO-8601 formatted (e.g. YYYY, YYYY-MM,YYYY-MM-DD) start date of event
eventEndDates: Internal ISO-8601 formatted (e.g. YYYY, YYYY-MM,YYYY-MM-DD) end date of event
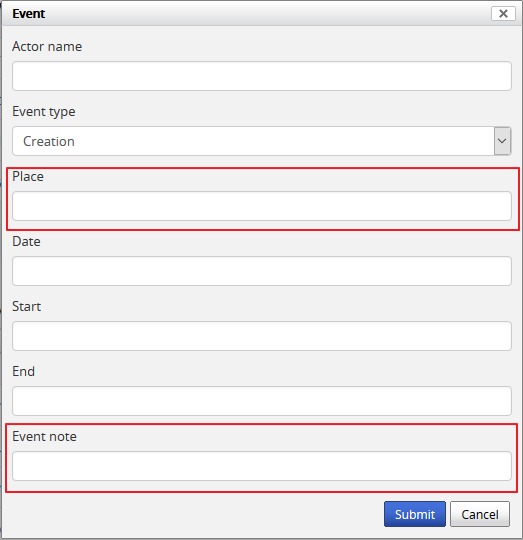
eventDescriptions: Only in RAD CSV template. Adds a note to the eventeventPlaces: Only in RAD CSV templates. Associates a place with the event.
If multiple actors/events exist for an information object, the values in these fields can be pipe-separated (e.g. using the | pipe separator between values).

On Authority records, archival descriptions, and CSV imports
AtoM tries to support the reusability of actor information through the maintenance of authority records that can be linked to archival descriptions and other entities. This, and the rationale for this, is outlined in greater detail in the following sections:
- AtoM, Authority records, Biographical histories, and Access points
- On Name vs. Subject Access Points
This also affects how actor names are handled during a CSV import. Some of the key behaviors are outlined below:
Creating new actor records on import
- AtoM looks for creator names in the eventActors column in the RAD and ISAD CSV import templates, as well as access point names (used as subjects) in the nameAccessPoints column during a CSV import of archival descriptions.
- Similarly, any Administrative / biographical history data in an archival description CSV import (i.e. data contained in the eventActorHistories CSV column will be mapped to the “History” field (ISAAR-CPF 5.2.2) in the related authority record (generated from the data contained in the creators column of the CSV), and then is presented in AtoM in any related descriptions where the entity is listed as a creator.
- Where multiple creator names and histories are included in an import,
eventActors and eventActorHistories elements are matched 1:1 in the
order they appear in the CSV, divided by pipe elements (e.g.
|). For example, if the eventActors column containsname 1|name 2, the eventActorHistories should also includehistory 1|history 2to match on import. If there is no history for the first actor, you can includeNULL, and AtoM will ignore the imput - e.g.name 1|name 2should be matched withNULL|history 2to include only a history for name 2. - This same
NULLapproach can be used for any matched date values where multiple actor names are included for import -eventDates,eventStartDates,eventEndDatescan all includeNULLif you wish to leave these blank when associating multiple actors with an event. An example, using the RAD template:

- If a creator history element is included in a CSV import, but no creator name is included, AtoM will still automatically generate a stub authority record and map the history data to the “History” field (ISAAR-CPF 5.2.2) - the authority record will be left untitled, until the user manually adds the appropriate name to the authority record. Similarly, if there are more eventActorHistories elements included in an import than creator names included in the creators column, the final biographical/administrative history will be mapped to an untitled authority record. Because the slug is normally based on the title of the authority record, AtoM will generate a random alphanumeric string to use as the slug - and you will not be able to edit this through the user interface.
Attempting to match to existing authority records on import
Important
If you are attempting to import both an archival description CSV and an authority record CSV to supplement the actor data that is linked to your descriptions, you must import the authority record CSV first. On import, the description CSV code will look for exact matches to which it can link - but the authority record CSV import code does not currently have similar logic. If you import your authority record CSV template after the description CSV, you might end up creating duplicate authority records!
During an archival description CSV import, AtoM will attempt to find matches for current authority records, and link to those instead of creating new ones during import when possible. However, to avoid collisions, or situations in which multiple imports overwrite the same authority record in a multi-repository system, the approach is conservative - for a match to be made and a link to an existing record added instead of a new record being created, the authorized form of name must bean exact match, and the existing authority record in AtoM must be linked to the same repository as the incoming records’ repository column value. The presence of a matching or different actor history, and the import type (import as new, match and update, or delete and replace) can also affect how actor linking behaves during a CSV import.
This means that users should be careful to double check authority linking behaviors in AtoM following an import, and manually perform any desired adjustments where needed.
For more information on linking an authority record to a repository, see: Link an authority record to a repository as its maintainer. For more information on the different types of imports, see below.
Below is a table summarizing the actor matching behavior on CSV imports of archival descriptions. It is followed by an explanation of the columns.
| # | Import type | Match on name | Match on repository | Match on history | Outcome |
|---|---|---|---|---|---|
| 1 | Any | Yes | Yes (or blank) | Yes (or blank) | Linked (no updates) |
| 2A | New or delete/replace | Yes | Yes | No | New actor created |
| 2B | Update | Yes | Yes (or blank) | No | Linked AND existing history updated |
| 3 | Any | Yes | No | Yes (or blank) | Linked (no updates) |
| 4 | Any | Yes | No | No | New actor created |
| 5 | Any | No | Yes (or blank) | Yes (or blank) | New actor created |
Table legend
- #: Scenario number
- Import type: AtoM’s CSV import supports 3 modes - import a record as new (ignore any matches found); find matches and update the record in place; or find matches, delete the existing record, and import the current record as a replacement. See more on how to use these options below.
- Match on name: Whether or not the CSV row’s
eventActorsvalue matches the existing authority record’s authorized form of name. - Match on repository: Whether or not the CSV row’s
repositoryvalue matches the Maintaining repository linked to the existing authority record. AtoM includes the ability to link an authority record directly to a repository, and this is used as a match parameter during import. For more information on linking authority records to a repository, see: Link an authority record to a repository as its maintainer. Note that during match and update imports, a blank value in a CSV is ignored (the original data is not modified) - hence “Yes (or blank)” as a response in some cases. - Match on history: Whether or not the CSV row’s
eventActorHistoriesvalue matches the biographical or administrative history associated with the existing authority record. Note that during match and update imports, a blank value in a CSV is ignored (the original data is not modified) - hence “Yes (or blank)” as a response in some cases. - Outcome: Based on the variables in the other columns, whether or not the CSV import will result in linking to an existing authority record (and whether or not any parts of the authority record is updated), or if a new actor is created by the import instead.
Scenario summaries
1: If you are importing a CSV and there is a match to an existing authority record’s authorized form of name, history, and the repository the existing authority record is linked to matches the repository in the CSV for the related description, then AtoM will link to the existing authority record.
2A: If you are importing new records or trying to update existing ones using “Delete and replace” and there’s a match on authority record name AND maintaining institution BUT NOT on the admin/bio history, AtoM will create a new authority record, instead of overwriting the match’s existing history. If you wanted to update the existing admin/bio history instead, use the “Match and update” option instead.
2B: If you are trying to update existing descriptions using the “Match and update” option and there’s a match on authority record name AND maintaining institution BUT NOT on the admin/bio history, then AtoM will link to the existing authority record but update the current admin/bio history to the data included in the CSV. If you don’t want this to happen, you can either exclude the admin/bio history (in which case, no changes will be made to the linked authority record) or use the “Delete and replace” import option instead (in which case a new authority record will be created).
3: If you are importing new descriptions or trying to update existing ones and there’s a match on an authority record’s name AND the history is either blank or also matches exactly on the existing authority record, BUT the maintaining repository does NOT match (or is blank on the existing authority record), then AtoM will link to the existing authority record without making any changes to it.
4: If you are importing new descriptions or trying to update existing ones and there’s a match on an authority record’s name BUT neither the repository NOR the admin/biog history matches, then a new authority record will be created (to avoid overwriting another institution’s history). If you want to link to an existing authority record, omit the history from your CSV import or make it exactly match the existing one.
5: If you are importing new descriptions or trying to update existing ones and there is NO match to any existing authority records on the authorized form of the name of the actor in your import CSV, then AtoM will create a new authority record on import. You cannot use the descriptions CSV import to update the authorized form of name of a linked authority record.
Important
Even with the “Delete and replace” update option only the related archival description is deleted - existing authority records and other entities (e.g. access points, etc) are not automatically deleted. If you have created a new authority record, make sure you remember to manually delete any superceded versions!
See also
Digital object-related import columns
As of AtoM 2.1, two new columns have been added to the
ISAD and RAD CSV import
templates: digitalObjectPath and digitalObjectURI. These columns will
allow you to link or upload a digital object and attach it to the new
information object being created in that row of the CSV.
In AtoM, a 1:1 relationship is maintained between information objects and digital objects - meaning that for every archival description, you can only attach one digital object. If you wish, you can create new child records - a number of item descriptions as children of a file-level description; a number of part descriptions as children of an item (for multiple views of a single object, for example, or individual pages of a single book uploaded separately, etc), and so on.
In the CSV templates, the digitalObjectPath and digitalObjectURI
columns are positioned after the publicationStatus column, and before
the physical object-related import columns.

The digitalObjectPath column can be used to upload local digital objects -
simply provide a complete path and filename to the digital object.
The digitalObjectURI column can be used to link to externally hosted,
publicly available digital objects, such as those available at a specific URL
on the web. You must have a path directly to the digital object which includes
a file extension, and not just to a web page with a digital object located on
it somewhere - it is often the equivalent of right-clicking on a digital
object in your browser and selecting “View image”.
You can use a mixture of the digitalObjectPath and digitalObjectURI
columns throughout your CSV (linking some information object rows to locally
uploaded digital objects, and others to web-based resources), but you cannot
use both columns in the same row. If AtoM encounters a CSV row where both the
digitalObjectPath and digitalObjectURI columns are populated, it will
favor the digitalObjectURI value, and ignore the digitalObjectPath
value.
Physical object-related import columns
The physicalObjectName, physicalObjectLocation, and physicalObjectType columns are related to the creation of physical objects and physical storage locations related to an archival description.

For more information on working with physical storage in AtoM, see: Physical storage.
Important
If your CSV import contains physical storage information, the CSV file must
contain information in both of the physical object storage fields:
physicalObjectName and physicalObjectLocation. Entering information
in physicalObjectName only will result in the creation of duplicates,
since AtoM defaults to duplicates rather than accidentally merging separate
records with the same location. For example, several collections may
contain physicalObjectName Box 1, but adding physicalObjectLocation
Shelf 1 will differentiate it from Box 1 on Shelf 5.
Other data entry notes
- language and languageOfDescription, like culture, expect two-letter
ISO 639-1 language code values - for example, “en” for English; “fr” for French,
“it” for Italian, etc. See Wikipedia
for a full list of ISO 639-1 language codes. Unlike the culture column,
however, these two fields will accept multiple values separated by a pipe
character - for example,
en|fr|it. - The script and scriptOfDescription columns expect four-letter ISO 15924 script code values - for example, “Latn” for Latin-based scripts, “Cyrl” for Cyrillic scripts, etc. See Unicode for a full list of ISO 15924 script codes.
- Alternative identifiers and their display labels can be imported using the
alternativeIdentifiers and alternativeIdentifierLabels columns. Use pipe
(
|) separators to add multiple values. There should be a 1:1 relationship between the number of identifier values in the alternativeIdentifiers column and corresponding labels in the alternativeIdentifierLabels column. - An accessionNumber column can be added to create a link between an existing accession record and an archival description being imported via CSV. See the section on Accession CSV import below for more information.
Import new archival descriptions via CSV
The following section will introduce how an archival description CSV of new records can be imported into AtoM via the user interface. AtoM also has the ability to use a CSV import to update existing descriptions - for more information on this, see below.
When importing new records, AtoM can also check for existing records that seem to match the descriptions you are about to import, and skip these records if desired - they will be reported in the Job details page of the related import job (see: Manage jobs for more information). This can be useful if you are uncertain if some of the records in your CSV have been previously imported - such as when passing records to a portal site or union catalogue. For more information on the criteria used during a CSV import to identify matches, see below, Matching criteria for archival descriptions.
Important
Before proceeding, make sure that you have reviewed the instructions above, to ensure that your CSV import will work. Here is a basic checklist of things to check for importing a CSV of archival descriptions via the user interface:
- CSV file is saved with UTF-8 encodings
- CSV file uses Linux/Unix style end-of-line characters (
/n) - All parent descriptions appear in rows above their children
- All new parent records have a legacyID value, and all children include the parent’s legacyID value in their parentID column
- No row uses both parentID and qubitParentSlug (only one should be used - if both are present AtoM will default to using the qubitParentSlug)
- Any records to be imported as children of an existing record in AtoM use the proper qubitParentSlug of the existing parent record
- If you have physical storage data in your CSV, you have ensured that all 3 physical storage columns are populated with data to avoid the accidental creation of duplicate storage locations (see above, Physical object-related import columns)
- You have reviewed any other relevant data entry guidelines in the section above: Prepare archival descriptions for CSV import
- You have reviewed how the authority record matching behavior works above, and know what to expect with your import.
If you have double-checked the above, you should be ready to import your descriptions.
To import a CSV file via the user interface:
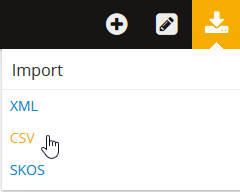
- Click on the
 Import menu, located in
the AtoM header bar, and select “CSV”.
Import menu, located in
the AtoM header bar, and select “CSV”.
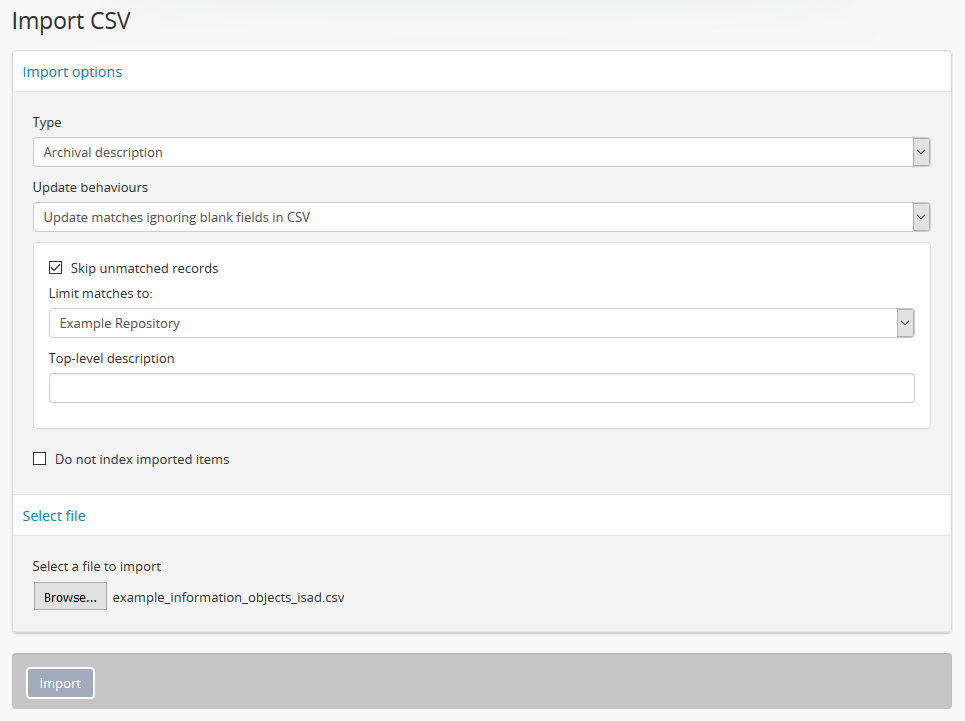
- AtoM will redirect you to the CSV import page. To import new archival descriptions, Make sure that the “Type” drop-down menu is set to “Archival description” and the Update behaviors drop-down is set to “Ignore matches and create new records on import.”
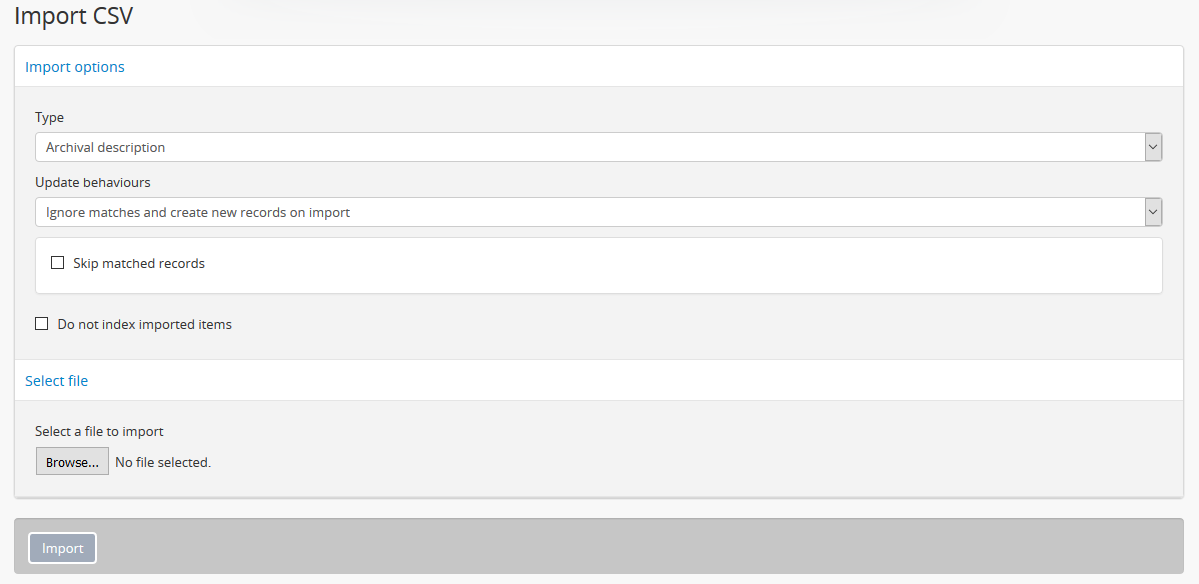
- AtoM can check for existing records that seem to match the descriptions you are about to import, and skip these records if desired - they will be reported in the Job details page of the related import job (see: Manage jobs for more information). To enable this option and skip matched records, click the checkbox labelled “Skip matched records.”
- If you do not want your files indexed during the import, you can click the checkbox labelled “Do not index imported items.” This will prevent the new records from automatically being added to AtoM’s search index.
Warning
If you do not index your records during import, they will not be discoverable via search or browse in the user interface! You will need to know the exact URL to reach them. To make them visible in the interface again, a system administrator will need to rebuild the search index. See: Populate search index.
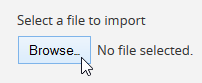
- When you have configured your import options, click the “Browse” button to open a window on your local computer. Select the CSV file that you would like to import.
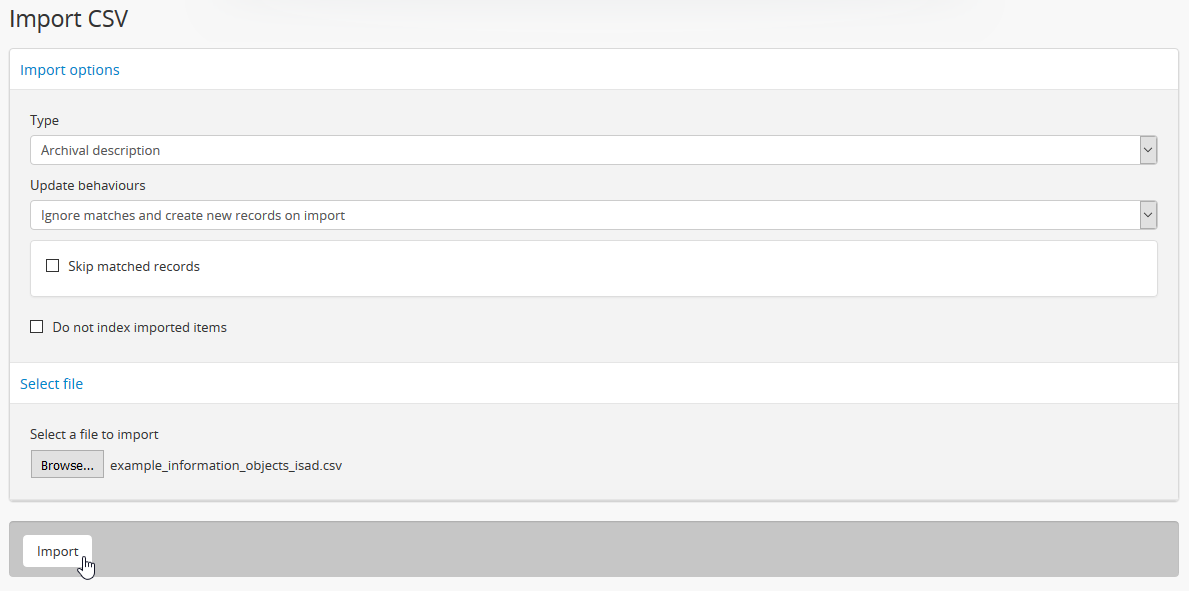
- When you have selected the file from your device, its name will appear next to the “Browse” button. Click the “Import” button located in the button block to begin your import.
Note
Depending on the size of your CSV import, this can take some time to complete. Be patient! Remember, you can always check on the status of an import by reviewing the Job details page of the related import job - see: Manage jobs for more information.
- After your import is complete, AtoM will indicate that the import has been initiated. A notification at the top of the page will also provide you with a link to the Job details page of the related import job. Alternatively, you can click the “Back” button in the button block at the bottom of the page to return to the CSV import page, or navigate elsewhere in the application.

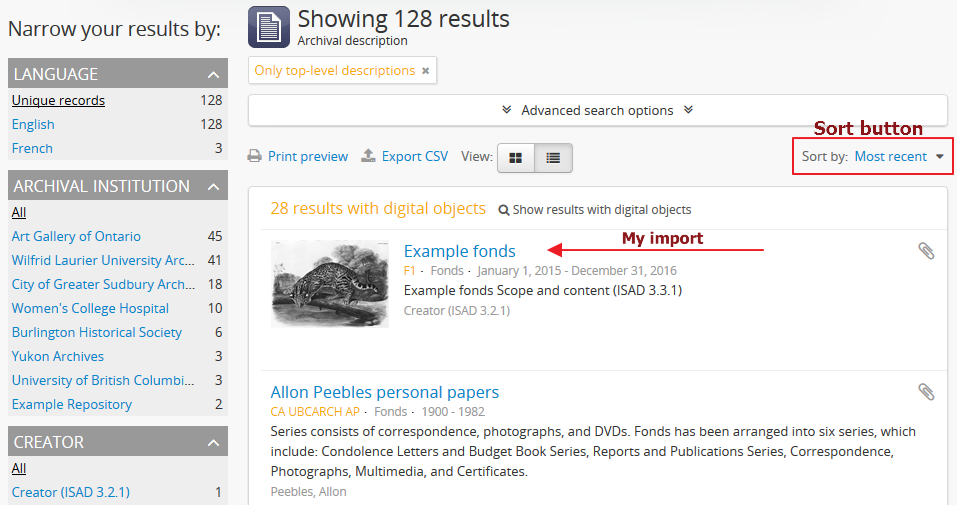
Tip
Want to find your recent imports? You can use the sort button located in the top-right hand side of the archival description browse page to change the results display to be ordered by “Most recent” if it is not already - that way, the most recently added or edited descriptions will appear at the top of the results. If you have come directly here after importing your descriptions, they should appear at the top of the results.
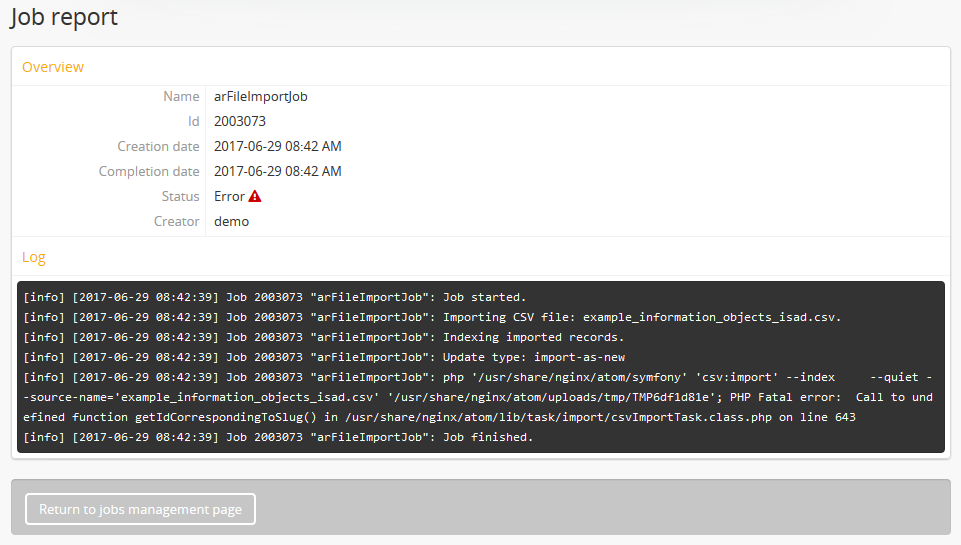
- If any warnings or errors are encountered, AtoM will display them on
Job details page of the related import job.
Generally, errors will cause an import to fail, while warnings will be
logged but will allow the import to proceed anyway. Errors can
occur for many reasons - please review the checklist
above for suggestions on resolving
the most common reasons that CSV imports fail. In the example pictured
below, the CSV includes a
qubitParentSlugvalue for a description that does not exist - so AtoM cannot attach the CSV row description to its intended parent:
Update existing descriptions via CSV import
AtoM’s CSV import includes the ability to use the import to update existing descriptions in two different ways, depending on the outcome desired. After attempting to identify existing matches, AtoM can either delete the existing match and replace it with the matched row in the CSV import, or it can attempt to use the matched CSV row to update the description in-place with new data. Both options (and their limitations) will be explained further below, along with the additional import options available when importing updates.
Jump to:
- Matching criteria for archival descriptions
- Update matches in place
- Delete matches and replace with imported records
- Importing updates via the user interface
Matching criteria for archival descriptions
AtoM uses the following cascading criteria when checking for matches on existing archival descriptions during a CSV import:
- First AtoM will look for an exact match in the
legacyIDand thesource_namevalue (for more information onsource_name, see above: Legacy ID mapping: dealing with hierarchical data in a CSV). During a CSV import via the user interface, the default source name value stored will be the filename of the CSV.
Tip
You can always check what source name was used for records created via an import by entering into edit mode and navigating to the Administration area of the edit page - the source name used will be diplayed there:
- If no match is found on
legacyIDandsource_name, then AtoM will look for an exact match on title, repository, and identifier. - If there is no exact match on all of these 3 values, then the record is considered not to have a match. Depending on user settings during import, it will either import as new, or be skipped and reported in the Job details page.
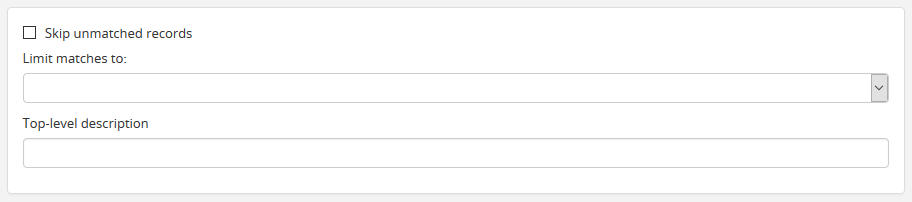
The default behavior when no match is found during an updates import is to import the record as a new description. However, AtoM does have an option in the user interface (and in the command-line options) to skip unmatched records. When this option is selected, any records that do not match existing descriptions will be ignored during the import, and reported in the console log shown on the Job details page of the related import job (see: Manage jobs for more information). This is recommended if you are intending to only import updates to existing records.
Warning
If you are working with hierarchical data and you include a parentID
value in a CSV import that cannot be matched on import (for example, the
parent is not included in the CSV, and a matching parentID is not found in
the keymap table duing import, AtoM will add the record as a top-level
description. The console output shown on the Job details
page of the related import job will say “attaching to root” for that
record.
If you don’t want this to happen, make sure you use the “Skip unmatched” option!
You can also narrow the scope of the matching criteria to either records linked to a specific repository (i.e. an archival institution), or a specific archival unit (i.e. a top-level description such as a fonds or collection, etc.). To avoid contradictory options, AtoM will only allow one of these parameters to be specified at a time. These options are useful for ensuring that you are matching the correct descriptions before updating them - for example, when importing updates to the records of one specific institution into a multi-repository system.
Update matches in place
AtoM’s first option for updates allows you to use incoming CSV data as an update to existing descriptions. Whenever a match is found for an existing description, AtoM will use the data in the CSV to update the related field in place. If a column is left blank in the updates CSV, it will be ignored (it will not overwrite existing data by erasing it).
To import a CSV as updates to existing descriptions, select the option “Update matches ignoring blank fields in CSV” from the “Update behaviours” drop-down menu on the CSV import page.

Important
AtoM can only update description fields that are stored in the primary information object database table using this method. This means that related entities (such as events, creators, access points, physical storage locations, etc.) cannot be deleted or updated with this method. You can add additional related entities, but the old ones will be left in place. There is code to prevent duplication however - so if you have left the same creator/event information as previously, it will be ignored.
The one exception to this is updating the biographical or administrative history of a related authority record, which requires specifc criteria. See scenario 2B in the section above, Attempting to match to existing authority records on import.
Additionally, in AtoM notes are stored in a different database table - this includes the General note, Archivist’s note, and the RAD- and DACS-specific note type fields in AtoM’s archival description templates. This means that in addition to related entities, notes cannot be deleted or updated with this method
If you wish to make updates to these entitites or fields, consider using the “Delete and replace” update option instead - though be sure to read up on the behavior and limitations of that method as well!
If a match is not found during the import, the default behavior is to import the CSV row as a new record. If you are only importing updates, we recommend clicking the checkbox for the “Skip unmatched records” - AtoM will then skip any unmatched CSV rows and report them in the console log shown on the Job details page of the related import job.
Specific instructions on configuring the user interface for import are included below - see: Importing updates via the user interface.
Delete matches and replace with imported records
AtoM’s second update option allows you to identify matched descriptions during import, and then delete the matches prior to importing the CSV data as a new record to replace it.
Note that only the matched archival description and its children are deleted during this process. Any related/linked entities (such as an authority record linked as a creator, subject/place/name/genre access points, linked accession records, physical storage locations, etc.) are not automatically deleted. If you want these fully removed, you will have to find them and manually delete them via the user interface after the import.
Once the original matched archival description has been deleted, the CSV
import proceeds as if the record is new. That is to say, just as AtoM does not
automatically delete related entities in the original archival
description, it also not automatically re-link previously related entities.
Instead, AtoM will use its default matching behaviors to determine if related
entities in the import (such as a creator in the eventActors CSV
column) should be linked to existing records in AtoM, or created as new
records during the import. AtoM’s matching criteria for authority records is
outlined above - see: Attempting to match to existing authority records on import
To import an archival description CSV of records as replacements for existing descriptions in AtoM, select the “Delete matches and replace with imported records” option from the “Update behaviours” drop-down menu on the CSV import page.

If a match is not found during the import, the default behavior is to import the CSV row as a new record. If you are only importing updates, you can click the checkbox for the “Skip unmatched records” if desired - AtoM will then skip any unmatched CSV rows and report them in the console log shown on the Job details page of the related import job.
Warning
It is very difficult to use the “Skip unmatched records” option with a “Delete and replace” import when working with hierarchical data. Once a match is found for the top-level description (e.g. the root parent record), AtoM will then proceed to delete the original description and all of its children (e.g. lower level records). This means that when AtoM gets to the next child row in the CSV, it will find no match in the database - because it has already deleted the children - and the records will therefore be skipped and not imported.
Unless you are only updating standalone descriptions (e.g. descriptions with no children), we do not recommend using the “Skip unmatched records” with the “Delete and replace” import update method.
Specific instructions on configuring the user interface for import are included below - see: Importing updates via the user interface.
Importing updates via the user interface
Important
Before proceeding, make sure that you have reviewed the preparation instructions above, to ensure that your CSV import will work. Here is a basic checklist of things to check for importing a CSV of archival descriptions updates via the user interface:
- CSV file is saved with UTF-8 encodings
- CSV file uses Linux/Unix style end-of-line characters (
/n) - All parent descriptions appear in rows above their children
- All new parent records have a legacyID value, and all children include the parent’s legacyID value in their parentID column
- No row uses both parentID and qubitParentSlug (only one should be used - if both are present AtoM will default to using the qubitParentSlug)
- Any records to be imported as children of an existing record in AtoM use the proper qubitParentSlug of the existing parent record
- You have reviewed how the authority record matching behavior works above, and know what to expect with your import.
- If you are using the “Delete and replace” method with hierarchical data - don’t use the “Skip unmatched records” option as well (see above, Delete matches and replace with imported records).
- If you are using the “Update matches ignoring blank fields in CSV” option, you have reviewed which entities and fields cannot be updated using this method (see above, Update matches in place).
If you have double-checked the above, you should be ready to import your updates.
To import a CSV file of description updates via the user interface:
- Click on the Import menu, located in
the AtoM header bar, and select “CSV”.
- AtoM will redirect you to the CSV import page. Make sure that the “Type” drop-down menu is set to “Archival description” .
Select the type of update import you want to initiate.
To update existing archival descriptions in place, select the option “Update matches ignoring blank fields in CSV” from the “Update behaviours” drop-down menu on the CSV import page.
To delete existing matched archival descriptions and replace them with the data in your CSV, select the “Delete matches and replace with imported records” option from the “Update behaviours” drop-down menu on the CSV import page.
Tip
You can read more about each update option in the sections above:
- AtoM’s default behavior when it cannot find a match during an update import is to import the CSV row as a new record. However, if you are only importing updates and don’t want to accidentally create new records when no match is found, you can check the “Skip unmatched records” checkbox. Any unmatched records will not be imported - instead, skipped records will be reported in the Job details page of the related import job (see: Manage jobs for more information).
To improve the default matching behavior (described in detail above: Matching criteria for archival descriptions), you can provide further criteria to help AtoM find the correct match. You can limit the matches to either the holdings of a specific repository, or if you are updating a single archival unit, you can limit matches to a specific top-level description. To prevent contradictory options, these limiters are mutually exclusive - you cannot pick a repository AND a top-level description.
To limit your matches to the holdings of a specifc archival institution, use the drop-down menu to select the name of the related institution
To limit your matches to a specific top-level description, place your cursor in the “Top-level description” field and begin to slowly type the name of the top-level description. This field is an autcomplete menu - as you begin to type, AtoM will display matching records in the drop-down menu that will appear below. When you see the top-level description you want to use as a match limit, click on it in the drop-down menu to select it.
If you do not want your files indexed during the import, you can click the checkbox labelled “Do not index imported items.” This will prevent the new records from automatically being added to AtoM’s search index.
Warning
If you do not index your records during import, they will not be discoverable via search or browse in the user interface! You will need to know the exact URL to reach them. To make them visible in the interface again, a system administrator will need to rebuild the search index. See: Populate search index.
- When you have configured your import options, click the “Browse” button to open a window on your local computer. Select the CSV file that you would like to import as your update.
- When you have selected the file from your device, its name will appear next to the “Browse” button. Click the “Import” button located in the button block to begin your import.
Note
Depending on the size of your CSV import, this can take some time to complete. Be patient! Remember, you can always check on the status of an import by reviewing the Job details page of the related import job - see: Manage jobs for more information.
- After your import is complete, AtoM will indicate that the import has been initiated. A notification at the top of the page will also provide you with a link to the Job details page of the related import job. Alternatively, you can click the “Back” button in the button block at the bottom of the page to return to the CSV import page, or navigate elsewhere in the application.
Tip
Want to find your recently updated records? You can use the sort button located in the top-right hand side of the archival description browse page to change the results display to be ordered by “Most recent” if it is not already - that way, the most recently added or edited descriptions will appear at the top of the results. If you have come directly here after importing your descriptions, they should appear at the top of the results.
- If any warnings or errors are encountered, AtoM will display them on Job details page of the related import job. Generally, errors will cause an import to fail, while warnings will be logged but will allow the import to proceed anyway. Errors can occur for many reasons - please review the checklist above for suggestions on resolving the most common reasons that CSV import updates fail.
Prepare events for CSV import
The Events CSV import can be used to supplement the types of events that associate an actor (represented in AtoM by an authority record) and an information object (represented in AtoM by an archival description. In AtoM’s data model, an archival description is a description of a record, understood as the documentary evidence created by an action - or event. It is events that link actors to descriptions - see Entity types for more information, and see the section above for more information on actors and events in the archival description CSV: Creator-related import columns (actors and events). The Events CSV can be useful for adding other event types to relate actors to descriptions, such as publication, broadcasting, editing, etc. At this time, the events import will only work with archival descriptions that have been created via import.
The event import processes 3 CSV columns: legacyId, eventActorName, and
eventType. The legacyId should be the legacy ID of the information object the
event will be associated with. The eventActorName and eventType specify the
name of the actor involved in the event and the type of event. An example CSV
template file is available in the AtoM source code
(lib/task/import/example_events.csv) or can be downloaded here:
Important
Before proceeding, make sure that you have reviewed the general CSV instructions above, to ensure that your CSV import will work. Here is a basic checklist of things to check before importing a CSV of events:
- The target description was imported using either the command line or the CSV import in the user interface - events import will not work with descriptions created in the user interface.
- The CSV file is saved with UTF-8 encodings
- The CSV file uses Linux/Unix style end-of-line characters (
/n) - All legacyID values entered correspond to the legacyID values of their corresponding archival descriptions
- The events CSV file should be renamed to match the
source_namevalue of the previous import. See above for more information, Legacy ID mapping: dealing with hierarchical data in a CSV. - If you are referencing existing authority records already in AtoM, make sure that the name used in the actorName column matches the authorized form of name in the authority record exactly. See above for more information on how AtoM attempts to identify authority record matches: Attempting to match to existing authority records on import.
If you have double-checked the above, you should be ready to import your events.
Import events via CSV
To import an events CSV file via the user interface:
- Click on the Import menu, located in
the AtoM header bar, and select “CSV”.
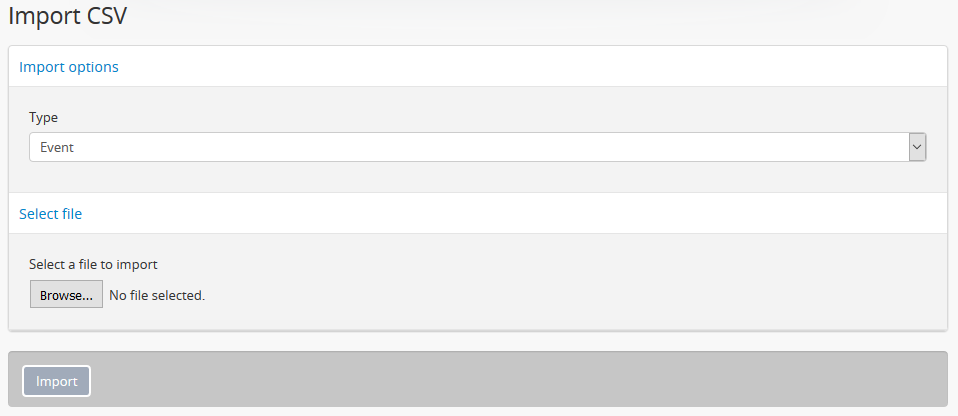
- AtoM will redirect you to the CSV import page. Make sure that the “Type” drop-down menu is set to “Event”.
- Click the “Browse” button to open a window on your local computer. Select the events CSV file that you would like to import.
- If you do not want your files indexed during the import, you can click the checkbox labelled “Do not index imported items.” This will prevent the new records from automatically being added to AtoM’s search index.
Warning
If you do not index your records during import, they will not be discoverable via search or browse in the user interface! You will need to know the exact URL to reach them. To make them visible in the interface again, a system administrator will need to rebuild the search index. See: Populate search index.
- When you have selected the file from your device, its name will appear next to the “Browse” button. Click the “Import” button located in the button block to begin your import.

Note
Depending on the size of your CSV import, this can take some time to complete. Be patient! Remember, you can always check on the status of an import by reviewing the Job details page of the related import job - see: Manage jobs for more information.
- After your import is complete, AtoM will indicate that the import has been initiated. A notification at the top of the page will also provide you with a link to the Job details page of the related import job. Alternatively, you can click the “Back” button in the button block at the bottom of the page to return to the CSV import page, or navigate elsewhere in the application.
Warning
There is a known bug in AtoM where Events that are imported via CSV will require further manual editing post-import to make them visible in AtoM’s user interface. Please see note 7 in the following issue ticket for more information:
Prepare archival institution records for CSV import
You can import repositories (i.e. archival institutions into AtoM as well. At this time, there is not support for importing all repository record data fields into AtoM. However, most fields are supported.
Find the example CSV import template here:
See also
Repository CSV columns
The legacyID column is a required field, used only internally. Add a
unique numeric value to this column. The legacyID can be used to assist in
matching multiple CSV import types. Further information is provided in the
section on legacy ID mapping above - see: Legacy ID mapping: dealing with hierarchical data in a CSV.
The uploadLimit column allows a user to set a default upload limit for a
repository at the time of import. This value should be a number, representing
Gigabytes. For more information on the use of respository upload limits in
AtoM, see: Set digital object upload limit for an archival institution.
The types column relates to the institution type found in the Identity
information area of the archival institution edit page.
It is linked to the “Repository Types” taxonomy in AtoM, which comes
pre-populated with 22 terms. New terms added via the CSV import
will be created successfully and be added to the Repository Types taxonomy.
You can add multiple terms by using the | pipe character between them,
like so:
Arts Organization|Community
Almost all other fields are drawn directly from the archival institution edit
template in AtoM, which is based upon the International Council on Archives’
International Standard for Describing Institutions with Archival Holdings
(ISDIAH). For more information on the use of each field and a link to the
related standard, see: ISDIAH edit template.
Generally, fields in the CSV template have been named in a fairly obvious way,
translating a simplified version of the field name in our data entry templates
into a condensed camelCase. For
example, ISDIAH 5.3.2, Geographical and cultural context (in the Description
Area) becomes geoCulturalContext in the CSV
template. Consult the ISDIAH page for further help
with fields.
The descStatus and descDetail columns are both also related to
controlled term taxonomies in AtoM - the “Description
Statuses” and “Description Detail Levels” taxonomies respectively. The
descStatus column has the following default terms available for use:
- Final
- Revised
- Draft
The descDetails column has the following default terms available for use:
- Full
- Minimal
- Partial
The culture column indicates to AtoM the language of the descriptions
being uploaded. This column expects two-letter ISO 639-1 language code values
- for example, “en” for English; “fr” for French, “it” for Italian, etc. See
Wikipedia for a
full list of ISO 639-1 language codes.
Import new archival institutions via CSV
Important
Before proceeding, make sure that you have reviewed the “Before you import” instructions above, to ensure that your CSV import will work. Most importantly, make sure your:
- CSV file is saved with UTF-8 encodings
- CSV file uses Linux/Unix style end-of-line characters (
/n) - You have prepared your repository CSV data following the recommendations in the section above, Prepare archival institution records for CSV import.
To import new archival institutions via the user interface:
- Click on the Import menu, located in
the AtoM header bar, and select “CSV”.
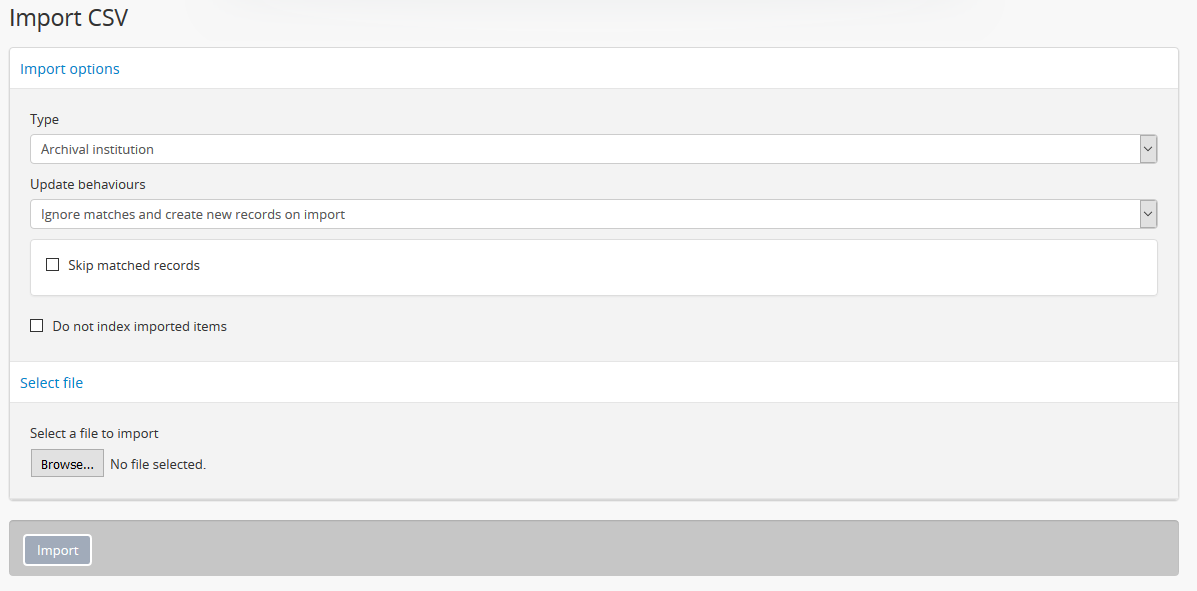
- AtoM will redirect you to the CSV import page. Make sure that the “Type” drop-down menu is set to “Archival institution”. For new repository records, make sure that the “Update behaviors” drop-down menu is set to “Ignore matches and create new records on import”.
AtoM can also double-check to see if a repository with an authorized form of name that exactly matches your import(s) already exists, and skip these records during import if desired. To skip any exact matches, check the “Skip matched records” checkbox. AtoM will report any skipped rows in the console output provided on the Job details page of the related import job - see: Manage jobs for more information.
The console output on the Job details page will include something similar to the following example when a match is found and skipped:
[info] [2018-01-01 14:06:04] Job 2003115 "arFileImportJob": Row 1: Matching record found for "Example Archives", skipping.
If you do not want your files indexed during the import, you can click the checkbox labelled “Do not index imported items.” This will prevent the new records from automatically being added to AtoM’s search index.
Warning
If you do not index your records during import, they will not be discoverable via search or browse in the user interface! You will need to know the exact URL to reach them. To make them visible in the interface again, a system administrator will need to rebuild the search index. See: Populate search index.
- Click the “Browse” button to open a window on your local computer. Select the Repositories CSV file that you would like to import.
- When you have selected the file from your device, its name will appear next to the “Browse” button. Click the “Import” button located in the button block to begin your import.
Note
Depending on the size of your CSV import, this can take some time to complete. Be patient! Remember, you can always check on the status of an import by reviewing the Job details page of the related import job - see: Manage jobs for more information.
- After your import is complete, AtoM will indicate that the import has been initiated. A notification at the top of the page will also provide you with a link to the Job details page of the related import job. Alternatively, you can click the “Back” button in the button block at the bottom of the page to return to the CSV import page, or navigate elsewhere in the application.
Update archival institutions via CSV import
AtoM’s CSV import includes the ability to use the import to update existing archival institution in two different ways, depending on the outcome desired. After attempting to identify existing matches, AtoM can either delete the existing match and replace it with the matched row in the CSV import, or it can attempt to use the matched CSV row to update the repository record in-place with new data.
Both options (and their limitations) will be explained further below, along with any additional import options available when importing updates.
Jump to:
- Updating repository records in place via CSV import
- Deleting and replacing repository records via CSV import
- Importing repository updates in the user interface
When importing updates, AtoM will attempt to match against the existing repository records using the authorized form of name of the repository. This means that it is not currently possible to use the update functionality to change the name of your repository record. If the authorized form of name is edited then no match will be found.
By default, when no match is found, AtoM will proceed to create a new record instead. If you do not want this to happen, you can click the “Skip unmatched records” checkbox. When no matches are found with this option checked, AtoM will skip the unmatched CSV row and report it in the console output found on the Job details page of the related import job - see: Manage jobs for more information.
Updating repository records in place via CSV import
AtoM’s first option for archival institution updates allows you to use incoming CSV data as an update to existing repository records. Whenever a match is found for an existing repository (based on the authorized form of name), AtoM will use the data in the CSV to update the related field in place. If a column is left blank in the updates CSV, it will be ignored (it will not overwrite existing data by erasing it).
To import a CSV as updates to existing repository records, select the option “Update matches ignoring blank fields in CSV” from the “Update behaviours” drop-down menu on the CSV import page.
Important
At this time, not all fields in the archival institution record can be updated. Primarily, these are fields that are found in other tables in the AtoM database than the primary repository record table. Examples of fields that cannot be updated include:
- Name (changing the repository name in your CSV will cause the match to fail)
- Parallel form(s) of name
- Other form(s) of name
- Institution type
- Locality, Revion, Country, and Postal code in Contact area
- Languages
- Scripts
- Status
- Level of detail
- Thematic area
- Geographic subregion
If you wish to update these fields, you might want to either make the changes manually, or consider the “delete and replace” method. However, please read the details below on the limitations of Delete and replace as well before proceeding!
If a match is not found during the import, the default behavior is to import the CSV row as a new record. If you are only importing updates, you can click the checkbox for the “Skip unmatched records” if desired - AtoM will then skip any unmatched CSV rows and report them in the console log shown on the Job details page of the related import job.
See below for step-by-step instructions on importing repository updates via the user interface.
Deleting and replacing repository records via CSV import
AtoM’s second update option allows you to identify matched repositories during import, and then delete the matches prior to importing the CSV data as a new record to replace it.
Note that only the matched archival institution record is deleted during this process. Any related/linked entities (such as an authority record linked as being maintained by the repository, Thematic area or other repository access points, and linked archival descriptions) are not automatically deleted. If you also want these fully removed, you will have to find them and manually delete them via the user interface after the import.
Once the original matched repository record has been deleted, the CSV import proceeds as if the record is new. That is to say, just as AtoM does not automatically delete entities related to the original archival institution, it also not automatically re-link previously related entities.
Warning
This means that if your archival institution record is linked to descriptions, using the “Delete and replace” method will unlink all descriptions - these will not be automatically re-linked with the new import!
We recommend you only use the “Delete and replace” method with repository records that are not currently linked to other entities.
To import an archival institution CSV of records as replacements for existing repositories in AtoM, select the “Delete matches and replace with imported records” option from the “Update behaviours” drop-down menu on the CSV import page.
If a match is not found during the import, the default behavior is to import the CSV row as a new record. If you are only importing updates, you can click the checkbox for the “Skip unmatched records” if desired - AtoM will then skip any unmatched CSV rows and report them in the console log shown on the Job details page of the related import job.
See below for step-by-step instructions on importing repository updates via the user interface.
Importing repository updates in the user interface
Important
Before proceeding, make sure that you have reviewed the “Before you import” instructions above, to ensure that your CSV import will work. Most importantly, make sure your:
- CSV file is saved with UTF-8 encodings
- CSV file uses Linux/Unix style end-of-line characters (
/n) - You have prepared your repository CSV data following the recommendations in the section above, Prepare archival institution records for CSV import
- You have confirmed that the authorized form of name of the repository record in your CSV matches exactly the repository record in AtoM you wish to update
- You have reviewed the sections above on each of the update behaviors and their limitations, and know what to expect.
If you have double-checked the above, you should be ready to import your updates.
To import a CSV file of repository updates via the user interface:
- Click on the Import menu, located in
the AtoM header bar, and select “CSV”.
- AtoM will redirect you to the CSV import page. Make sure that the “Type” drop-down menu is set to “Archival institution” .
Select the type of update import you want to initiate.
To update existing archival institutions in place, select the option “Update matches ignoring blank fields in CSV” from the “Update behaviours” drop-down menu on the CSV import page.
To delete existing matched archival institutions and replace them with the data in your CSV, select the “Delete matches and replace with imported records” option from the “Update behaviours” drop-down menu on the CSV import page.
Tip
You can read more about each update option in the sections above:
- AtoM’s default behavior when it cannot find a match during an update import is to import the CSV row as a new record. However, if you are only importing updates and don’t want to accidentally create new records when no match is found, you can check the “Skip unmatched records” checkbox. Any unmatched records will not be imported - instead, skipped records will be reported in the Job details page of the related import job (see: Manage jobs for more information).

- If you do not want your files indexed during the import, you can click the checkbox labelled “Do not index imported items.” This will prevent the new records from automatically being added to AtoM’s search index.
Warning
If you do not index your records during import, they will not be discoverable via search or browse in the user interface! You will need to know the exact URL to reach them. To make them visible in the interface again, a system administrator will need to rebuild the search index. See: Populate search index.
- When you have configured your import options, click the “Browse” button to open a window on your local computer. Select the CSV file that you would like to import as your update.
- When you have selected the file from your device, its name will appear next to the “Browse” button. Click the “Import” button located in the button block to begin your import.
Note
Depending on the size of your CSV import, this can take some time to complete. Be patient! Remember, you can always check on the status of an import by reviewing the Job details page of the related import job - see: Manage jobs for more information.
- After your import is complete, AtoM will indicate that the import has been initiated. A notification at the top of the page will also provide you with a link to the Job details page of the related import job. Alternatively, you can click the “Back” button in the button block at the bottom of the page to return to the CSV import page, or navigate elsewhere in the application.
- If any warnings or errors are encountered, AtoM will display them on Job details page of the related import job. Generally, errors will cause an import to fail, while warnings will be logged but will allow the import to proceed anyway. Errors can occur for many reasons - please review the checklist above for suggestions on resolving the most common reasons that CSV import updates fail.
Prepare authority records for CSV import
The authority record import tool allows you to import data about people, familiies, and organizations. In addition to importing data detailing these entities, the tool also allows the simultaneous import of supplementary data (in separate CSV files) on how these entities relate to each other and alternate names these entities are known by.
You can view the example CSV files for authority records in the AtoM code (at
lib/task/import/example/authority_records/) or they can be downloaded
directly here:
Important
If you are attempting to import both an archival description CSV and an authority record CSV to supplement the actor data that is linked to your descriptions, you must import the authority record CSV first. On import, the description CSV code will look for exact matches to which it can link - but the authority record CSV import code does not currently have similar logic. If you import your authority record CSV template after the description CSV, you might end up creating duplicate authority records!
For more information on how the archival description import manages the identification and linking of existing authority records, see: Attempting to match to existing authority records on import.
A brief explanation of the main fields in authority record CSV template is included below.
The culture column indicates to AtoM the language of the descriptions
being uploaded. This column expects two-letter ISO 639-1 language code values
- for example, “en” for English; “fr” for French, “it” for Italian, etc. See
Wikipedia for a
full list of ISO 639-1 language codes.
The typeOfEntity column maps to the entity type terms recommended in
ISAAR-CPF 5.1.1 Type of Entity, and maintained in AtoM in the Actor Entity
Types taxonomy. This column expects one of three recommended
values - Person, Corporate body, or Family.
Almost all other fields are drawn directly from the authority record edit template in AtoM, which is based upon the International Council on Archives’ International Standard Archival Authority Record for Corporate Bodies, Persons and Famillies (ISAAR-CPF). For more information on the use of each field, see the Data entry page on the ISAAR-CPF template and consult the related standard. See also: Authority records.
Most fields in the CSV template have been named in a fairly obvious way,
translating a simplified version of the field name in our data entry
templates into a condensed camelCase.
For example, ISAAR 5.2.1, Dates of Existence (in the ISAAR Description
Area) becomes datesOfExistence in the CSV
template. Consult the ISDIAH data entry page for
further help with fields.
The history column, which conforms to ISAAR 5.2.2, will appear as the
Administrative or Biographical history in any archival description
to which an authority record is linked. For more information on
how AtoM manages authority records, see: Authority records.
The status and levelOfDetail columns are both also related to controlled
term taxonomies in AtoM - the “Description Statuses” and
“Description Detail Levels” taxonomies respectively. The status column has
the following default terms available for use:
- Final
- Revised
- Draft
The levelOfDetails column has the following default terms available for
use:
- Full
- Minimal
- Partial
Tip
Some fields available in the user interface (such as alternative forms of name, as well as the Relationships area, where you can link one authority record to another) are not available in this CSV template. However, two additional CSV templates can be imported at the same time by a system administrator via the command-line interface to add this information. For more information, see: Importing authority records.
Import new authority records via CSV
Important
Before proceeding, make sure that you have reviewed the “Before you import” instructions above, to ensure that your CSV import will work. Most importantly, make sure:
- Your CSV file is saved with UTF-8 encodings
- Your CSV file uses Linux/Unix style end-of-line characters (
/n) - If you intend to import archival descriptions as well and hope to link
them to your authority records, make sure you are importing the authority
records CSV first, that the authorized form of name used in the
authority records CSV matches exactly the name used in the
eventActorscolumn of the related descriptions CSV. Be sure you also review how AtoM attempts to link descriptions to existing authority records on import - see: Attempting to match to existing authority records on import - You’ve reviewed the instructions in the section above on preparing your CSV file and have made sure it conforms to the recommendations. See: Prepare authority records for CSV import.
To import authority records via the user interface:
- Click on the Import menu, located in
the AtoM header bar, and select “CSV”.
- AtoM will redirect you to the CSV import page. Make sure that the “Type” drop-down menu is set to “Authority record”. For new authority records, make sure that the “Update behaviors” drop-down menu is set to “Ignore matches and create new records on import”.
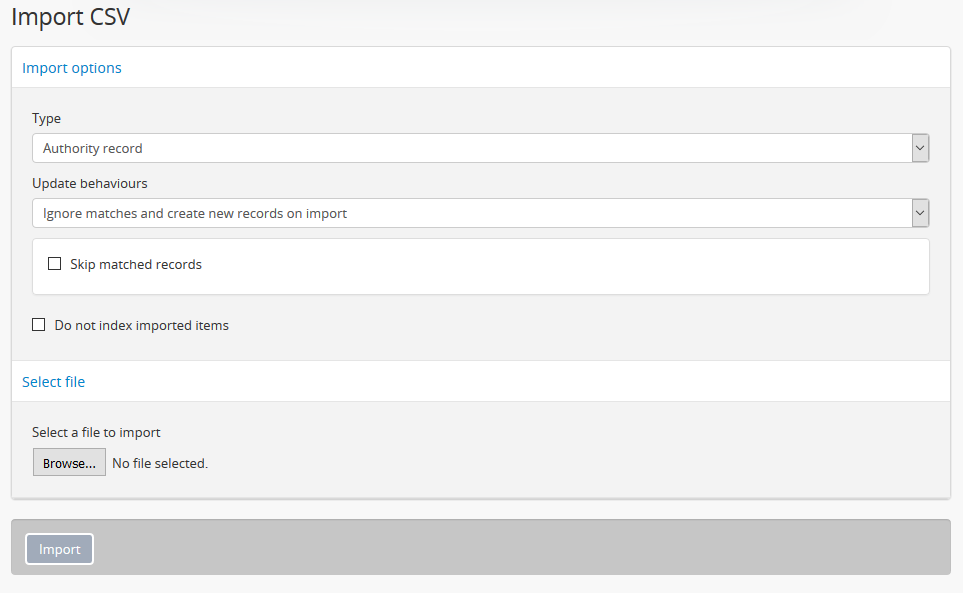
AtoM can also double-check to see if an authority record with an authorized form of name that exactly matches your import(s) already exists, and skip these records during import if desired. To skip any exact matches, check the “Skip matched records” checkbox. AtoM will report any skipped rows in the console output provided on the Job details page of the related import job - see: Manage jobs for more information.
The console output on the Job details page will include something similar to the following example when a match is found and skipped:
[info] [2018-01-01 15:01:04] Job 2003116 "arFileImportJob": Row 1: Matching record found for "Jane Doe", skipping.
If you do not want your files indexed during the import, you can click the checkbox labelled “Do not index imported items.” This will prevent the new records from automatically being added to AtoM’s search index.
Warning
If you do not index your records during import, they will not be discoverable via search or browse in the user interface! You will need to know the exact URL to reach them. To make them visible in the interface again, a system administrator will need to rebuild the search index. See: Populate search index.
- Click the “Browse” button to open a window on your local computer. Select the Authority record CSV file that you would like to import.
- When you have selected the file from your device, its name will appear next to the “Browse” button. Click the “Import” button located in the button block to begin your import.
Note
Depending on the size of your CSV import, this can take some time to complete. Be patient! Remember, you can always check on the status of an import by reviewing the Job details page of the related import job - see: Manage jobs for more information.
- After your import is complete, AtoM will indicate that the import has been initiated. A notification at the top of the page will also provide you with a link to the Job details page of the related import job. Alternatively, you can click the “Back” button in the button block at the bottom of the page to return to the CSV import page, or navigate elsewhere in the application.
Update authority records via CSV import
AtoM’s CSV import includes the ability to use the import to update existing authority records in two different ways, depending on the outcome desired. After attempting to identify existing matches, AtoM can either delete the existing match and replace it with the matched row in the CSV import, or it can attempt to use the matched CSV row to update the authority record in-place with new data.
Both options (and their limitations) will be explained further below, along with any additional import options available when importing updates.
Jump to:
- Update authority records in place via CSV import
- Delete and replace existing authority records via CSV import
- Updating authority records via import in the user inteface
When importing updates, AtoM will attempt to match against the existing authority records using the authorized form of name of the existing actor (a.k.a. authority record). This means that it is not currently possible to use the update functionality to change the name of your authority record. If the authorized form of name is edited then no match will be found.
If you have previously linked your authority records to a repository (for more information, see: Link an authority record to a repository as its maintainer), then it is possible to increase the likelihood of a successful match on import by limiting the update to only those authority records associated with a particular repository.
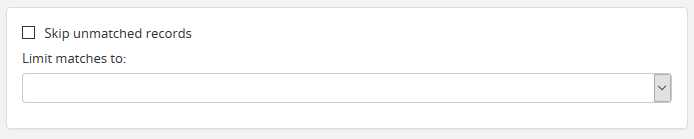
By default, when no match is found, AtoM will proceed to create a new record instead. If you do not want this to happen, you can click the “Skip unmatched records” checkbox. When no matches are found with this option checked, AtoM will skip the unmatched CSV row and report it in the console output found on the Job details page of the related import job - see: Manage jobs for more information.
Update authority records in place via CSV import
AtoM’s first option for authority record updates allows you to use incoming CSV data as an update to existing authority records in place. Whenever a match is found for an existing authority record (based on the authorized form of name), AtoM will use the data in the CSV to update the related field in place. If a column is left blank in the updates CSV, it will be ignored (it will not overwrite existing data by erasing it).
To import a CSV as updates to existing authority records, select the option “Update matches ignoring blank fields in CSV” from the “Update behaviours” drop-down menu on the CSV import page.
Important
At this time, not all fields in the authority record can be updated. Primarily, these are fields that are found in other tables in the AtoM database than the primary authority record table. Examples of fields that cannot currently be updated this way include:
- Name (changing the authority record name in your CSV will cause the match to fail)
- Parallel form(s) of name
- Standardized form(s) of name according to other rules
- Other form(s) of name
- Any relationships to other authority records
- Language(s)
- Script(s)
If you wish to update these fields, you might want to either make the changes manually, or consider the “delete and replace” method. However, please read the details below on the limitations of Delete and replace as well before proceeding!
Note as well that any existing access point data (for example, the Occupations access point on the authority record) cannot be modified or removed via this method - though new access points can be added via this “Match and update” approach.
See below for step-by-step instructions on importing repository updates via the user interface.
Delete and replace existing authority records via CSV import
AtoM’s second update option allows you to identify matched authority records during import, and then delete the matches prior to importing the CSV data as a new record to replace it.
Note that only the matched authority record is deleted during this process. Any related/linked entities (such as a repository linked as the authority record’s maintainer, other authority records linked via a relationship, Occupation access points, and linked archival descriptions) are not also automatically deleted. If you also want these fully removed, you will have to find them and manually delete them via the user interface after the import.
Once the original matched authority record has been deleted, the CSV import proceeds as if the record is new. That is to say, just as AtoM does not automatically delete entities related to the original archival institution, it also not automatically re-link previously related entities.
Warning
This means that if your authority record is linked to descriptions, a repository, or other authority records, using the “Delete and replace” method will unlink all related descriptions, repositories, and authority records - these will not be automatically re-linked with the new import!
We recommend you only use the “Delete and replace” method with authority records that are not currently linked to other entities.
For more information on linking authority records, see:
To import an archival institution CSV of records as replacements for existing repositories in AtoM, select the “Delete matches and replace with imported records” option from the “Update behaviours” drop-down menu on the CSV import page.
See below for step-by-step instructions on importing repository updates via the user interface.
Updating authority records via import in the user inteface
Important
Before proceeding, make sure that you have reviewed the “Before you import” instructions above, to ensure that your CSV import will work. Most importantly, make sure your:
- CSV file is saved with UTF-8 encodings
- CSV file uses Linux/Unix style end-of-line characters (
/n) - You have prepared your authority record CSV data following the recommendations in the section above, Prepare authority records for CSV import
- You have confirmed that the authorized form of name of the authority record in your CSV matches exactly the authority record in AtoM you wish to update
- You are aware that using the “Delete and replace” update option will remove the links between all related entities (descriptions, other authority records, repositories, access points, etc) - though it will not delete these entities.
- You have reviewed the sections above on each of the update behaviors and their limitations, and know what to expect.
If you have double-checked the above, you should be ready to import your updates.
To import a CSV file of authority record updates via the user interface:
- Click on the Import menu, located in
the AtoM header bar, and select “CSV”.
- AtoM will redirect you to the CSV import page. Make sure that the “Type” drop-down menu is set to “Archival institution” .
Select the type of update import you want to initiate.
To update existing authority records in place, select the option “Update matches ignoring blank fields in CSV” from the “Update behaviours” drop-down menu on the CSV import page.
To delete existing matched authority records and replace them with the data in your CSV, select the “Delete matches and replace with imported records” option from the “Update behaviours” drop-down menu on the CSV import page.
Tip
You can read more about each update option in the sections above:
AtoM’s default behavior when it cannot find a match during an update import is to import the CSV row as a new record. However, if you are only importing updates and don’t want to accidentally create new records when no match is found, you can check the “Skip unmatched records” checkbox. Any unmatched records will not be imported - instead, skipped records will be reported in the Job details page of the related import job (see: Manage jobs for more information).
To improve the default matching behavior (based on the authorized form of name of the authority record), you can provide further criteria to help AtoM find the correct match. If you have linked your authority record(s) to a repository as the maintainer, then you can limit the matches to either the authority records of a specific repository. To learn more about linking an authority record to a repository, see: Link an authority record to a repository as its maintainer.
To limit your matches to the holdings of a specifc archival institution, use the drop-down menu to select the name of the related repository.
If you previously created your repository record via CSV import, it will sometimes not appear at first in the drop-down menu. Try to begin typing the first letters of the target repository name when your cursor is on the Limit matches drop-down to see if it appears.
- If you do not want your files indexed during the import, you can click the checkbox labelled “Do not index imported items.” This will prevent the new records from automatically being added to AtoM’s search index.
Warning
If you do not index your records during import, they will not be discoverable via search or browse in the user interface! You will need to know the exact URL to reach them. To make them visible in the interface again, a system administrator will need to rebuild the search index. See: Populate search index.
- When you have configured your import options, click the “Browse” button to open a window on your local computer. Select the CSV file that you would like to import as your update.
- When you have selected the file from your device, its name will appear next to the “Browse” button. Click the “Import” button located in the button block to begin your import.
Note
Depending on the size of your CSV import, this can take some time to complete. Be patient! Remember, you can always check on the status of an import by reviewing the Job details page of the related import job - see: Manage jobs for more information.
- After your import is complete, AtoM will indicate that the import has been initiated. A notification at the top of the page will also provide you with a link to the Job details page of the related import job. Alternatively, you can click the “Back” button in the button block at the bottom of the page to return to the CSV import page, or navigate elsewhere in the application.
- If any warnings or errors are encountered, AtoM will display them on Job details page of the related import job. Generally, errors will cause an import to fail, while warnings will be logged but will allow the import to proceed anyway. Errors can occur for many reasons - please review the checklist above for suggestions on resolving the most common reasons that CSV import updates fail.
Prepare accession records for CSV import
The accession record import tool allows you to import data about your
accessions. Additionally, when importing descriptions as well, you can use the
subsequent archival description CSV import to create a link between
your accession records and your descriptions, by adding an accessionNumber
column in the archival description CSV and populating it with the exact
accession number(s) used during your accessions data import.
Alternatively, you can use the qubitParentSlug column to link existing
descriptions in AtoM to new or updated accessions records via your import -
more details below.
An example CSV template file is available in the
lib/task/import/example/example_accessions.csv directory of AtoM, or it
can be downloaded here:
See also
Below you’ll find brief data entry guidelines for preparing a CSV file of accessions data for import.
The acquisitionDate column expects date strings to be formatted according
to the ISO 8601 date format
standard - that is, YYYY-MM-DD. ISO 8601 prescribes, as a minimum, a four-digit
year [YYYY]. If the date range is not formatted according to ISO 8601 formatting,
then AtoM will use the PHP date_parse function (which adds ‘1’ as default value
to the month and day if they are missing) to modify the date to a YYYY-MM-DD
format.
To link incoming accession records to existing archival descriptions, you can
add a column named qubitParentSlug. This column will behave similarly to
the qubitParentSlug column in the archival description CSV templates
(described above). To link an accession
row in your CSV to an existing description in your AtoM instance, simply enter
the slug of the target description in the qubitParentSlug column.
AtoM will locate the matching description and link the two during import,
similar to how an accession created through the user interface can be linked
to a description (see: Link an accession record to an archival description).
Most fields in the CSV template have been named in a fairly obvious way,
translating a simplified version of the field name in the AtoM
user interface into a condensed camelCase
in our data entry. For example, the “Immediate source of acquisition” field in
the user interface is represented in the CSV template as the
sourceOfAcquisition column.
Some fields are linked to a taxonomy of controlled values in AtoM, maintained as terms. These are generally represented in the accession record edit page in the user interface as a drop-down menu providing a limited list of options for a user to select. To learn more about managing taxonomies and terms, see: Terms. Some of the taxonomy-related fields in the CSV template include:
acquisitionType- listed in the user inteface as “Acquisition type.” Default values are: Deposit, Gift, Purchase, Transfer.resourceType- listed in the user interface as “Resource type.” Default values are: Public transfer, Private transfer.processingStatus- listed in the user interface as “Processing status.” Default values are: Complete, Incomplete, In-Progress.processingPriority- listed in the user interface as “Processing priority.” Default values are: High, Medium, Low.
The creators column can be used to add the name(s) of the creator
of the accession materials. For now, only creation events are supported, so the
the eventTypes value should always be Creation. eventDates,
eventStartDates, and eventEndDates columns can be used similarly to
those in the archival description CSV templates - The eventDates field
will map to the free-text display date field in AtoM, where users can use special
characters to express approximation, uncertainty, etc. (e.g. [190-?];
[ca. 1885]), while eventStartDates and eventEndDates should include
ISO 8601-formatted date values (YYYY-MM-DD, YYYY-MM, or YYYY). If there are
multiple creators/events associated with the accession, these fields can all
accept multiple values, separated using the pipe | character.

Important
When using pipe-separated values to add multiple creators/events, values
will be matched 1:1 across all related rows (creators, eventTypes,
eventDates, eventStartDates and eventEndDates). This means that
even if you wish to leave the values for one creator blank (say the end
date for creator 1 of 2), you must still pipe the field when adding the
second creator’s endDate values, or else they will be matched up with
creator 1!
The culture column indicates to AtoM the default language of the
accession records being uploaded. This column expects two-letter ISO 639-1
language code values - for example, “en” for English; “fr” for French, “it”
for Italian, etc. See Wikipedia
for a full list of ISO 639-1 language codes.
Create new accession records via CSV import
Important
Before proceeding, make sure that you have reviewed the “Before you import” instructions above, to ensure that your CSV import will work. Most importantly, make sure your:
- CSV file is saved with UTF-8 encodings
- CSV file uses Linux/Unix style end-of-line characters (
/n) - You have prepared your CSV data in accordance with the accession CSV guidance provided above - Prepare accession records for CSV import.
To import an accessions CSV file via the user interface:
- Click on the Import menu, located in
the AtoM header bar, and select “CSV”.
- AtoM will redirect you to the CSV import page. Make sure that the “Type” drop-down menu is set to “Accession”.
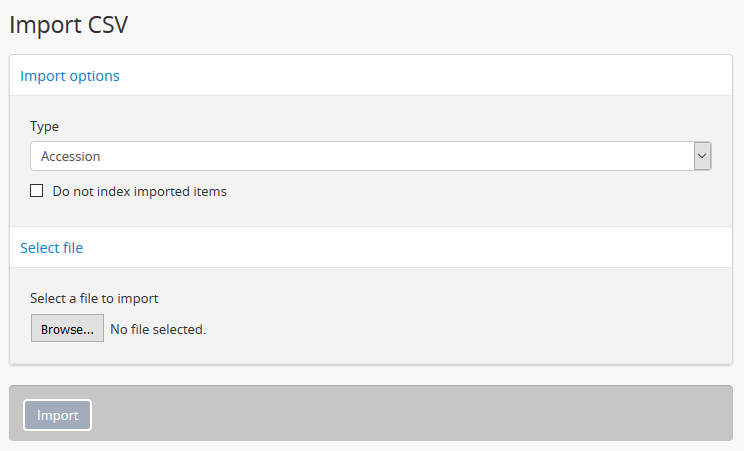
- If you do not want your files indexed during the import, you can click the checkbox labelled “Do not index imported items.” This will prevent the new records from automatically being added to AtoM’s search index.
Warning
If you do not index your records during import, they will not be discoverable via search or browse in the user interface! You will need to know the exact URL to reach them. To make them visible in the interface again, a system administrator will need to rebuild the search index. See: Populate search index.
- When you have configured your import options, click the “Browse” button to open a window on your local computer. Select the CSV file that you would like to import as your update.
- When you have selected the file from your device, its name will appear next to the “Browse” button. Click the “Import” button located in the button block to begin your import.
Note
Depending on the size of your CSV import, this can take some time to complete. Be patient! Remember, you can always check on the status of an import by reviewing the Job details page of the related import job - see: Manage jobs for more information.
- After your import is complete, AtoM will indicate that the import has been initiated. A notification at the top of the page will also provide you with a link to the Job details page of the related import job. Alternatively, you can click the “Back” button in the button block at the bottom of the page to return to the CSV import page, or navigate elsewhere in the application.
- If any warnings or errors are encountered, AtoM will display them on Job details page of the related import job. Generally, errors will cause an import to fail, while warnings will be logged but will allow the import to proceed anyway. Errors can occur for many reasons - please review the checklist above for suggestions on resolving the most common reasons that CSV imports fail.